


Chapter 4 Rack and Optional Product Installation
4.3 Standard Installation Rules Before Shipment (Only for Regions Other than EMEA&I)
ETERNUS DX60 S2 Disk storage system User’s Guide -Site Planning-
59
Copyright 2012 FUJITSU LIMITED P3AM-5492-04ENZ0
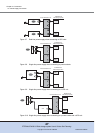
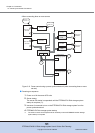
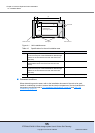
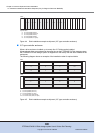
Up to twelve 3.5" disks can be installed in a controller enclosure (3.5" type) or a drive enclosure.
Disks with different types can be installed in a single enclosure.
Install disks in the slots of a controller enclosure from Slot#0 to Slot#11 in ascending order
according to the installation order in Table 4.4
. Then, install disks in the slots of a drive enclosure
from Slot#0 to Slot#11 in ascending order.
Figure 4.3 Installation diagram for 3.5" disks
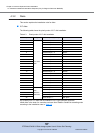
4.3.3 Disk Installation Examples
This section provides examples of disk installation at shipment.
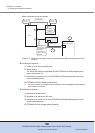
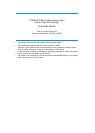
■ 2.5" type controller enclosure
Up to twenty-four 2.5" disks can be installed in a controller enclosure.
When optional disks are purchased at the same time as the ETERNUS DX Disk storage system,
the ETERNUS DX Disk storage system is shipped from the factory with the disks installed in the
enclosure.
The following diagram shows an example of the installation order for optional disks.
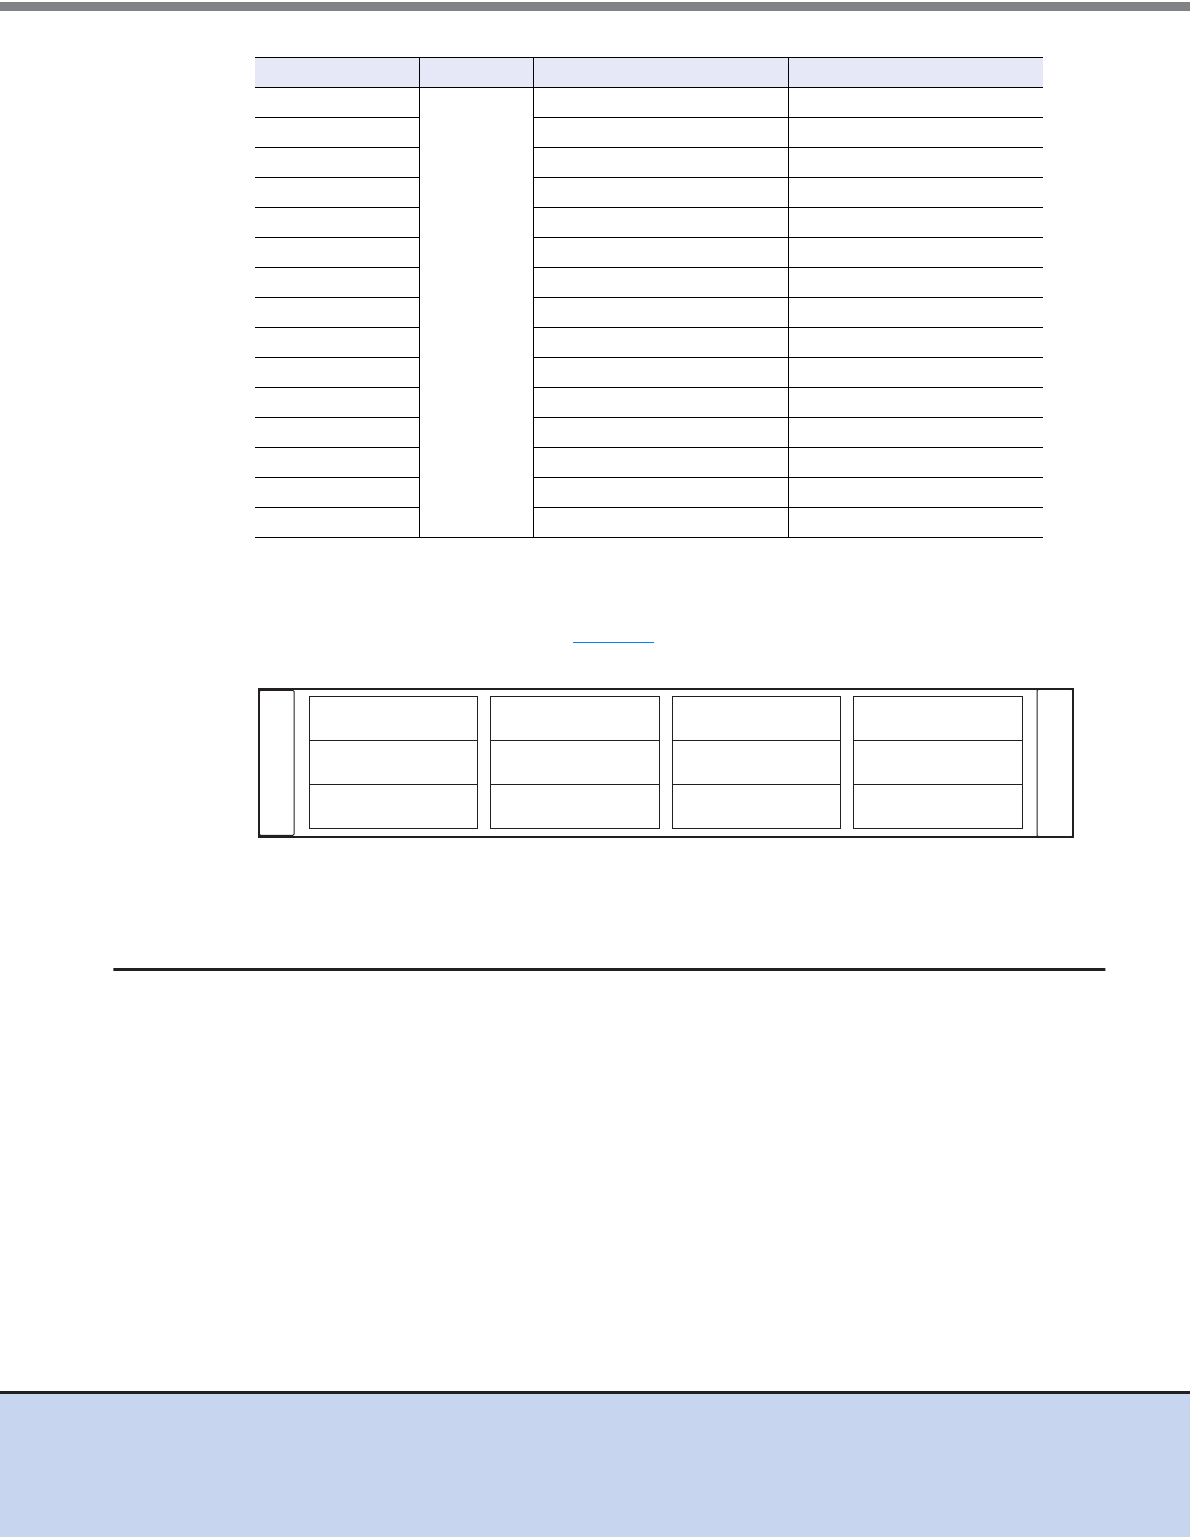
16
3.5"
Nearline
SAS disk
1TB/7.2krpm × 2RAID1
17 1TB/7.2krpm × 6RAID1+0
18 1TB/7.2krpm × 6RAID5
19 1TB/7.2krpm × 6RAID6
20 1TB/7.2krpm × 1 Hot spare
21 2TB/7.2krpm × 2RAID1
22 2TB/7.2krpm × 6RAID1+0
23 2TB/7.2krpm × 6RAID5
24 2TB/7.2krpm × 6RAID6
25 2TB/7.2krpm × 1 Hot spare
26 3TB/7.2krpm × 2RAID1
27 3TB/7.2krpm × 6RAID1+0
28 3TB/7.2krpm × 6RAID5
29 3TB/7.2krpm × 6RAID6
30 3TB/7.2krpm × 1 Hot spare
Priority order Type Disk capacity/quantity RAID level
Slot#0
Slot#4
Slot#8
Slot#1
Slot#5
Slot#9
Slot#2
Slot#6
Slot#10
Slot#3
Slot#7
Slot#11