


Magic 260
21
Edit Preset Movement Offset Point and Radius
(1) Press the FIXTURE button so its green LED illuminates ON solid.
(2) Press the FUNCTION button or buttons that correspond with the fixture or fixtures that you wish
to include into your preset. The relevant FUNCTION buttons should be flashing red and the
fixture attributes should display in the LCD. Note: all selected fixtures should be of the
same type. If different fixture types are selected, the last selected fixture attributes
will be on in the LCD and channel setting will not match.
(3) Adjust the MASTER fader to 10 and open your fixtures shutter so light emits from the front lens.
(4) Press the RECORD button so its green LED is flashing.
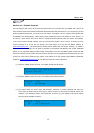
(5) Press the ENTER button so your display reads the following:
RECORD FIGURE MENU
1.Record Circle
(6) 1 = Circle movement, 2 = Figure 8 movement, 3 = Pan movement, 4 = Tilt movement & 5 = Preset
point. Turn DATA wheel #1 clockwise to the desired movement that you wish to edit. Note: Option
#5, Preset point, will not allow for radius change.
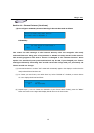
(7) Press the ENTER button to access its settings. For example, if you select option #2, Figure 8, your
display should read as follows:
2. Record Figure 8
Pan:000 Tilt:000 Fade:02.0 Radius=20
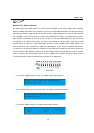
(8) For preset movements 1 & 2, turn DATA wheels 1 & 2 to adjust the offset point (center point). Turn
DATA wheel #3 to adjust the factory fade setting and DATA wheel #4 to adjust the radius (size of the
movement). For preset movement 3 & 4, turn DATA wheel #1 to adjust the relevant offset point (Pan
or Tilt center point). Turn data wheel #2 to add a delay between fixtures. Adding a delay will create a
wave effect from fixture to fixture. Turn DATA wheel #3 to adjust the factory fade setting and DATA
wheel #4 to adjust the radius (size of the movement).
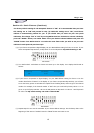
(9) Press the ENTER button to confirm your new settings. The new settings will affect all scenes
which previously include the relevant preset movement.
(10) Repeat steps 6-8 to adjust additional preset movement settings for the selected fixtures.
(11) Press the RECORD button to exit.