


Wolf Cinema Owner's Manual
3-53
Section3►Operation
Step 1: General Setup
1a) Adjust primary colors (see Matching Colors in Multiple Screens) to ensure matched overall
color temperatures and light output between screens.
IMPORTANT
Double-check that all WHITES and LIGHT OUTPUT are well-matched.
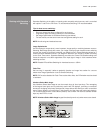
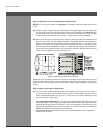
1b) Enable the White Field Uniformity
checkbox. This will enable access to the
uniformitycontrols and will apply the settings
to your image.
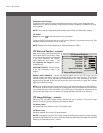
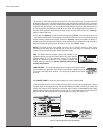
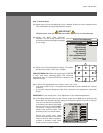
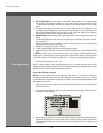
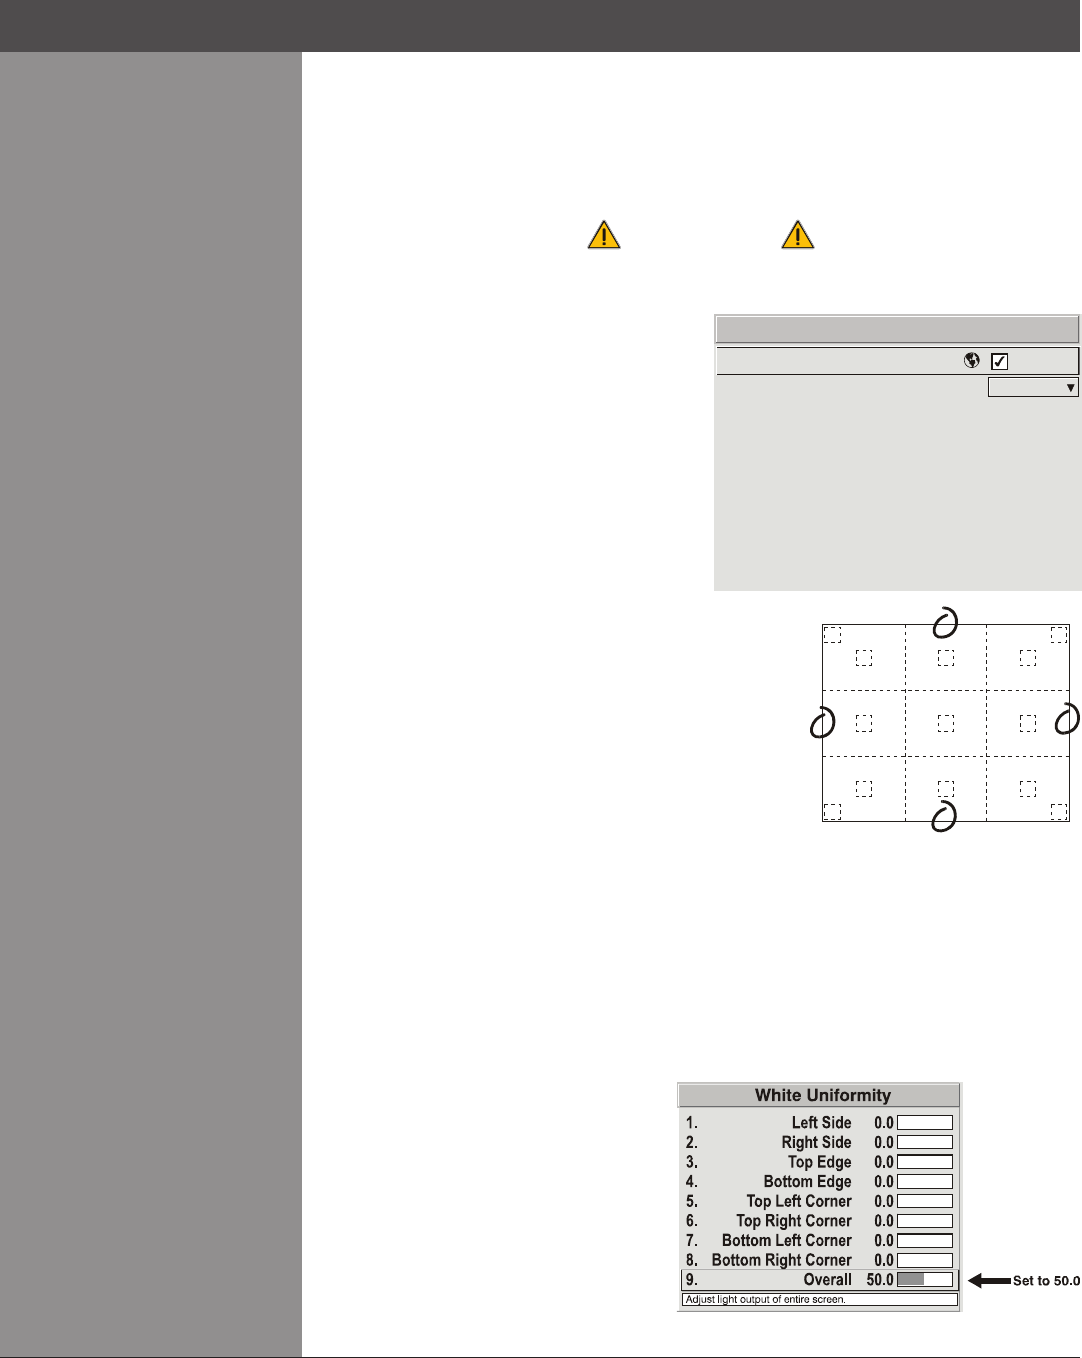
1c) Select the 13-Point test pattern for display. This pattern
provides nine screen “zones” with 13 targets.
FOR BEST RESULTS: Rather than examining the CENTER
of each zone when assessing White Field Uniformity
adjustments focus on extreme EDGES as indicated in the
illustration at right.
1d) In either Color Adjustments menu, select a “User” color. Then:
If you have created a “User 1” color gamut (recommended) for a well-matched wall, continue •
to Step 1e.
If you prefer maximum brightness rather than a particular color temperature, select “Max •
Drives”.
IMPORTANT: Do not change User 1 Color Adjustment in color-matched applications!
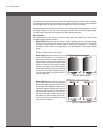
1e) In the White Uniformity menu, set the “Overall” output level to 50.0 and all remaining slide
bars to 0.0. This decreases the light output just enough throughout the screen so that any
color level can then be increased later
as necessary for matching light output
from zone-to-zone. Do not exceed 50.0
for “Overall”—a higher level will likely
interfere with achieving White Field
Uniformity and is not recommended.
Ensure that overall light output
remains well matched from one screen
center to the next. Where necessary,
increase or decrease Lamp Power
slightly to recover center matches.
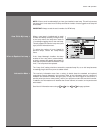
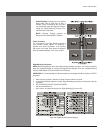
1.
2.
3.
4.
5.
6.
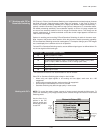
Uniformity Enable
Test Pattern
Left Uniformity
Right Uniformity
Top Uniformity
Bottom Uniformity
White Field Uniformity
Off
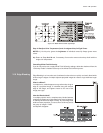
9.
0.
Color Temp Adjust
Lamp
7.
8.
Top Uniformity
Color Adjustment by X,Y