


31
GB
DVD/VIDEO CD/CD/Super Audio CD/MP3
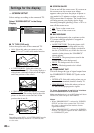
x BALANCE
You can vary the balance of the left and right
speakers as follows. Be sure to set “TEST
TONE” to “ON” for easy adjustment.
• FRONT (CENTER): Adjust the balance
between the front left and right speakers (You
can adjust in 6 steps to left or right from center
position).
• REAR (CENTER): Adjust the balance between
the rear left and right speakers (You can adjust
in 6 steps to left or right from center position).
x LEVEL
You can vary the level of each speakers as
follows. Be sure to set “TEST TONE” to “ON”
for easy adjustment.
• CENTER (0 dB): Adjust the level of the center
speaker (–6 dB to +6 dB, 1 dB steps).
• REAR (0 dB): Adjust the level of the rear
speakers (–6 dB to +6 dB, 1 dB steps).
• SUBWOOFER (0 dB): Adjust the level of the
subwoofer (–6 dB to +6 dB, 1 dB steps).
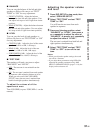
x TEST TONE
The speakers will emit a test tone to adjust
“BALANCE” and “LEVEL”.
• OFF: The test tone is not emitted from the
speakers.
• ON: The test tone is emitted from each speaker
in sequence while adjusting balance or level.
When you select one of the “SPEAKER
SETUP” items, the test tone is emitted from
both left and right speakers simultaneously.
To adjust the volume of all the
speakers at once
Turn VOLUME (or press VOLUME +/– on the
remote).
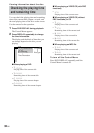
Adjusting the speaker volume
and level
1 Press DVD SETUP in stop mode, then
select “SPEAKER SETUP”.
2 Select “TEST TONE” and set “TEST
TONE” to “ON”.
You will hear the test tone from each
speaker in sequence.
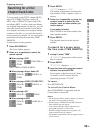
3 From your listening position, select
“BALANCE” or “LEVEL”, then press B
or b repeatedly to adjust the value of
“BALANCE”, or press V or v repeatedly
to adjust the value of “LEVEL”.
The test tone is emitted from both left and
right speakers simultaneously.
4 Select “TEST TONE” and set “TEST
TONE” to “OFF” to turn off the test
tone.
Notes
• When you adjust the speaker settings, the sound
cuts off for a moment.
• If you adjust these parameters using OSD while
adjusting the speaker parameters using AMP
MENU or SPEAKER LEVEL (pages 14–16), the
display on the unit turns off.