Chapter 4 Advanced Operations
4-2
Chapter 4 Advanced Operations
2
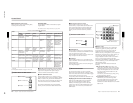
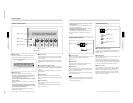
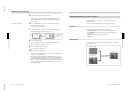
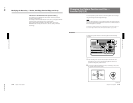
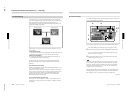
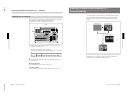
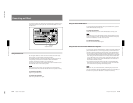
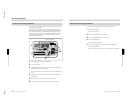
Use buttons 0 to 9 to enter the pattern number you want to assign to a
button.
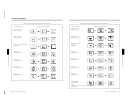
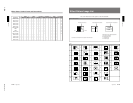
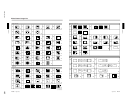
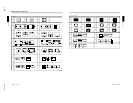
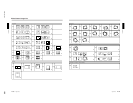
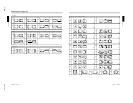
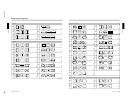
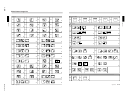
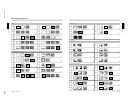
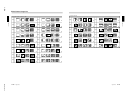
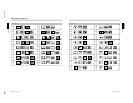
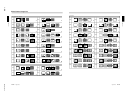
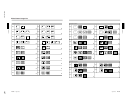
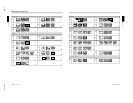
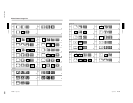
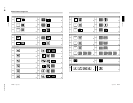
For more information about pattern numbers, see the section “Effect Pattern
Image List” (page A-29).
The number you enter appears in the PATTERN NUMBER display
window.
3
Press the ENTER button.
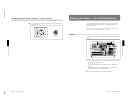
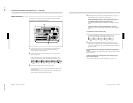
4
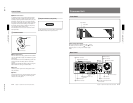
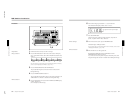
While holding down the DIRECT PATTERN button, press the button
(0 to 9, or P IN P/RST) to which you want to assign the pattern.
The button you pressed lights, and the pattern number entered in step 2
is assigned to the button.
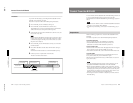
To restore the default assignments (direct pattern reinitialization)
After changing pattern assignments, you can restore the factory default
assignments shown in “Example Effects” (page 3-18).
To return all of the buttons 0 to 9 and P IN P/RST to their factory default
assignments, use the following procedure.
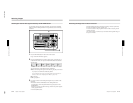
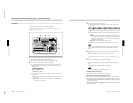
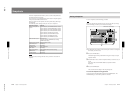
1
Press the SET UP button.
The setup menu appears.
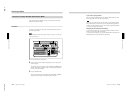
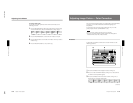
2
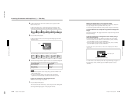
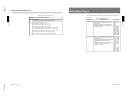
Press the PAGE button to display page 6/8.
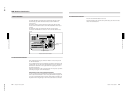
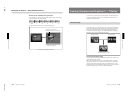
3
Press the F4(KEYPAD) button to set it to “ON”.
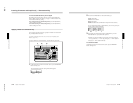
4
Press the F5(EXEC) button.
5
Press the F3(OK) button.
This returns all of the assignments to the 0 to 9 and P IN P/RST buttons
to their factory default settings.
Changing Direct Pattern Assignments
Chapter 4 Advanced Operations
Chapter 4 Advanced Operations
4-3
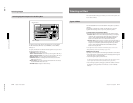
User Program Effects
In addition to the internal effect patterns, you can also create user-
customized effect patterns. These are referred to as “user program effects.”
With standard equipment you can save a maximum of 40 effects. You use
these effect patterns in the same way as the internal patterns, using the
assigned number.
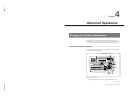
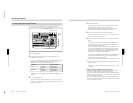
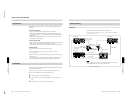
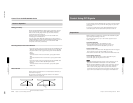
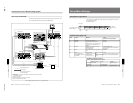
Constructing a User Program Effect
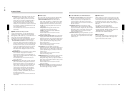
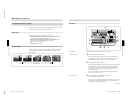
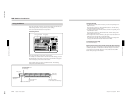
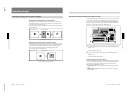
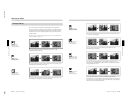
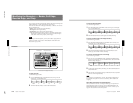
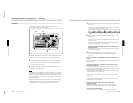
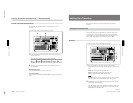
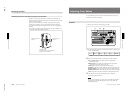
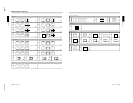
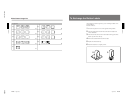
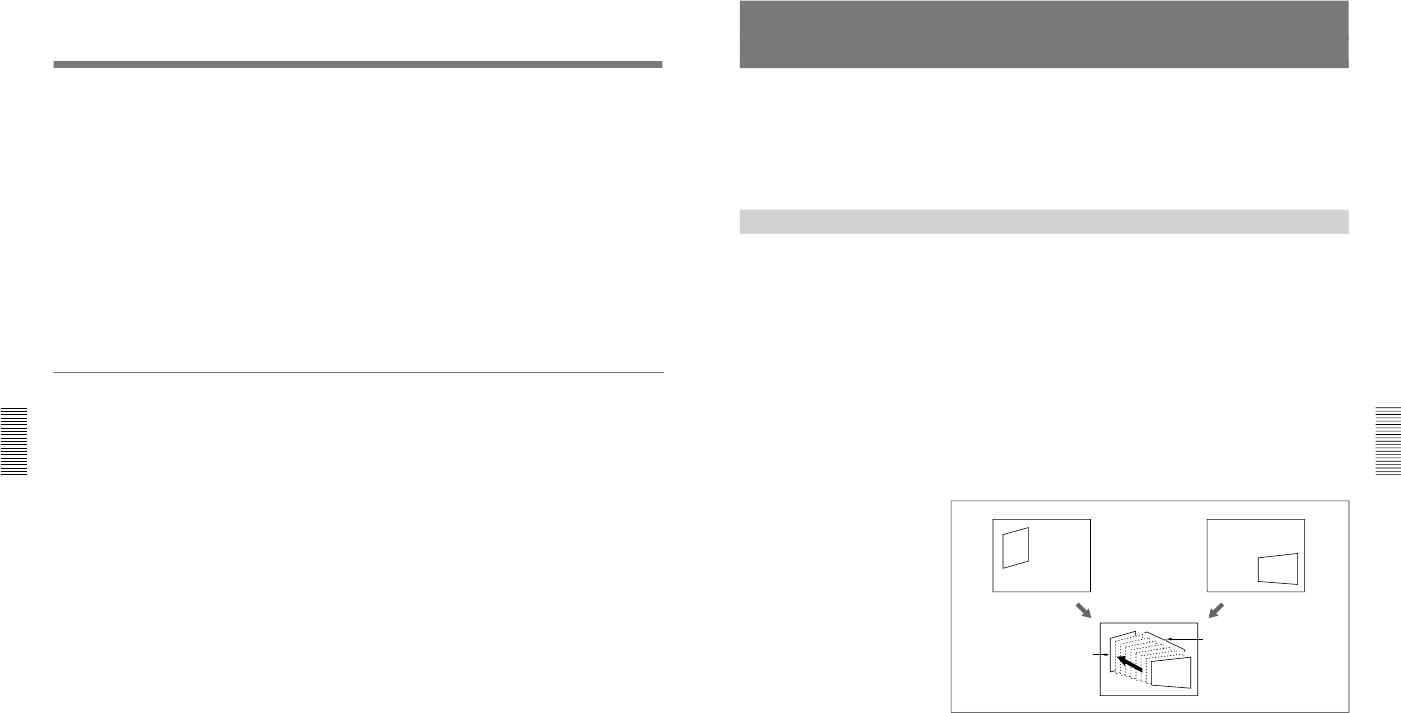
You build a user program effect from key frames, which show an outline
of the animation.
A user effect can consist of up to eight key frames, numbered from 1 to 8.
When you execute the effect, it runs through the key frames in sequence,
starting from the highest numbered, and ending on key frame 1.
Therefore, when creating the effect you save the movement in the reverse
direction (with the image selected on the foreground bus moving outside
the screen).
By pressing the REVERSE button, turning it on, you can execute the effect
in the reverse order of the created key frames. You can adjust the interval
between key frames by a menu setting.
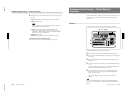
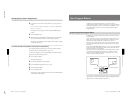
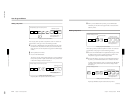
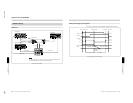
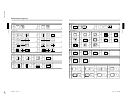
When you execute a user program effect, the interval between key frames
is automatically interpolated using spline curves, producing a smooth
effect. You can also adjust the smoothness of the spline curves (i.e. the
movement) when executing the effect.
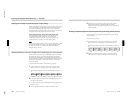
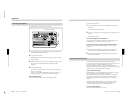
If you execute a user program effect that consists of a single key frame, the
result is that the foreground image appears against the background image,
subjected only to the effect defined for key frame 1.
Key frame 1 Key frame 2
Key frame 1
Key
frame 2
Effect created by interpolation