


1-41
DFS-700/700P
Chapter 3 Basic Operation
3-54
Chapter 3 Basic Operation
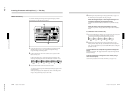
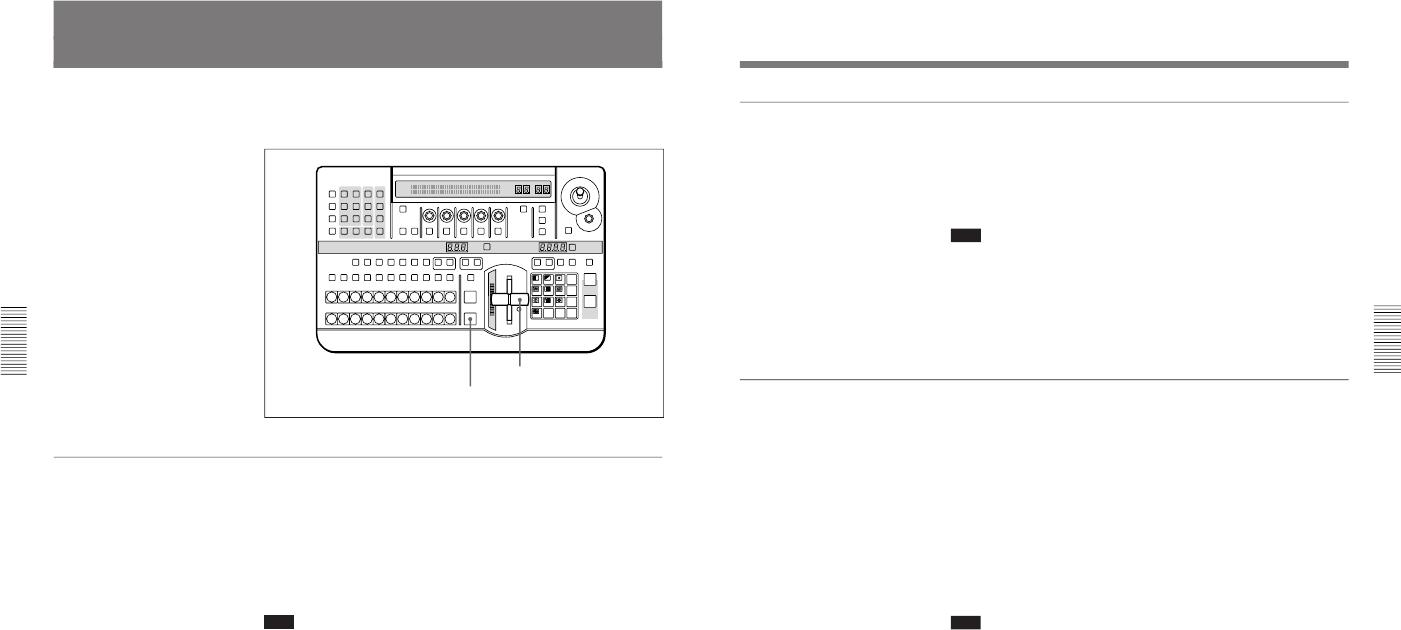
To execute an effect, after setting the execution direction (normal/reverse),
in the effect transition section press the AUTO TRANS button, or move
the fader lever.
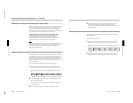
Using the fader lever
By moving the fader lever from one end of its travel to the other at any
desired speed, you can manually control the transition.
The transition indicator on the left of the fader lever lights progressively
corresponding to the status of the transition. When the transition
completes, the transition indicator goes completely off.
For an effect in which the image switches like a cut, the transition occurs
when the fader lever is in the center position.
Note
After powering on the system, move the fader lever once through the
whole of its travel. This will ensure that the fader lever operates correctly.
To pause the transition
Stop moving the fader lever.
To resume the transition
Start moving the fader lever again.
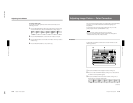
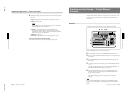
Executing an Effect
LAST X
INS
RST
TITLE
12
EDITOR LUM LUM LUM
DSK EDGE
TRAIL
SHADOW
GPI CRK CRK BORDERBEVELD
EDGE
SET UP MASK MASK MASK SOFT
SHIFT CCR LIGHTING BORDERMATTES
LOCATION
LEARNEDIT
RECALL
HOLD
INPUT
INITIAL
PATTERN
ADJ
PAGE
F1 F2 F3 F4 F5
USER PGM
STATUS EDIT
SNAP SHOT
SET
PATTERN NUMBER
EFFECT
DSK
FTB
SET
TRANS RATE
789
456
123
0
DOWN UP
ENTER
FADE
TO
BLACK
P IN P
DSK
DEL
N/R REV DSK PVWDIRECT
RECALL
DIRECT
PATTERN
CCR TITLE 1
SOURCE
TITLE 2
SOURCE
DSK
FILL
SUPER BGFRGD 2MEMORYFRAME FREEZ MIX EFFECT
BACKGROUND
BLACK MEMORY INT
VIDEO
TITLE
12345678
CUT
AUTO
TRANS
AUXILIARY
BLACK
MEMORY
INT
VIDEO
12345678
FOREGROUND
BLACK
MEMORY
INT
VIDEO
12345678
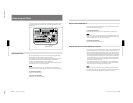
PATTERN/KEY PAD
AUTO TRANS button
Fader lever
Chapter 3 Basic Operation
Chapter 3 Basic Operation
3-55
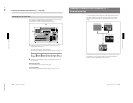
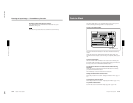
Using the AUTO TRANS button
To execute the effect automatically at the preset transition time, press the
AUTO TRANS button, turning it on.
To pause the transition
During the transition, press the AUTO TRANS button, turning it off.
Note
If the fader lever is in an intermediate position, then the transition pauses
at the corresponding position. To make sure the transition does not pause,
first move the fader lever to either end of its travel.
To resume the transition
Press the AUTO TRANS button again.
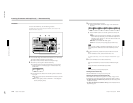
Using the fader lever and AUTO TRANS button together
You can use the AUTO TRANS button to complete a transition started and
paused with the fader lever, or in the opposite way, use the fader lever to
complete a transition started and paused with the AUTO TRANS button.
•If you resume a transition partially executed with the fader lever, using
the AUTO TRANS button, then the transition time taken is in proportion
to the setting for the entire transition. For example, if the transition time
is set to 100 frames, and you carry out the equivalent of 25 frames with
the fader lever, then press the AUTO TRANS button, the remainder of
the transition will take 75 frames.
•If you partially execute the transition with the AUTO TRANS button,
then start moving the fader lever, the transition resumes when the fader
lever reaches the corresponding intermediate position.
Note
When you carry out an auto transition by controlling the processor unit
from an external editor through the EDITOR connector, then regardless of
the fader lever position, the transition is executed in its entirety.