


Installation
LightStyle™ LS-12HBd Installation/Operation Manual 23
PRE
L
IMINAR
Y
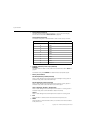
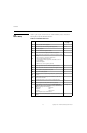
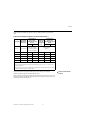
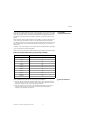
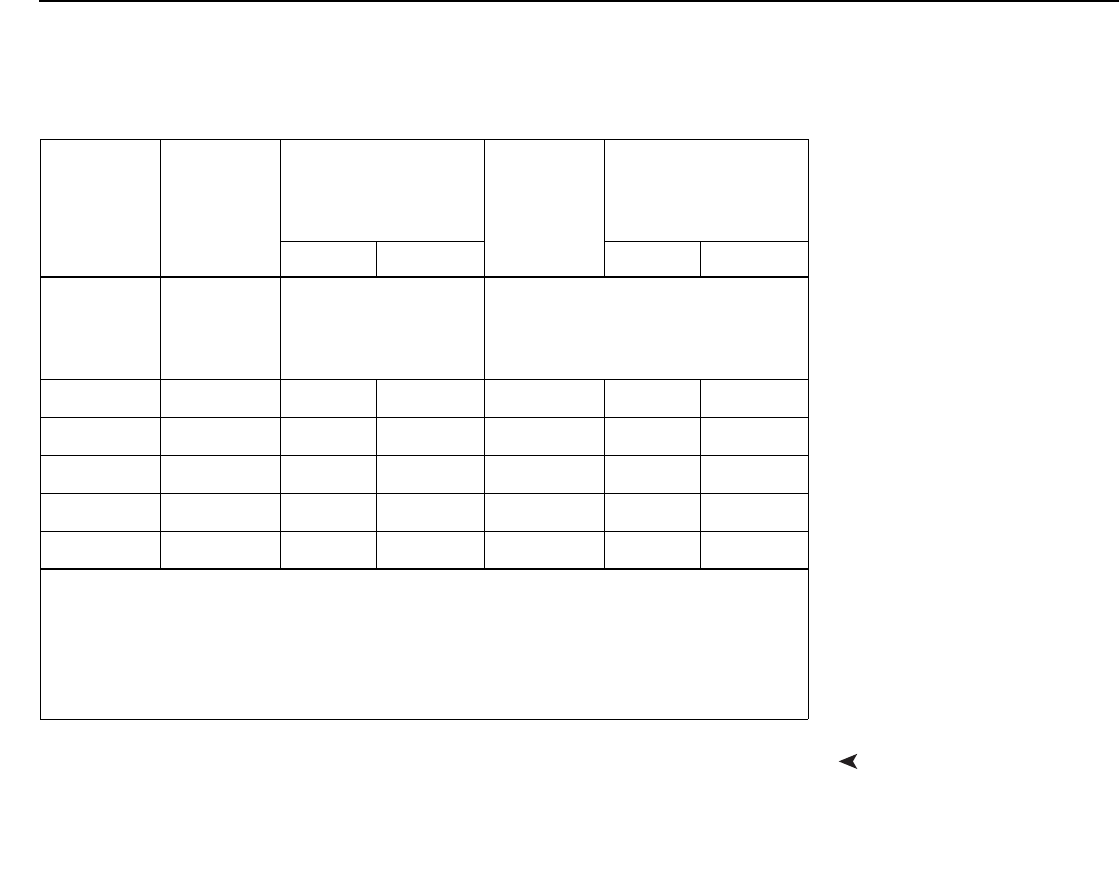
Table 3-3 lists the available lens options for the LS-12HBd and their associated throw
ratios.
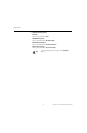
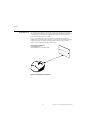
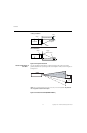
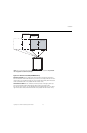
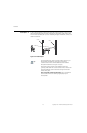
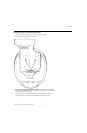
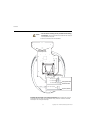
Vertical and Horizontal
Position
Proper placement of the projector relative to the screen will yield a rectangular,
perfectly-centered image that completely fills the screen.
Ideally, the projector should be positioned perpendicular to the screen and in such a way
that the lens center is aligned with either the top or bottom edge of the screen area, and
centered horizontally. See Figure 3-2.
Table 3-3. LS-12HBd Lens Options and Throw Ratios (Note 1)
Lens Option
Throw Ratio
with Primary
Lens Only
Throw Range in
inches, with
117x65.8-inch (1.78:1)
Screen
Throw Ratio
with Primary
Lens and
Anamorphic
Lens
Throw Range in
inches, with
156x65.8-inch (2.35:1)
Screen
Minimum Maximum Minimum Maximum
Proteus 1
0.77 (Fixed)
For rear-screen installa-
tions only. Contact
Runco Technical Support
for more information.
Not Applicable
(Note 2)
Proteus 2
1.45 - 1.74 169.65 203.58 1.09 - 1.30 170.04 202.80
Proteus 3
1.74 - 2.17 203.58 253.89 1.30 - 1.63 202.80 254.28
Proteus 4
2.17 - 2.90 253.89 339.30 1.63 - 2.17 254.28 338.52
Proteus 5
2.90 - 4.34 339.30 507.78 2.17 - 3.26 338.52 508.56
Proteus 6
4.34 - 6.76 507.78 790.92 3.26 - 5.07 508.56 790.92
Notes:
1. Due to normal manufacturing variances, throw distance can vary by up to +/- 5 percent from
these specifications.
2. Only the Proteus 2, 3, 4, 5 and 6 lenses can be used with the optional anamorphic lens. Doing
so affects the throw distances as shown here.