9
Section 1: Introduction- Quick Start
5 INSTALL THE SOFTWARE
1. Place the QSC Signal Manager CD in your computer’s CD drive (typically the D:\ drive). The installation program should run
automatically after several seconds; if it does not,
then
proceed with step 2:
2. Run D:\Setup.exe (replace D: with the drive letter designator appropriate for your system) and follow the instructions displayed.
3. When the installation is complete, you will be presented with a screen that prompts you to view the “Readme” file. Please take
time to read this- it contains important up-to-date information on the software.
4. After installation, you will have an icon on your computer’s “desk top” labeled
Signal Manager
. Use this icon to start the
application (double-click on the
Signal Manager
icon, this will start the program).
5. Using the Menu Bar (see below) at the top of the window, choose the “
Help
” item and read the software help section. The help
system includes the contents of this hardware manual for “paperless” reference.
6. IMPORTANT! The DSP-3 is shipped with all of its presets configured to pass full-range audio signals through both channels.
THIS MAY NOT BE APPROPRIATE FOR YOUR SETUP! Be sure to configure any necessary crossovers , filters, etc. prior
to applying audio signals to the inputs. Damage to equipment may result if these recommendations are not followed.
WHAT THE SIGNAL MANAGER APPLICATION LOOKS LIKE
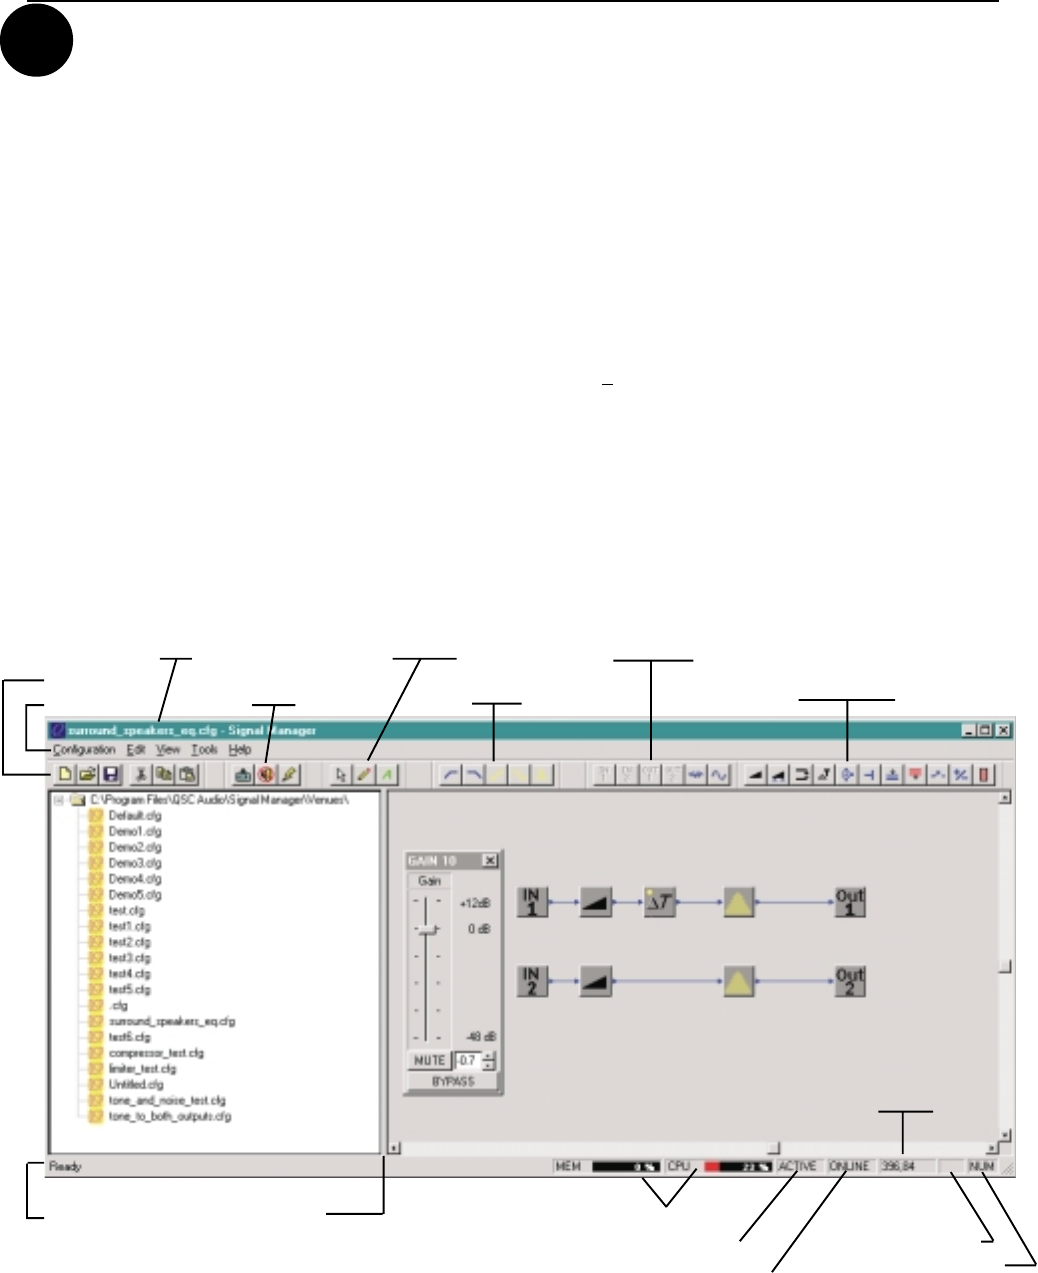
This screen-shot is what a typical Signal Manager “configuration” looks like (example only):
SPLITTER BAR
RESOURCE METER PANES
COMMUNICATION STATUS PANE
CURSOR POSITION PANE
CAPS LOCK INDICTAOR
NUM LOCK INDICATOR
DSP TOOLS PALETTE
DRAWING TOOLS PALETTE INPUTS AND OUTPUTS PALETTE
MISC PROCESSORS PALETTE
FILTERS PALETTE
MENU BAR
WORKSPACE PANE
FILE VIEW PANE
STATUS BAR
TITLE BAR
MAIN PALETTE
CONFIGURATION STATUS PANE
