


EN
21
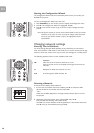
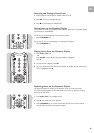
Selecting a Network Type
If the LCD screen displays ‘Select Network Type’: (See ‘Network Environments
Supported’ for a more complete description of network types.)
1 Press 4 to choose an option, then press 2.
2 Choose ‘Infrastructure’ if you have a base station.
-OR-
Choose ‘Ad-hoc’ if the SLA5500 is connecting directly to the PC’s wireless
adapter.
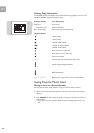
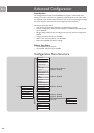
Selecting Encryption Settings
If the LCD screen displays ‘Select Encryption’ or ‘Edit Key 1’:
1 Press 4 to choose an option, then press 2.
2 Choose ‘No’ if no encryption is used on the wireless network or ‘WEP’ if WEP
encryption is used.
3 If you choose ‘Yes’, you will prompted to enter the WEP Key. If a key already
exists in the current profile, asterisks (***) will be displayed in place of the actual
key. See ‘Entering Text in Edit Mode’.
Note: See the user manual of your wireless base station for details on how to identify
the WEP Key.
4 Press 2 when you have finished entering the key. The Key Type and Key Length
will be displayed in the top right of the LCD screen, based on what you have
entered: i.e. ASCII or Hex, 64 or 128 bit.
Note: By default, Key Index 1 will be used. To use another Key Index, see ‘Managing
Multiple Key Indexes’.
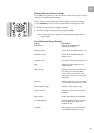
Selecting Network IP Settings
If the LCD screen displays ‘Network IP Settings’:
1 Press 4 to choose an option, then press 2.
2 Choose ‘Automatic (DHCP)’ if you are using DHCP or Auto IP on the network
or ‘Static IP Address’ if the SLA5500 will need a fixed IP address.
3 If you choose ‘Static IP Address’, you will be prompted to edit/confirm the
SLA5500's IP Address, Subnet Mask, Gateway, DNS Server Preferred and DNS
Server Alternate.
Press 2 after confirming/entering each IP address.
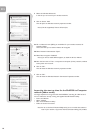
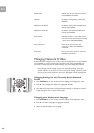
Completing the Configuration
1 When all required settings have been entered, the Configuration Wizard will
display the message: ‘Configuration Complete...Apply Settings?’.
2 If you are modifying an existing profile, press 2 to display the Save to Profile
menu. Press 4 to choose a profile in which to save the new settings.
3 Press 2 to finish. The message ‘Configuration Wizard...Applying Settings’ or
‘Configuration Wizard...Saved to Profile xxx.’ will be briefly displayed, depending
on whether you are applying changes to the active profile or to a different profile.
The Configuration Wizard will then display the home menu.
Note: If the message No Network or another error message appears, the SLA5500
was unable to connect to an available wireless network. Please see ‘Troubleshooting’.
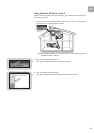
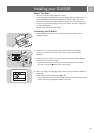
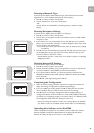
Uploading New Software to the SLA5500
Check www.philips.com/support for new software versions. When new software
becomes available, the Software Upload Wizard in the Philips Wireless Music
Receiver PC Utility will help you to install it on your SLA5500.