RQT8948
14 15
RQT8948
ENGLISH
If the sound is broken or noisy when the headphones are in use
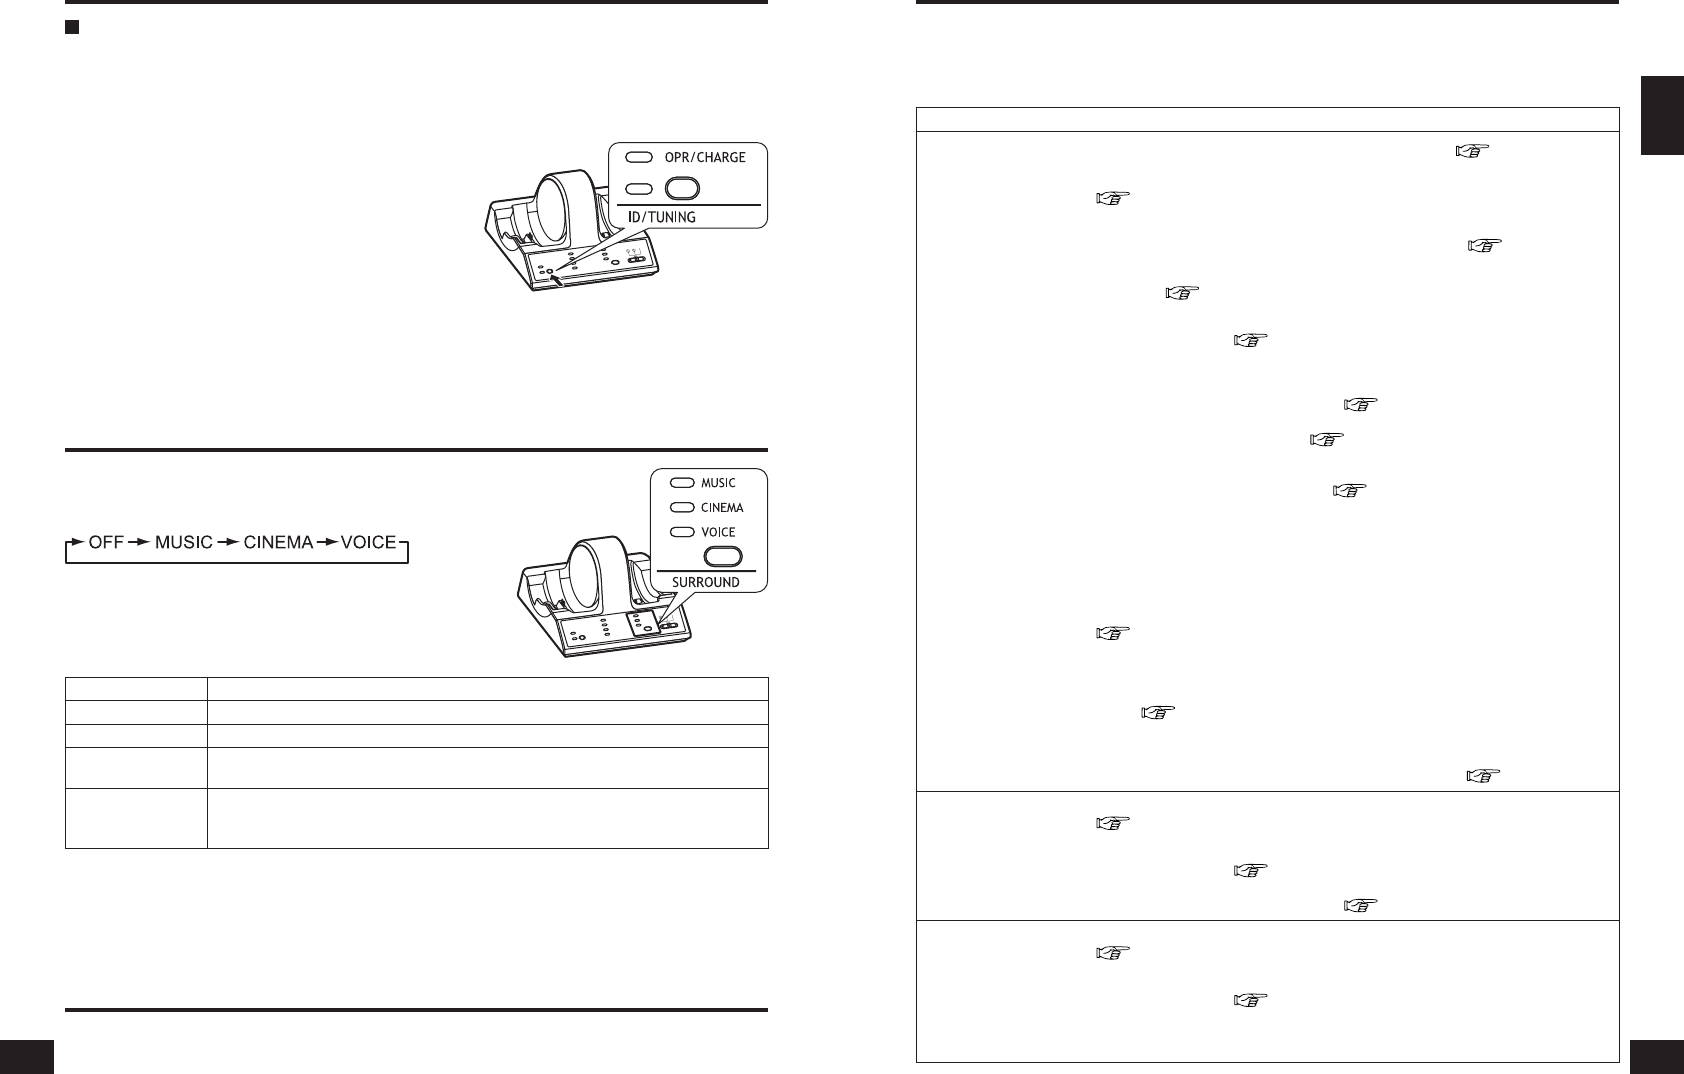
(Setting the most appropriate frequency)
The sound may be broken or noisy if the headphones are used outside the range of the radio waves or if
the reception becomes poor due to the interference from other wireless equipment using the 2.4 GHz radio
frequency band, a microwave etc.
Perform the following steps to manually reset the appropriate frequency for transmitting.
Press [SURROUND] to select the desired surround
mode.
Each time the button is pressed
● The SURROUND lamp for the selected mode will come on.
● This will go off, if “OFF” is selected.
● If the AC adaptor is disconnected and then connected, CINEMA is
automatically selected.
Press [ID/TUNING] on the transmitter once.
● The ID/TUNING lamp on the transmitter glows green, the
transmitter changes the frequency and then radio waves
start being transmitted.
● The headphones will automatically detect the emitted
frequency and noise and sound distortion will stop.
Selecting the surround field
Listening to audio from equipment connected to the transmitter
Surround mode Surround mode and suitable input source
OFF For normal headphone play
MUSIC When playing music sources for enhanced acoustics
CINEMA
When playing movie sources for greater audio impact
Creates a feeling close to being actually part of the scene.
VOICE
When playing sports game sources
Reproduces the excitement of being in a stadium at a noisy sports scene while making
the sound of the announcer or commentator easier to hear.
For your reference
● Depending on the signal being input, volume may vary when changing between surround modes.
● There is no surround effect when playing a monaural source.
14
Maintenance
To clean this unit, wipe with a soft, dry cloth.
● Never use alcohol, paint thinner, or benzine to clean this unit.
● Before using chemically treated cloth, read the instructions that came with the cloth carefully.
Before requesting service, make the below checks. If you are in doubt about some of the check points, or if the
remedies indicated in the chart do not solve the problem:
refer to the “Limited Warranty” on page 66 if you reside in the U.S.A., or refer to the "Limited Warranty" on page 67
if you reside in Canada.
Take both the headphones and the transmitter when you visit your dealer.
Troubleshooting guide
Problem Possible cause and suggested remedy
No sound.
y Check that the AC adaptor is connected to the transmitter (
page 6).
y Check that the transmitter and the AV equipment are connected
(
page 9 to 10).
y Turn on the AV equipment connected to the transmitter and start play on it. Check
that the OPR/CHARGE lamp on the transmitter lights green (
page 12).
y Check that the transmitter’s INPUT SELECT control is set correctly for the connected
equipment (
page 12).
y If the transmitter is connected to the headphone jack, turn up the volume on the
connected equipment (
page 10).
y Put the headphones on again.
y Turn up the volume on the headphones (
page 12).
y The MUTING function is activated (
page 13).
● Move into the range of the radio waves.
y The headphones’ OPR lamp is not on (
page 8).
● The supplied rechargeable battery has run down. Recharge them or replace the
alkaline dry cell batteries with new ones. If the OPR lamp is still off, take the unit to
your dealer.
y Set the digital output setting on the connected equipment to “ON” if digital input is
selected.
y You are playing a DTS audio track on a DVD player that is not compatible with DTS
(
page 10).
● Use a DTS compatible DVD player or select a PCM or Dolby Digital track.
y You are playing a DVD recorded in DTS audio on a DVD player (includes game
machines) when “OFF” has been selected for the DVD player’s DTS digital output
setting (
page 10).
● Set the DVD player’s DTS digital output setting to “ON”.
y You are playing a DVD recorded in DTS audio on a DVD player (includes game
machines) connected to this unit with an analog connection (
page 10).
Sound is low.
y If analog input is selected, switch the transmitter’s ATT control to “0 dB”
(
page 10).
y If the transmitter is connected to the headphone jack, turn up the volume on the
connected equipment (
page 10).
y Turn up the volume on the headphones (
page 12).
Sound is distorted.
y If analog input is selected, switch the transmitter’s ATT control to “-8 dB”
(
page 10).
y If the transmitter is connected to the headphone jack, turn the volume down on the
connected equipment (
page 10).
y Set “CINEMA”, “MUSIC” or “VOICE” with the SURROUND button on the transmitter
when playing a DTS source.
15
When the noise or sound distortion does not stop
Repeat the above step until the most appropriate frequency is set.
● This may not solve the problem if the headphones are being affected by a digital cordless telephone or other
device. In this case, moving the transmitter and the headphones as far as possible from the digital cordless
telephone or other device may stop the noise or sound distortion.


