


RQT8948
12 13
RQT8948
ENGLISH
Before using the transmitter, read [Connections] ( page 9 to 10) and ensure that it is connected
correctly.
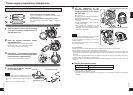
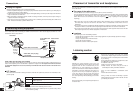
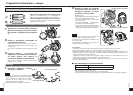
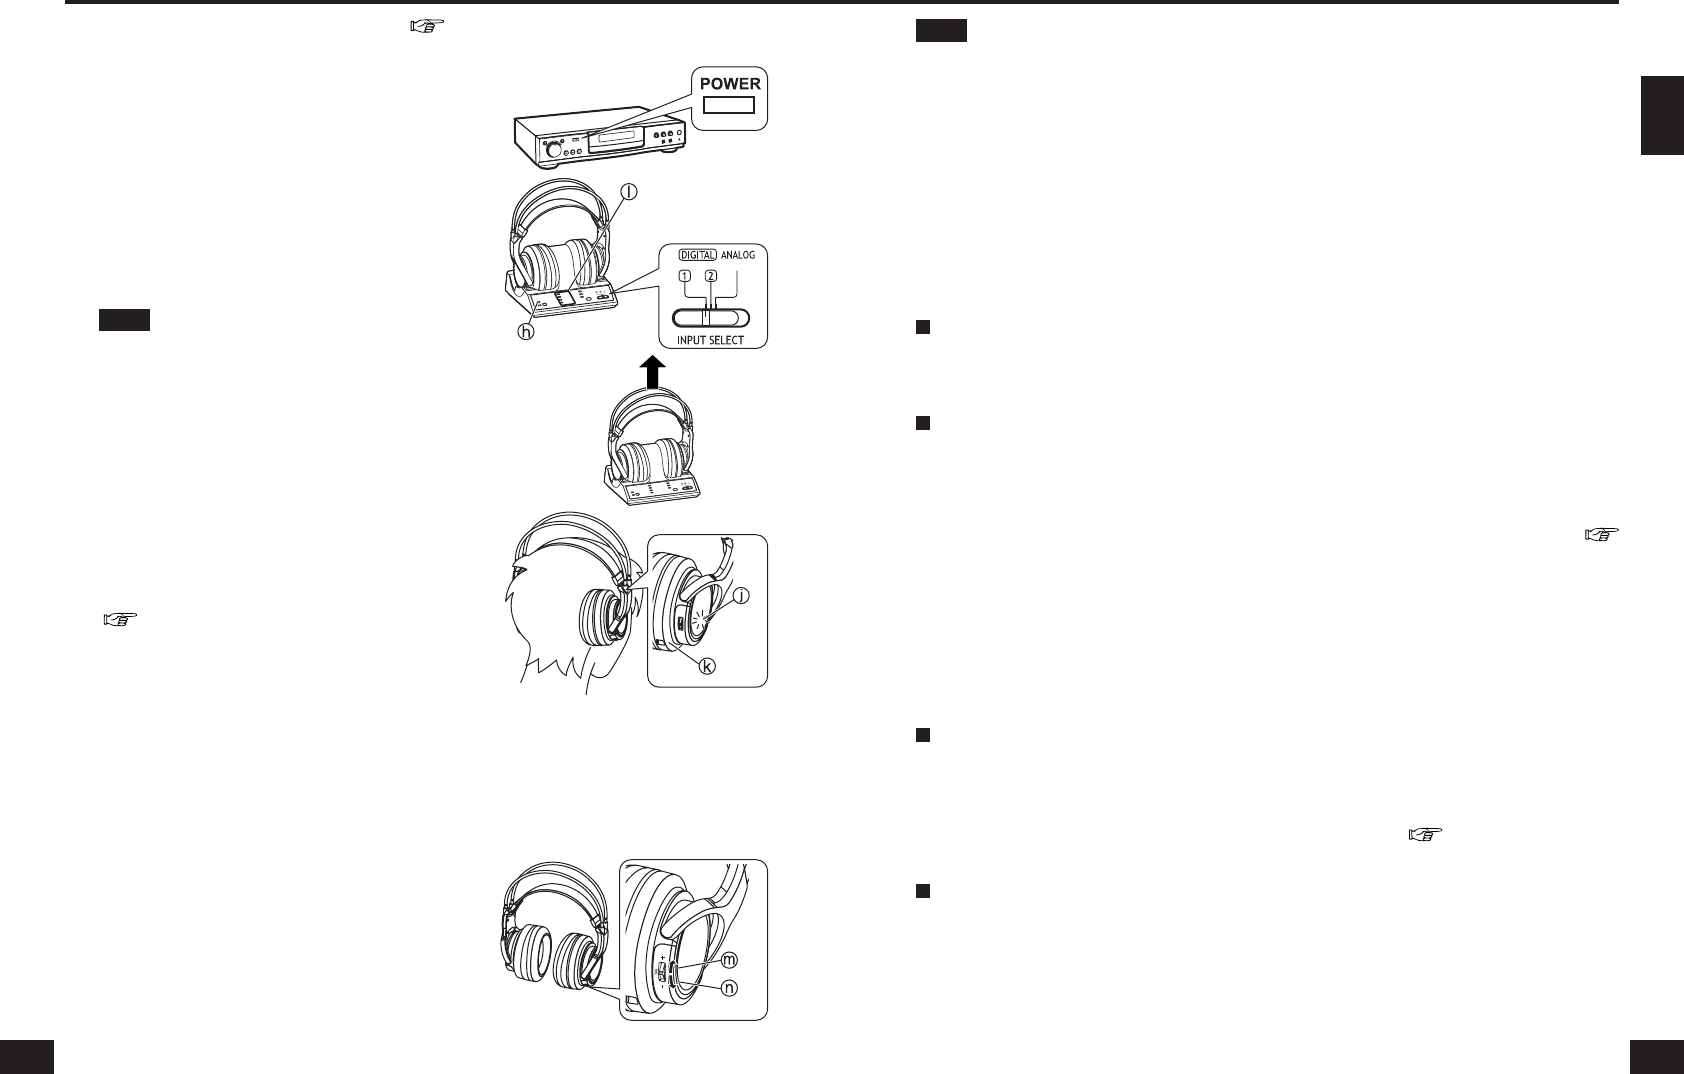
1
Turn on the equipment connected to the
transmitter.
3
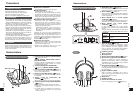
Take the headphones off the transmitter.
4
Put the headphones on your head.
Make sure that the headphones are positioned so that the right
housing (R) goes over the right ear and the left housing (L) over
the left ear. Then put the headphones straight down onto your
head. Doing this will ensure that the auto power on/off function
(
page 8) works correctly.
● The OPR lamp j on the right housing k glows red and the
power automatically turns on.
2
Select the signal with [INPUT SELECT].
DIGITAL 1: To hear sound from equipment connected to the
transmitter’s DIGITAL IN 1 terminal.
DIGITAL 2: To hear sound from equipment connected to the
transmitter’s DIGITAL IN 2 terminal.
ANALOG: To hear sound from equipment connected to the
transmitter’s LINE IN terminal.
Note
● When watching movies, be careful not to turn up the volume too high during quiet scenes. The movie may
suddenly switch to a very noisy scene and you could damage your ears if the volume is raised too high.
● Avoid listening for prolonged periods of time to prevent hearing damage.
● Be sure to use the headphones within the range of the radio waves.
● Discontinue use if you experience discomfort. Continued use may cause rashes or other allergic reactions.
Note
With dual sound sources (MAIN/SUB), select the desired sound
on the player or television connected through the LINE IN
terminal.
Time required for mode changes
The actual time required for the unit to change to a particular mode after it has been selected using the slide
switch on the transmitter, may vary between individual modes. This is due to different internal systems being
used to change to different modes.
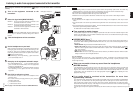
DECODE MODE lamp l
The transmitter automatically distinguishes the recording method of the input signal and this lamp lights as
shown below. When switching to DOLBY DIGITAL/DTS and so on, do so on the connected equipment e.g. the
DVD player.
● DOLBY DIGITAL: Signals recorded in DOLBY DIGITAL format.
● DOLBY PRO LOGIC II: Analog input signals, digital input signals (PCM 2-channel signals) and DOLBY
DIGITAL 2-channel signals treated as DOLBY PRO LOGIC II. (Select “OFF” in SURROUND MODE (
page 14) to stop this).
● DTS: Signals recorded in DTS format.
● MPEG-2 AAC: One of the audio compression formats defi ned by the MPEG-2 standard. Advanced audio
coding is used for the sound in digital televisions.
For your reference
When any function other than [PLAY] - such as fast-forward or rewind - is selected on the equipment connected
using the DIGITAL IN terminal, the DECODE MODE lamp may not light correctly. If [PLAY] is selected, it will
however light correctly.
When you are unable to hear any sound from the headphones
(MUTING function)
If the headphones are used outside the range of the radio waves or the radio waves weaken, reception will
decline and the MUTING function will come on. No sound will then be heard from the headphones. If this
happens, move nearer to the transmitter and the MUTING function will automatically switch off. If the sound
is still broken, reset the headphones to the most appropriate frequency.(
page 14 [Setting the most
appropriate frequency])
If no audio signal is received at the transmitter for more than
approximately 5 minutes
The radio waves being emitted from the transmitter automatically stop and the transmitter’s OPR/CHARGE
lamp goes out. The radio waves start being emitted again when an audio signal is received. When the input
audio (analog only) continues to be very low for more than 5 minutes (approximately), the radio waves being
emitted from the transmitter may stop. If this happens, increase the volume level on the connected equipment
and decrease the volume level on the headphones.
If a noise signal is input from equipment connected by the LINE IN terminal, the output of radio waves may not
stop.
5
Start play on the equipment selected in step 2.
● The OPR/CHARGE lamp h on the transmitter will light
green and radio waves will be emitted. The most appropriate
frequency is automatically set.
● The DECODE MODE lamp l glows approximately 5 seconds
later depending on the signal sent from the connected
equipment.
6
Use [VOL] to adjust the volume.
● The volume is the same as when the headphones were
previously used.
● The volume will keep changing while the [VOL] control is
pushed to either side.
m To increase the volume
n To decrease the volume
Listening to audio from equipment connected to the transmitter
DVD player and so on
● If you disconnect the AC adaptor from the transmitter before taking off the headphones, there may be static
noises.
● The actual location of the sound may be diffi cult to recognize with music and audio only sources such as music
CDs.
● This unit simulates the average person’s HRTF
. However individual differences in human’s HRTF mean that the
effect of this system will vary between individuals.
An abbreviation for Head Related Transfer Function.
1312
For your reference
Refer to page 14 for information about the SURROUND effects.