


53
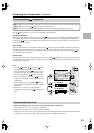
First Time Setup
—Continued
Notes:
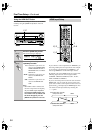
• See page 35 for charts showing how the HDMI Moni-
tor and Resolution settings affect the video signal flow
through the AV receiver.
• This procedure can also be performed on the AV
receiver by using its [SETUP], [ENTER], and arrow
buttons.
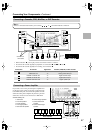
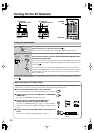
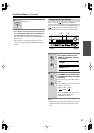
2
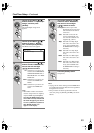
Use the Up and Down [ ]/[ ]
buttons to select “1. Input/Output
Assign,” and then press
[ENTER].
The Input/Output Assign menu
appears.
3
Use the Up and Down [ ]/[ ]
buttons to select “1. Monitor
Out,” and then press [ENTER].
The Monitor Out menu appears.
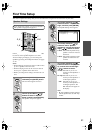
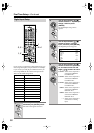
4
Use the Up and Down [ ]/[ ]
buttons to select “HDMI Monitor,”
and use the Left and Right
[ ]/[ ] buttons to select:
No:
Select this if your TV is con-
nected to the COMPONENT
VIDEO MONITOR OUT, S
MONITOR OUT, or V MON-
ITOR OUT.
Main:
Select this if your TV is con-
nected to the HDMI OUT
MAIN.
Sub:
Select this if your TV is con-
nected to the HDMI OUT
SUB.
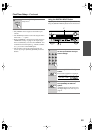
Note:
• When Main or Sub is selected, the
onscreen setup menus are output by
only the HDMI outputs.
If you’re
not using the HDMI outputs and
select Main or Sub by mistake and
the menus disappear, press the AV
receiver’s [HDMI OUT] button so
that “HDMI Monitor: No”
appears on the display.
ENTER
ENTER
ENTER
ENTER
1-1.Monitor Out
HDMI Monitor
Main
Resolution Through
ENTER
ENTER
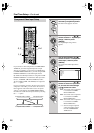
5
Use the Up and Down [ ]/[ ]
buttons to select “Resolution,”
and use the Left and Right
[ ]/[ ] buttons to select:
Through:
Select this to pass video
through the AV receiver at the
same resolution and with no
conversion.
Auto:
Select this to have the AV
receiver automatically con-
vert video at resolutions not
supported by your TV.
480p:
Select this for 480p output
and video conversion as nec-
essary. (Not available when
the HDMI Monitor setting is
set to No.)
720p:
Select this for 720p output
and video conversion as nec-
essary.
1080i:
Select this for 1080i output
and video conversion as nec-
essary.
1080p:
Select this for 1080p output
and video conversion as nec-
essary. (Not available when
the HDMI Monitor setting is
set to No.)
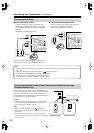
6
Press the [SETUP] button.
Setup closes.
ENTER
ENTER
S
E
T
U
P