44
First Time Setup—Continued
If you connect an -capable Onkyo MiniDisc
recorder, CD recorder, or next generation HDD-compat-
ible component to the TAPE IN/OUT or VIDEO 3 IN
jacks, for to work properly, you must change this
setting.
This setting can only be changed on the AV receiver.
iPod photo: If you’re using an iPod photo with the
DS-A1 Remote Interactive Dock, connect the DS-A1 to
the VIDEO 3 IN jacks.
Note:
HDD can be selected for the TAPE input selector or
VIDEO 3 input selector, but not both at the same time.
You must specify the TV system used in your area.
Note:
• This procedure can also be performed on the AV
receiver by using its [SETUP] button, arrow buttons,
and [ENTER] button.
Changing the Input Display
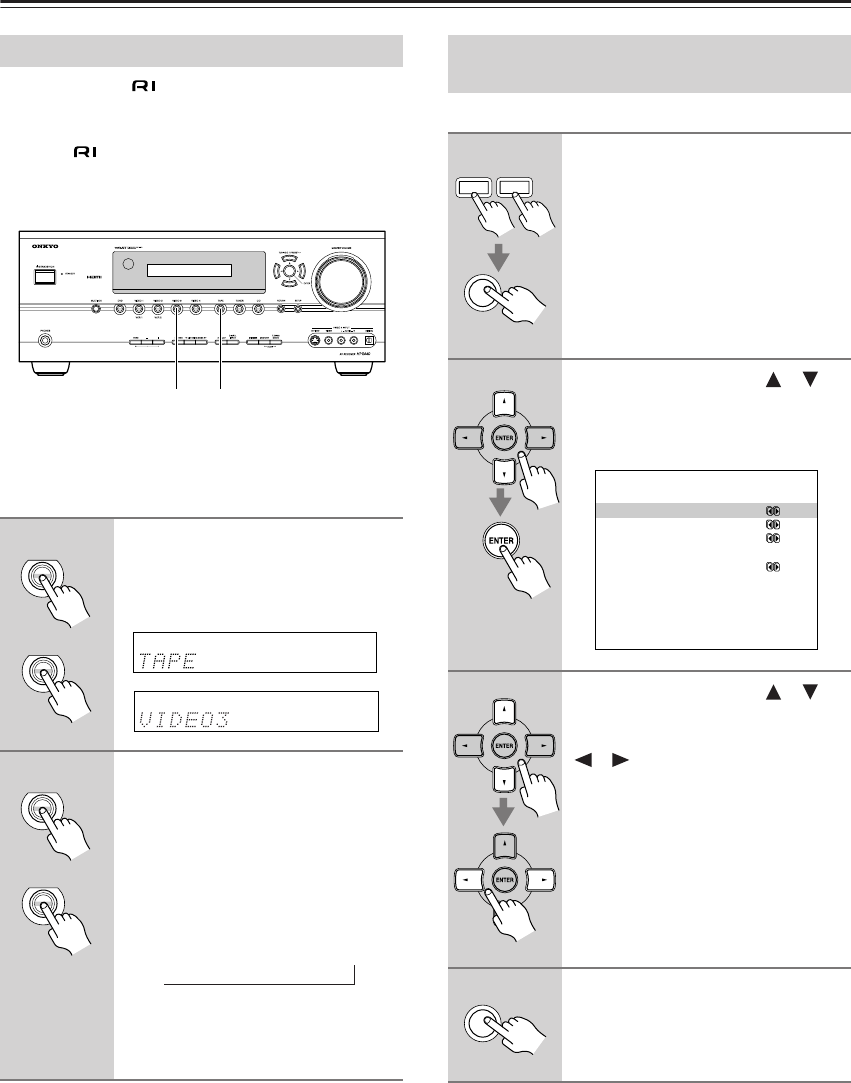
1
Press the [TAPE] or [VIDEO 3]
input selector button so that
“TAPE” or “VIDEO3” appears on
the display.
2
Press and hold down the [TAPE]
or [VIDEO 3] input selector but-
ton (about 3 seconds) to change
the setting.
Repeat this step to select MD, CDR, or
HDD.
For the TAPE input selector, the setting
changes in this order:
TAPE
→ MD → CDR → HDD
For the VIDEO 3 input selector, the set-
ting changes in this order:
VIDEO 3
↔ HDD
1, 2
1, 2
TAPE
VIDEO 3
TAPE
VIDEO 3
→
TV Format Setup
(not North American models)
1
Press the [RECEIVER] or [AMP]
button, followed by the [SETUP]
button.
The main menu appears onscreen.
2
Use the Up and Down [ ]/[ ]
buttons to select “7. Hardware
Setup,” and then press [ENTER].
The Hardware Setup menu appears.
3
Use the Up and Down [ ]/[ ]
buttons to select “TV Format,”
and then use the Left and Right
[ ]/[ ] buttons to select:
Auto: Select this to automatically
detect the TV system from the
video input signals.
NTSC: Select if the TV system in
your area is NTSC.
PAL: Select if the TV system in
your area is PAL.
4
Press the [SETUP] button.
The setup menu closes.
RECEIVER
AMP
SETUP
7.Hardware Setup
------------------------
a.TV Format :Auto
b.Remote ID :1
c.HDMI Audio Out :Off
d.SW Input Sensitivity
: 0dB
SETUP


