


14
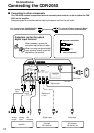
Connecting to the Onkyo Separate Collection
This section introduces you to the other Separate Collection Series system components and their
convenient system functions, followed by connecting instructions.
The following Separate Collection series components are commercially available:
• R-805X ....... FM Stereo/AM Tuner Amplifier
• MD-105X ... MD Recorder (Not available in U.S.A. and Canada)
• K-505X ....... Stereo Cassette Tape Deck
• C-707CHX .. Compact Disc (CD) Changer (Only available in U.S.A. and Canada)
Note that the available components may vary according to the area.
Combination use of the unit with the above system components enables you to operate the
following convenient functions.
• Auto power on
By turning on the CDR-205X or starting a playback with it, the power to the amplifier is automatically
turned on as well. Also, when not using the CDR-205X, you can turn it off independently.
Note:
When the R-805X is in its energy save mode, the auto power on function will not work.
• Direct change
By pressing the play/pause button(n)on the CDR-205X, the input source at the tuneramplifier
automatically switches to CDR.
• Remote controller operation
The remote controller supplied with the R-805X can be used to operate the CDR-205X. (For more details,
refer to the R-805X instruction manuals.)
• Timer
Timed playback is possible. (For more details, refer to page 40 of this instruction manual or to the R-805X
instruction manuals.)
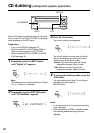
• CD dubbing
This function allows one-touch recording from the CD player to the CDR-205X. (For more details, refer to
the page 20 of this instruction manual.)
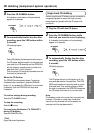
• CD - synchro recording
By first setting the CDR-205X so that it is ready for recording, you can start the recording by just pressing
play at the CD player. (For more details, refer to the page 22 of this instruction manual.)
• Synchronous recording from the MD or tape deck
By first setting the CDR-205X so that it is ready for recording, you can start the recording by just pressing
play at the MD or tape deck. (For more details, refer to the page 23 of this instruction manual.)