


ABOUT VIDEO FORMATS
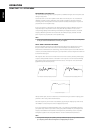
For many years, there was only one type of video format used. Composite video signals include the
Luminance (black & White) and Chroma (color) signals combined on one wire. S-Video uses separate
wires in a single cable for Luminance and Chroma signals. Component Video goes a step further
with separate cables for Luminance and the two elements of Chroma. For NTSC (America, Japan)
as well as PAL signals(Europe, Asia) these are labeled Y, Cr, Cb. Television studios use the Component
Video format to keep these signals separate in order to maintain the best quality. As consumer video
equipment has improved this higher quality format has been included.
VIDEO FORMAT CONVERSION
The T 175 is equipped with a Video Format Converter. This allows for a simplied video connection
between the T 175 and your TV Monitor when using multiple video formats such as Composite (CVBS),
S-Video, and Component (YUV). This format change is accomplished by encoding the analog video
signal into a digital signal using a very high quality digital encoder to maintain the best possible
picture quality. Once in a digital format, it can be decoded into any of the three standard analog video
formats. These analog outputs are also up-converted to HDMI output. Video output availability will
depend on the resolution capability of your TV/Monitor.
It is suggested that you select the highest quality video format available on your TV Monitor and utilize this
for your Monitor OUT connection from the T 175 to the TV Monitor. In most cases this will be Component
Video or HDMI (where possible), but on some older TV’s S-Video may be the best quality connection.
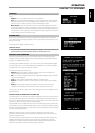
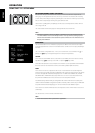
A/V PRESET
A particular Source can be assigned a stored Preset. The parameters set up in the selected Preset
number will be adopted into the particular Source it is assigned (Please refer to the separate section on
“A/V PRESETS” for further understanding of Preset settings).
Scrolling to “A/V Preset” and by pressing [ ] and then [ ] keys, a Source could be assigned a
Preset number ranging from Preset 1 to 5.
If it is desired not to assign the particular Source a Preset setting, select “None”.
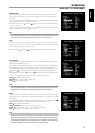
TRIGGER OUT
The Trigger Out for a particular Source is dependent on the congurations done in a separate menu on
Trigger Setup (See “TRIGGER SETUP” below). If all three available Trigger outputs are assigned to “Source Setup”
in the separate “Trigger Setup” window, a particular Source can have the following Trigger Out combinations
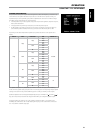
Trigger Out 1 2 1 + 2 3 1 + 3 2 + 3 1+2+ 3
These combinations are dependent on the assignment of “Source Setup” for “Trigger 1 Out”, “Trigger 2
Out” or “Trigger 3 Out” at the Trigger Setup menu.
Another option is “O” whereby the particular Source is not assigned any Trigger Out.
For “Trigger Out” to become enabled and assignable at “Source Setup (Normal View)” menu, make sure
to carry out or note the following beforehand
• In the separate “Trigger Setup” menu, assign “Trigger 1 Out”, “Trigger 2 Out” or “Trigger 3 Out” to
“Source Setup”.
• “Trigger Out” will not appear as an option at the Source Setup (Normal View) menu if at the
separate “Trigger Setup” menu, “Trigger 1 Out”, “Trigger 2 Out” or “Trigger 3 Out” are all assigned to
“Main”, “Zone 2”, “Zone 3”, “Zone 4”, or “Zone 2+3+4” without a single “Trigger Out” port allocated to
“Source Setup”.
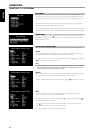
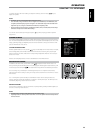
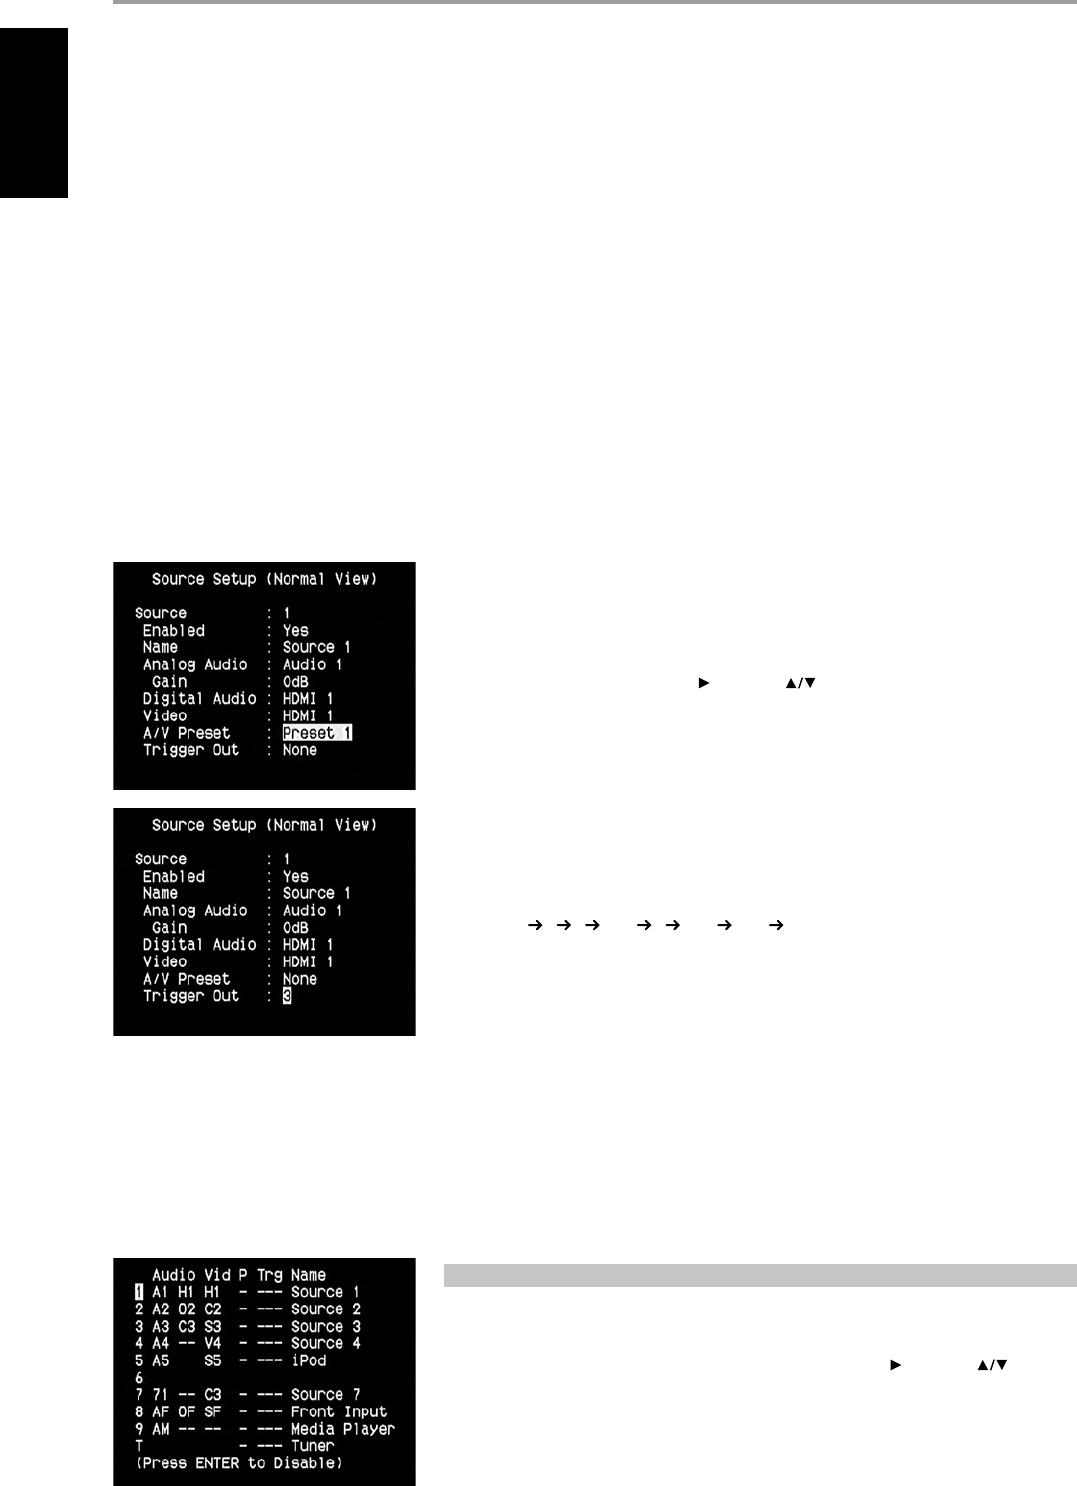
SOURCE SETUP (TABLE VIEW)
The Source Setup (Table View) reects the settings made in the Source Setup (Normal View) menu. All
the Source settings are summarized and displayed in tabulated form in the Source Setup (Table View).
Navigating through the Source Setup (Table View) via a combination of [ ] and then [ ] keys,
one will have the benet of directly changing the settings for “Audio”, “Video”, “Preset”, “Trigger” and
“Source Name” without going back to the Source Setup (Normal View) menu.
OPERATION
USING THE T 175 SETUP MENU
18
ENGLISH FRANÇAIS ESPAÑOL ITALIANO DEUTSCH NEDERLANDS SVENSKA РУССКИЙ