39
Chapter 7: Using the Web-based Utility of the Wireless-B Media Link for Music
Setup
Wireless-B Media Link for Music
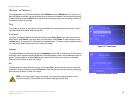
If you clicked the Edit Security Settings button, then the Security Setting screen will appear. From the
Wireless Encryption Level drop-down menu, select a level of encryption, 64Bit or 128Bit.
Enter a Passphrase and click the Generate key to automatically generate WEP keys. If you prefer to manually
enter WEP key(s), then complete the WEP Key 1-4 fields. From the Active Key drop-down menu, make a
selection that specifies which WEP key to use for encryption.
Click the Apply button to save your changes. Click the Undo button to cancel your changes and return to the
Setup screen. Click the Clear button to clear all your changes.
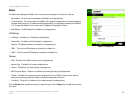
• Wireless Encryption Level - In order to use WEP encryption, select 64Bit or 128Bit.
• Passphrase - Instead of manually entering WEP keys, you can enter a Passphrase. This Passphrase is
used to generate one or more WEP keys. It is case-sensitive and should have no more than 16
alphanumeric characters. (The Passphrase function is compatible with Linksys wireless products only. If
you want to communicate with non-Linksys wireless products, you will need to enter your WEP key
manually on the non-Linksys wireless products.) After you enter the Passphrase, click the Generate
button to create WEP key(s).
• Active Key - Select which WEP key (1-4) will be used when the Media Link sends data. Make sure the
other wireless-equipped devices are using the same key.
• WEP Keys 1-4 - If you are not using a Passphrase, then you can enter one or more WEP keys manually. In
each key field, manually enter a set of values. (Do not leave a key field blank, and do not enter all zeroes.
These are not valid key values.) If you are using 64-bit WEP encryption, then each key must consist of
exactly 10 hexadecimal characters in length. If you are using 128-bit WEP encryption, then each key must
consist of exactly 26 hexadecimal characters in length. Valid hexadecimal characters are “0”-“9” and
“A”-“F”.
To save your changes, click the Apply button. Click the Cancel button to cancel your changes. Click the Help
button for additional on-screen information.
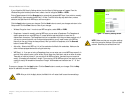
Figure 7-3: Security Setting Screen
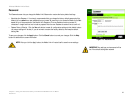
NOTE: Make sure that your encryption settings
match the encryption settings of your wireless
network. Otherwise, the connection will fail.
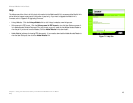
NOTE: After you click the Apply button, the Media Link will restart itself to save the new settings.


