


37
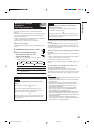
Creating Realistic Sound Fields
6
Press CONTROL 3 (or 2) to make adjustments.
• When adjusting the speaker output levels, make adjustments
so that the sound level of the selected speaker is set at the
same level as that of the front speakers.
7
Repeat steps
5
and
6
to adjust the other
settings.
To cancel Surround Mode
Press SURROUND ON/OFF again so that “STEREO” appears on
the display.
• If Surround mode is canceled while playing back multichannel
digital software, all channel signals are mixed and output through
the front speakers (and subwoofer if you have connected a
subwoofer and set the subwoofer setting correctly—“YES”).
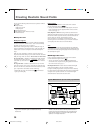
Using DAP Modes and All Channel
Stereo (Front Panel)
Once you have adjusted the DAP modes and All Channel Stereo, the
adjustment is memorized for each source.
• You cannot use the DAP modes and All Channel Stereo if no rear
speakers are connected.
• You cannot adjust the effect level for “ALL CH ST.”
1
Start playing 2-channel software—either digital
or analogue—and select the source.
2
Press SURROUND ON/OFF to activate Surround
mode.
When Surround mode turns on, the last selected Surround mode
will be activated.
• Each time you press the button, Surround mode turns on and
off alternately.
3
Press SURROUND MODE repeatedly until one
of the DAP modes or “ALL CH ST.” you like to
apply appears on the display.
The DSP indicator also lights up on the display.
4
Press ADJUST.
The CONTROL buttons now work for sound
adjustments.
5
Press CONTROL ∞ (or 5) repeatedly until one
of the following indications (with the current
setting)
* appears.
CENTER (only for “All CH ST.”) :
To adjust the center speaker output level
(from –10 to +10).
REAR L : To adjust the left rear speaker output level
(from –10 to +10).
REAR R :To adjust the right rear speaker output level
(from –10 to +10).
EFFECT (except “All CH ST.”) :
To adjust the DAP effect level.
As the number increases, the effect becomes
stronger (normally set it to “EFFECT 3”).
* “0” is the initial setting for the speaker output levels, and
“EFFECT 3” is for the DAP effect level.
If you have already changed the setting, another setting will be
shown.
6
Press CONTROL 3 (or 2) to make adjustments.
• When adjusting the speaker output levels, make adjustments
so that the sound level of the selected speaker is set at the
same level as that of the front speakers.
7
Repeat steps
5
and
6
to make other
adjustments.
To cancel DAP Modes and All Channel Stereo
Press SURROUND ON/OFF so that “STEREO” appears on the
display. The DSP indicator goes off.
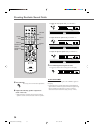
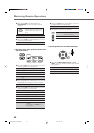
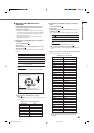
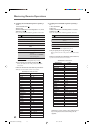
Ex.: When adjusting the center speaker output level.
ADJUST
ANALOG
PR ΙΙ
SUBWFRLFE
VOL
AUTO SR
INPUT ATT
DSP
LCR
LS S RS
LPCM
DOLBY D
DTS
ANALOG
PR ΙΙ
SUBWFRLFE
VOL
AUTO SR
INPUT ATT
DSP
LCR
LS S RS
LPCM
DOLBY D
DTS
(back to the beginning)
SURROUND
MODE
Ι
VOL
R
T
T
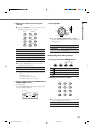
Ex.: “LIVE CLUB” has been selected.
SURROUND
ON/OFF
CONTROL
ANALOG
PR ΙΙ
SUBWFRLFE
VOL
AUTO SR
INPUT ATT
DSP
LCR
LS S RS
LPCM
DOLBY D
DTS
ANALOG
PR ΙΙ
SUBWFRLFE
VOL
AUTO SR
INPUT ATT
DSP
LCR
LS S RS
LPCM
DOLBY D
DTS
Ex.: When adjusting the left rear speaker output level.
CONTROL
CONTROL
EN30-37.RX-E111&112RSL[B]_f 02.2.6, 7:36 PM37