


2-16
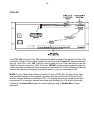
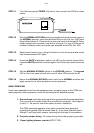
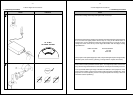
STEP 11 Turn the front pannel FADER fully down, then connect the CP65 to mains
power.
Model CP65
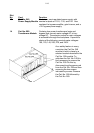
STEP 12 With the NORMAL/BYPASS switch (accessible with the front door open) in
the NORMAL position, verify that all three LEDs on the Cat. No. 249 Power
Supply Module are lit. Close the front door and verify that format 04 Dolby
stereo optical with surround, local active, and proj 1 or proj 2 LEDs are on
(unless a different wake-up format was selected on the Cat. No. 443).
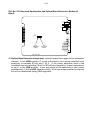
STEP 13 Select each format in turn, using the buttons on the front panel and check
that the associated LED lights.
STEP 14 Press the MUTE pushbutton switch; the LED on the switch should blink.
Press the MUTE pushbutton switch again; the LED on the switch should be
off.
STEP 15 Set the NORMAL/BYPASS switch to the BYPASS position. The bypass
LED on the front panel should blink and all other LEDs should be off.
STEP 16 Return the NORMAL/BYPASS switch back to the NORMAL position and
apply power to the other projection room equipment.
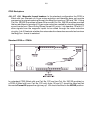
HUM PROBLEMS
If you hear undesirable hum from the speakers when you apply power to the CP65 and
other projection room equipment, check the following list for possible causes:
1. Ground loops caused by audio signal wiring, especially to power amplifiers.
Only one end of an audio shield wire should be connected. See Pages 2-
3 and 2-4. Be sure to check the booth monitor installation.
The CP65 backplane contains a link which connects frame ground to
signal/power ground (TB2 terminals 8 and 9). If you have checked items 1
through 7 and hum is still present, removing this link may fix the problem.
2. Projector power wiring. All mains wiring should be properly grounded.
3. Room lighting dimmer controls (SCR-TYPE).