


Getting Started Connections Playback Remote Control Multi-zone Information Troubleshooting Specifi cations
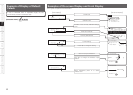
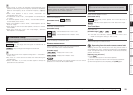
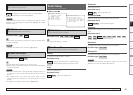
Step 2 : Measurement
q Select “Next
0
”, then press o.
• The measurement of the 2nd position starts.
• Select “Calculate
0
” with i, and press o to proceed to Step 3.
w Move the microphone to the 3rd position and press o.
• The measurement of the 3rd position starts.
• Select “Calculate
0
” with i, and press o to proceed to Step 3.
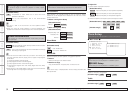
e Perform repeatedly through the 6th position or more. A maximum
of 8 position can be measured .
r “All the measurements were fi nished.” is displayed on the on-
screen display, when you have completed measurements in 8th
positions.
• Select “Calculate
0
”, and press o to proceed to Step 3.
After completing a measurement position, move the microphone to
the next position.
Measure at least 6 positions: the main listening position and 5 other
surrounding positions. Although it is allowable to measure less than 6
positions, it is recommended to measure 6 or more positions (with a
maximum of 8 positions) for best results.
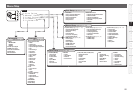
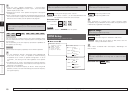
Step 3 : Calculation
The values obtained from the measurements are automatically
analyzed and the attributes for each of the speakers in the listening
area are determined.
q Select “Calculate
0
” at Step 2, then press o.
• Analysis begins.
• Analysis takes several minutes to complete.
• The time required for this analysis depends on the number of
speakers connected. The greater the number of speakers connected,
the longer analysis will take.
NOTE
• Do not change the speaker connections or subwoofer volume,
or speaker locations after making measurements. If changes are
necessary, make the changes and use Audyssey MultEQ XT auto
setup once again for an updated EQ solution.
• For instance, if the location or direction of a speaker is altered, the
Auto Setup should be performed again to ensure the correct EQ
solution for the new room confi guration.
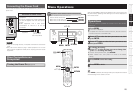
F Menu screen F
q
w
Auto Setup
Step2:Measurement
Audyssey
MultEQ XT
Please place microphone
Cancel
Next
Calculate
2nd listening position.
at ear height at
Auto Setup
Step2:Measurement
Audyssey
MultEQ XT
Now measuring 2nd
Cancel
Front L
listening position.
w
r
Auto Setup
Step2:Measurement
Audyssey
MultEQ XT
Please place microphone
Retry
Cancel
Next
Calculate
3rd listening position.
at ear height at
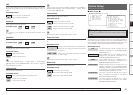
Step 4 : Check
Distance values that are greater than the actual distance of a speaker
may be accurate for speakers with built-in fi lters (subwoofers, etc).
This is because these fi lters add electrical delay (distance) to the signal
that is compensated for by the Auto Setup process.
When analysis is complete, check the analysis results for the following
four items.
q Make your selection using ui and press ENTER.
• Presence and size of speaker
“Speaker Confi g. Check”
• Distance of speaker from listening position
“Distance Check”
• Speaker channel level
“Channel Level Check”
• Crossover Frequency
“Crossover Freq. Check”
w Use ui to change which speaker is displayed.
e Press RETURN.
This returns you to analysis results items, so repeat step q.
r Press i to select “Next
0
”, and then press o to proceed to Step
5.
F Menu screen F
q
Auto Setup
Step4:Check
Audyssey
MultEQ XT
Please check the results
of the measured item.
Distance Check
Channel Level Check
Crossover Freq.Check
Speaker Config.Check
Next
F Menu screen F
q
Auto Setup
Step3:Calculation
Audyssey
MultEQ XT
Calculating
––––––––––––––––––––––––––––––––––––
Please wait...
Auto Setup
Step2:Measurement
Audyssey
MultEQ XT
Retry
Cancel
Calculate
All the measurements
were finished.
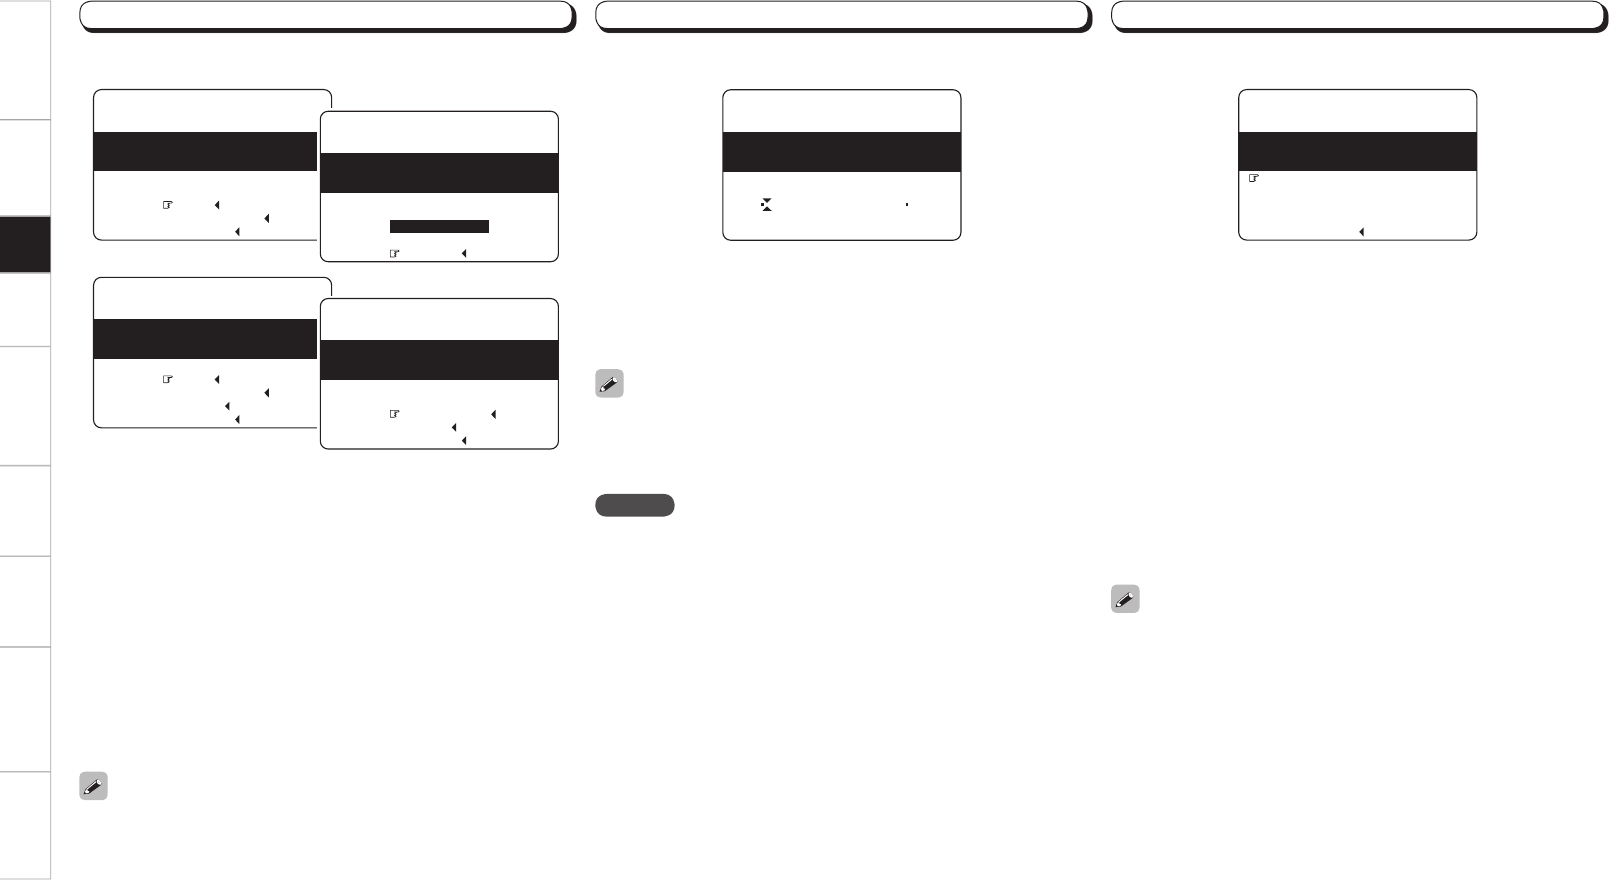
n To cancel Auto Setup
Press ui to select “Cancel
0
”, then press o.
q
Setup