Windows Vista - Additional Setup Requirements
PLEASE NOTE: STEP 2 IS CRITICAL FOR WINDOWS VISTA USERS!
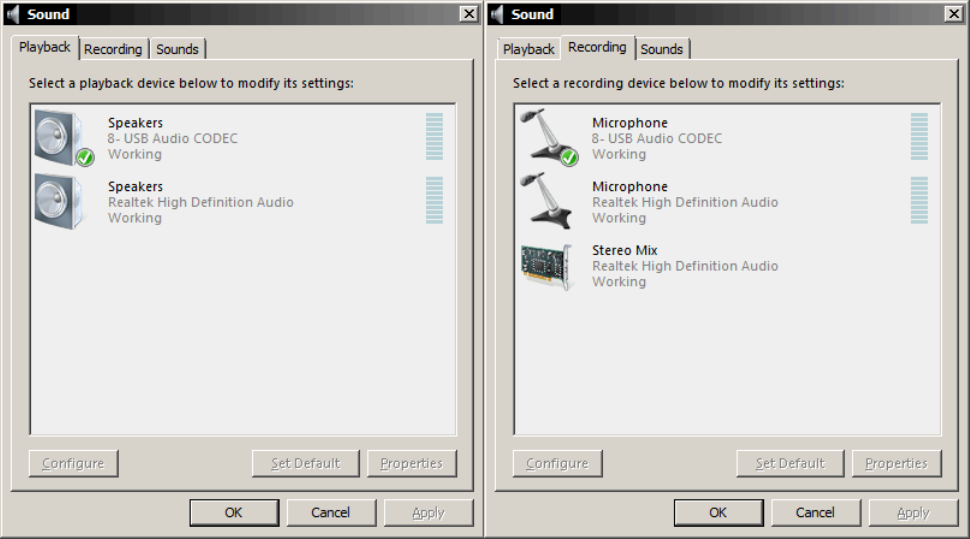
1. Go to the Windows Control Panel and open the “Sound” control panel. At the "Playback" tab make
sure that "USB Audio Codec" is selected as the default sound system for playback. (the icon should
appear with a green check mark as shown). If not, click on the "USB Audio Codec" and then click the
"Set Default" button below.
2. Change to the "Recording" tab at the top of the Sound control panel. As above, make sure that "USB
Audio Codec" is selected as the default sound system for recording (the icon should appear with a
green check mark as shown). If not, click on the "USB Audio Codec" selection and then click the "Set
Default" button below. The "USB Audio Codec" should now appear as the default selection. While at
the "Recording" tab click on the "Properties" button and switch to the "Advanced" tab (shown below).
If not already selected, then select "2 channel, 16 bit, 44100 Hz (CD Quality)" from the list. Click
OK to set the recording format and close the dialog.


