


TASCAM TA-1VP 29
note and therefore pulls the phrase up to the correct
pitch.
A NOTE ABOUT SCALE EDITS: While you remain in
a preset, you can make edits to multiple scales and
the TA-1VP will remember the edits and allow you to
switch between the edited scales (e.g., to evaluate
the effect of various scale settings on the correction
of a particular performance). However, if you select
another preset without first saving the first preset, all
of your scale edits will be lost. Furthermore, since a
TA-1VP preset includes only the scale selected at the
time it was saved, be sure your desired scale is selected
before saving the preset, as any edits to other scales
will also be lost.
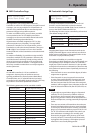
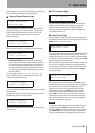
Speed Page
ª
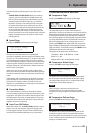
Pressing the SPEED button brings up this page:
Correction Speed
(0 is fast): 7
The Speed control determines how rapidly pitch
correction is applied to the incoming sound. Values range
from 0 to 25. (The default setting is 7). A value of zero will
cause instantaneous changes from one note to another
and will completely suppress a vibrato and any purposeful
expressive pitch variations (note that any related volume
changes will remain). This will result in what has become
known as the “Cher effect.”
Values from 6 to 10 are typical for vocals. Higher values
allow more vibrato and other interpretative pitch gestures,
but will slow down the rate at which pitch corrections are
made.
Although the above suggestions can be used as starting
points, finding the correct Speed setting for a particular
performance is largely a matter of trial-and-error and
depends on such attributes as song tempo, note duration
and vocal style, among others.
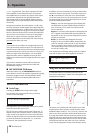
Correction Meter
ª
This meter indicates, in real time, the amount of pitch
correction being applied to change the input pitch to the
target pitch. The green LEDs indicate that the input is flat
and that positive correction is being applied. Conversely,
the yellow LEDs indicate that the input is sharp and that
negative correction is required.
Auto-Tune ON Button
ª
When this button is lit, the AUTO-TUNE module is active.
When it is not lit, the module is bypassed. Pressing the
button toggles its state. The Auto-Tune On/Off function
can also be controlled by MIDI and/or by a footswitch.
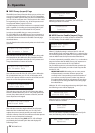
COMPRESSOR/GATE MODULE
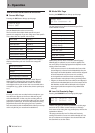
Compressor Page
ª
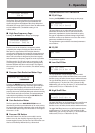
Pressing the COMP button brings up this page:
This page allows you to set the main compressor
parameters. Use the cursor buttons to move from field to
field and the Data Knob to set each parameter. For ease
in setting the threshold, this page includes a display of
the incoming signal level and a graphic indication of the
currently selected threshold. The threshold must be set
below the signal peaks for any compression to occur.
Pressing the COMP button again while the Compressor
Page is displayed will display the Gain Reduction Meter
Page (see below). Continually pressing the COMP button
will alternate between the two pages.
The ranges of the parameters are as follows:
Threshold: –36 dB - 0 dB (Default: –10 dB)
Ratio: 1.0:1 - 99:1
Makeup Gain: 0 dB - 36 dB (Default: 10 dB)
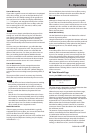
Compressor Attack Page
ª
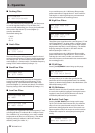
Pressing the ATK button brings up this page:
Compressor Attack
40ms
The Attack Time control adjusts the speed with which
the compressor responds to peaks in the input signal.
The range of the control is from 1 milliseconds to 200
milliseconds. (The default setting is 7.)
NOTE
While using the compressor and the de-esser
simultaneously, be sure that the attack time of the
compressor is long enough not to interact with the de-
esser.
Compressor Release Page
ª
Pressing the REL button brings up this page:
Compressor Release
200 ms
The Release Time control sets the time it takes for the
compressor’s gain to return to normal after the input
level drops below the threshold. The range of the control
is from 1 milliseconds to 200 milliseconds. (The default
setting is 120 milliseconds.)
5 – Operation