


TASCAM TA-1VP 27
5 – Operation
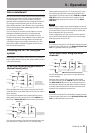
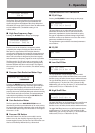
Source Mic Low Cut
If you select a specific source mic and that mic is equipped
with a low-cut filter, you can use the Data Knob to turn
the filter ON or OFF (default setting). (If the specific mic
does not have a low-cut filter, the display will default to
“
---
.”) All generic mic categories include a low cut filter.
If the source mic does include a low-cut filter, select the
low-cut setting (ON or OFF) that was (or will be) used
when capturing your audio.
NOTE
It is important to keep in mind that the purpose of this
setting is to “undo” the effect of any low-cut filter that
was used to capture your audio. If you play around with
this setting, you may initially think that it is working
“backwards.” That is, changing the menu selection from
OFF to ON will actually cause a bass boost in the monitored
audio.
However, once you think about it, you will realize that
this is the way it’s supposed to work. The purpose of the
controls in the Source Mic section is to neutralize the
effects of the source mic. So, when you select a low-cut
filter, you’re telling the Microphone Modeler that the
source mic recorded the audio with bass attenuation and,
therefore, the model must now boost the bass an equal
amount to remove the source mic’s sonic coloration.
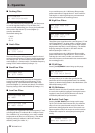
Source Mic Proximity
Use the Data Knob to set the average distance that
separated the mic and the signal source during the
recording of the audio. Or select OFF (default setting) to
preserve the source recording’s actual proximity effect (if
any).
The purpose of this control is to remove any Proximity
Effect that may have been introduced by the source mic.
NOTE
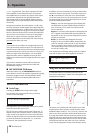
Proximity Effect is a boost in bass frequencies resulting
•
from placing a directional mic in close proximity to
a signal source. The amount of the effect is inversely
proportional to the distance from the mic to the source
(i.e., the smaller the distance, the greater the bass
boost).
Like the Low-Cut control described above, the Source
•
Mic Proximity control may initially seem to be working
backwards (i.e., setting a shorter distance will result in
an audible bass attenuation). Refer to the explanation
up in the Source Low-Cut section to understand why
this is actually how it is supposed to work.
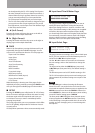
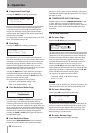
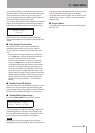
Model Mic Low Cut
If the mic type you select as the Model Mic is typically
equipped with a low-cut filter, you can use the Data Knob
to turn the filter ON or OFF (default setting).
(If the selected mic type does not have a low-cut filter (and
actually, only the Telephone is lacking one), the display
will default to “---.”)
If the modeled mic does include a low-cut filter, turning
the low-cut ON will reproduce the same effect that the
filter would have on the actual modeled mic.
NOTE
Although it’s always best to let your ears be your guide,
if your audio was recorded with the source mic’s low-cut
filter turned on, in most cases it will be best to turn on the
modeled mic’s low-cut filter as well. (After all, there was
presumably some reason that someone chose to use that
filter in the first place.)
Model Mic Proximity
Use the Data Knob to select a mic distance for a desired
amount of proximity effect.
Using the Data Knob to set a particular distance will result
in the amount of proximity effect that would be produced
by the actual modeled mic when placed at that distance
from the signal source. (The default setting is off.)
NOTE
A secondary effect of mic-to-source distance is the
extent to which environmental ambience is picked up
by a mic. For example, as a mic is moved away from the
source, the proximity effect decreases, but the amount
of “room tone” increases (assuming that you are not in
an anechoic chamber). The TA-1VP does not model this
effect. However, judicious use of the Proximity control
in combination with some appropriately programmed
reverb will allow you to create the same effect, with the
additional bonus of being able to control the exact nature
of the room tone.
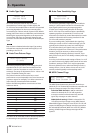
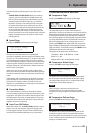
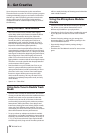
Tube Warmth Page
ª
Pressing the TUBE button brings up this page:
Tube Warmth Amount:
10.0.
The Tube section is designed to model the distortion that
is typical of a high-quality tube pre-amp.
When tube pre-amps are operated in their linear range,
there is virtually no signal distortion and their audio
qualities are essentially identical to solid state pre-amps.
However, it commonly occurs that transients exceed the
linear voltage range, resulting in distortion. The distortion
characteristics of a vacuum tube pre-amp is vastly
different than that of solid state amplifiers and is often
described as adding a certain “warmth” to a sound (in
contrast to what is often described as the “brittleness” of
the solid state sound).
The amount of tube saturation effect applied to your
audio is controlled by the Tube Warmth Amount control
in combination with the Input Level control.
The Warmth Amount control determines the amplification
factor of the modeled tube pre-amp with the numeric
display indicating the amplification in dB. At .0 (default
setting), no distortion occurs, even for full amplitude