


TASCAM TA-1VP 25
If this happens to you, check to be sure that you have sent
the TA-1VP the correct file from your sequencer.
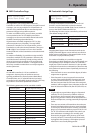
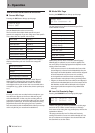
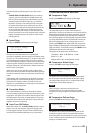
Factory Preset Restore Page
ª
<Save> to restore
## Preset Name
If you have edited or replaced any of the factory presets
and wish to restore one or more of them, use the Data
Knob to select the desired factory preset. If you scroll
to the end of the factory preset list you will see the
additional choice:
<Save> to restore
Restore all Presets
Once you have made your selection, press Save to see:
Are you sure?
<Save> to confirm
IMPORTANT NOTE: Restoring one or more factory
presets will permanently overwrite whatever presets
are currently in the corresponding preset locations. If
you want to save those presets, either copy them to
a location which will not be overwritten or save them
as a MIDI SysEx file using the MIDI Preset Dump page
described above.
If you have selected
Restore all Presets
, the
process will take about 9 seconds and you will see this
screen during the save process:
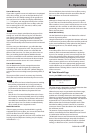
Factory Presets
restore in progress.
If you have selected a single preset, the process is virtually
instantaneous.
In either case, once the restore is completed, you will see
the following screen for a few seconds:
Factory Presets
restore completed.
and then you will be returned to the initial Factory Preset
Restore page.
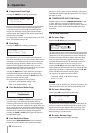
LCD Contrast Page
ª
LCD contrast
3
The LCD Contrast parameter lets you set the maximum
display contrast for your viewing angle. Use the Data
Knob to select the value that provides the greatest
contrast between the display text and the background.
(The default setting is 4.)
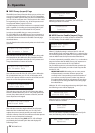
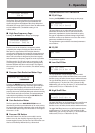
Save Preset Page
ª
When you have created a new preset or made changes to
an existing preset and want to save the changes, press the
SAVE button to access this screen:
Edit name & <Save>
Name:Preset Name
If you have been editing an existing preset, the Name field
will contain the name of that preset. If you don’t wish to
change the name (e.g., if you are editing a preset and plan
to overwrite it with the edited version), simply press SAVE
again to be taken to the next screen.
If you do wish to change the name, use the Cursor buttons
to move from character to character and the Data Knob
to select the desired letter, number or punctuation mark
for each character. When you are finished, press SAVE to
access this screen:
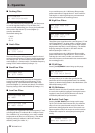
<Save> to overwrite:
## Preset Name
The Preset number and Preset name will initially be the
number and name of the original preset you were editing
(i.e., the Preset Name will be the original name of the
preset). If you want to overwrite that preset with your
newly edited version, press SAVE. Otherwise, use the
Data Knob to select another preset location and then
press SAVE. In either case you will see a brief message
confirming that your preset was saved and will then be
returned to whichever screen you were on immediately
before initiating the Save process.
NOTE
To copy an existing preset to another location, first select
the preset and press SAVE. Edit the name (if you wish)
and press SAVE again. Select the location to copy to and
press SAVE again. You may now edit your copy without
any risk of accidentally overwriting the original version.
5 – Operation