


GENERAL FUNCTIONS AND CONTROLS (Cont.)
©American Audio® - www.AmericanAudio.us - Radius 3000™ Instruction Manual Page 14
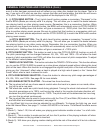
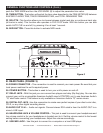
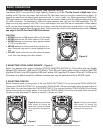
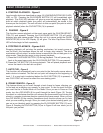
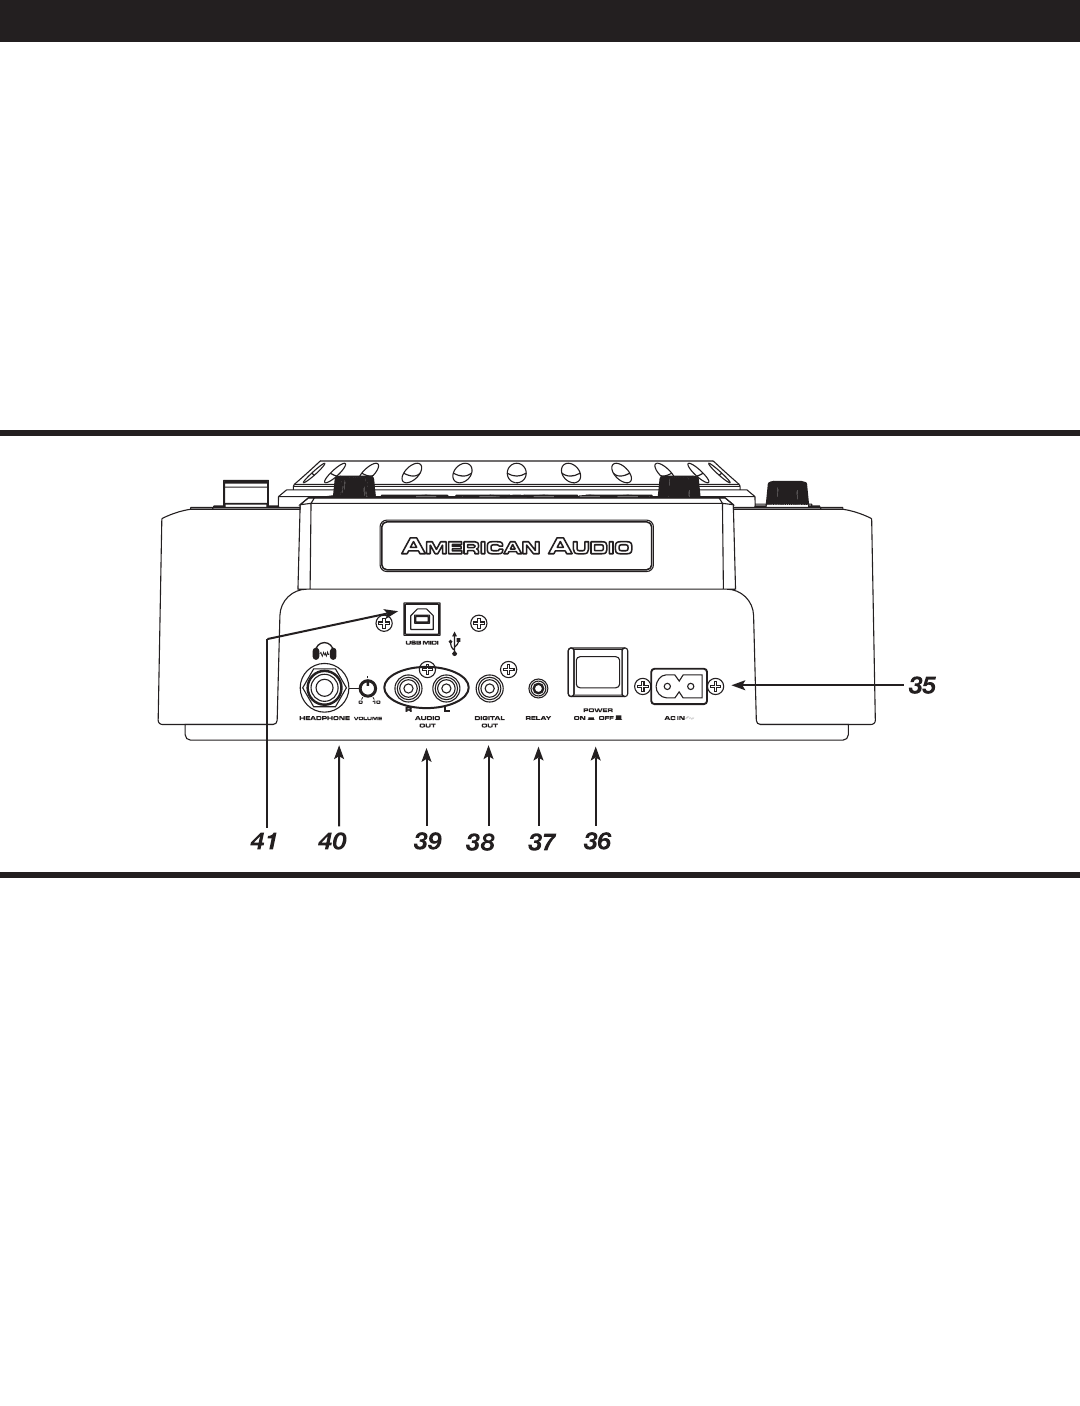
B. REAR PANEL (FIGURE 3)
35. POWER CONNECTOR - This connection is used to connect your main power. Be sure that your
local power matches the unit’s required power.
36. POWER BUTTON - This button is used to turn your unit’s power on and off.
37. RELAY JACK - With this jack you can connect two players and relay (flip flop) play. You can also
connect your unit to a compatible American Audio® mixer’s CONTROL out, to use American Audio’s
“Q” start fader control. This feature is only available on American Audio’s “Q” series mixers.
38. DIGITAL OUT JACK - Use this connection to create near perfect copies of your disc to mini disc,
CD-R, or any other digital recording device.
39. AUDIO OUT R & L - Audio out signals. Connect stereo RCA cable's from the AUDIO OUT to a
mixer's LINE input.
40. HEADPHONE JACK & VOLUME CONTROL - This jack is used to connect your headphones and
the volume control is for your headphones is located next to it. Set the volume control to the lowest
setting before connecting your headphones. Adjust the volume accordingly.
41. USB MIDI JACK - Use this jack to connect to a computer or a host USB player.
Figure 3
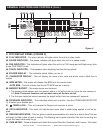
push the TIME KNOB and turn the JOG WHEEL (9) to adjust the parameter time value.
32. TIME BUTTON - The button will switch the time value described in the TIME METER (48) between
ELAPSED PLAYING TIME, TRACK REMAINING TIME, and TOTAL REMAINING TIME.
33. SGL/CTN - This function allows you to choose between single track play or continuous track play
(all tracks in order). This function also operates in FLIP-FLOP mode. With this button you can also
switch AUTO CUE on and off, by pressing it for at least 1 second.
34. MIDI BUTTON - Press this button to activate MIDI mode.