23
Tape
The Tape source is used for audio-only recorders, such as a CDR,
MiniDisc or cassette deck.
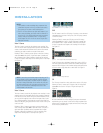
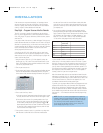
Referring to Table 2, connect your recorder to the Tape Analog
Audio inputs and outputs, and to any available digital audio input.
See Figure 23.
Figure 23 – Tape Audio Inputs and Outputs,and Digital Audio Inputs
NOTE: You will not be able to make digital audio recordings using
the AVR 144. Make sure your source is connected to any of
the AVR 144’s analog audio inputs, and connect your recorder
to either the Video 1 or Tape Analog Audio Outputs. The AVR 144
will not convert a digital audio input signal to analog.
Remember to connect the
output
jacks on your recorder to the Tape
or digital audio
input
jacks on the AVR, and the
input
jacks on your
recorder to the Tape
output
jacks on the AVR.
No video connections are made.
Step Five – Connect Video Display
Only video connections should be made between the receiver and your
video display (TV), unless your TV is the source for your television pro-
gramming (see note above).
You will need to make a video connection for each type of video used
for your sources. In addition, even if you didn’t use S-video or compos-
ite video for any of your sources, you will still need to use one of these
two video monitor connections in order to view the AVR 144’s on-
screen menus and displays.
First, determine what types of video your display is capable of handling.
Remember that component video is preferred, followed by S-video and
then composite video. Ideally, this guided you in selecting the video con-
nections for your sources.
Next, note which types of video connections you used for your source
devices. Make sure you didn’t use a better type of video connection for
a source than your video display can handle. If so, you will need to dis-
connect the source and use a video connection that’s compatible with
your display.
If you used component video for any sources, connect the Component
Video Monitor outputs on the receiver to one set of component video
inputs on your display. Make a note of how these inputs are labeled on
the display. See Figure 24.
Figure 24 – Component Video Monitor Outputs
If you used S-video for any sources, or if all of your sources used com-
ponent video, connect the S-video Monitor output on the receiver to an
S-video input on your display. Make a note of how the input is labeled.
See Figure 25.
If you used composite video for any sources, connect the composite
video Monitor output on the receiver to a composite video input on the
display. Again, make a note of how this input is labeled on the display.
See Figure 25.
Figure 25 – S-Video and Composite Video Monitor Outputs
Consult the manual for your TV to make sure you understand how to
select each video input. As you play different source devices that use
different types of video connections, you will need to remember to
select the correct video input on your video display.
Step Six – Plug in AC Power
Having made all of your wiring connections, it is now time to plug each
component’s AC power cord into a working outlet.
Before plugging the AVR 144’s AC Power Cord into an electrical outlet,
make sure that the Master Power Switch on the front panel is popped
out so that the word OFF appears on its top. Gently press the button to
turn the switch off. This will prevent the possibility of damaging the AVR
in case of a transient power surge.
Step Seven – Insert Batteries in Remote
The AVR 144 remote control uses three AAA batteries, which are
included.
To remove the battery cover located on the back of the remote, firmly
press the ridged depression and slide the cover towards the top of
the remote.
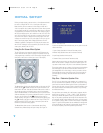
Insert the batteries as shown in the diagram, making sure to observe
the correct polarity. See Figure 26.
Figure 26 – Remote Battery Compartment
When using the remote, remember to point the lens toward the front
panel of the AVR 144. Make sure no objects, such as furniture, are
blocking the remote’s path to the receiver. Bright lights, fluorescent lights
and plasma video displays may interfere with the remote’s functioning.
The remote has a range of about 20 feet, depending on the lighting
conditions. It may be used at an angle of up to 30 degrees to either
side of the AVR.
INSTALLATION
HKP1482AVR144-om 9/7/06 3:11 PM Page 23


