ADVANCED OPERATIONS
58
You can display this unit’s operating information on a
video monitor. If you display the SET MENU and sound
field program parameter settings on a monitor, it is much
easier to see the available options and parameters than it is
by reading this information on the front panel display.
1 Turn on the video monitor connected to this
unit.
2 Press ON SCREEN repeatedly to change the
OSD mode.
The OSD mode changes in the
following order: full display, short
display, and display off.
Full display
Always shows the sound field program parameter settings
as well as the contents of the front panel display.
Short display
Briefly shows the contents of the front panel display at the
bottom of the screen each time you operate this unit.
Display off
Only operations performed using ON SCREEN are
displayed. The OSD is displayed when using SET MENU
even if the OSD mode is set to “Display off”.
• The OSD signal is not output to the REC OUT jack, and will
not be recorded.
• You can set the OSD to turn on (gray background) or off when a
video source is not being reproduced (or the source component
is turned off) by using DISPLAY SET (see page 70).
• When only the component video signals are input, the OSD is
not displayed if the OSD mode is set to “Short display”. To
display the OSD with component video signal input, set the
OSD mode to “Full display” while GRAY BACK in DISPLAY
SET (see page 70) is set to AUTO.
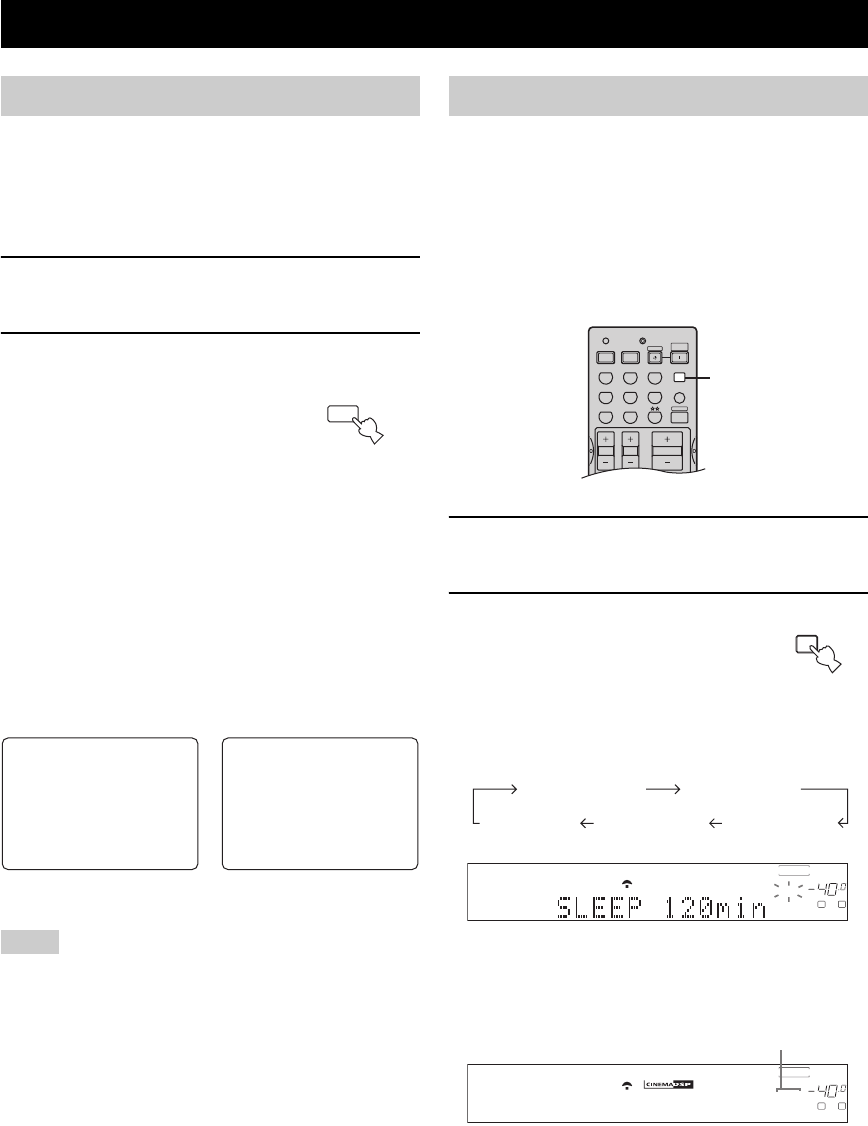
Use this feature to automatically set this unit in the
standby mode after a certain amount of time. The sleep
timer is useful when you are going to sleep while this unit
is playing or recording a source. The sleep timer also
automatically turns off any external components
connected to AC OUTLET(S).
■ Setting the sleep timer
1 Select a source and start playback on the
source component.
2 Press SLEEP repeatedly to set
the amount of time.
Each time you press SLEEP, the front
panel display changes as shown
below. The SLEEP indicator flashes
while switching the amount of time
for the sleep timer.
The SLEEP indicator lights up in the front panel
display, and the display returns to the selected sound
field program.
ADVANCED OPERATIONS
Selecting the OSD mode
Notes
ON SCREEN
DISPLAY
P04
MOVIE THEATER
.General
DSPLEVEL;;;;0dB
P.INIT.DLY;;15ms
P.ROOMSIZE;;1.0
S.INIT.DLY;;20ms
S.ROOMSIZE;;1.0
P04MOVIETHEATER
General
Full display Short display
Using the sleep timer
TRANSMITCODE SET
STANDBY
SYSTEM
POWER
CD MD/CD-R
TUNER
V-AU XDVD
AMP
POWERPOWER
VOLUME
TV MUTE TV INPUT
TV VOL TV CH
AVTV
VCR 1 DVR/VCR2
DTV/CBL
MULTI CH IN
SLEEP
2
SLEEP
SLEEP 90min
SLEEP 60minSLEEP 30minSLEEP OFF
SLEEP 120min
CD PHONOTUNER
MD/CD-R
DVD
DTV/CBL
V-AUX
VCR1
DVR/VCR2
TUNED
VOLUME
SLEEP
A
SP
dB
HiFi DSP
LR
CD PHONOTUNER
MD/CD-R
DVD
DTV/CBL
V-AUX
VCR1
DVR/VCR2
TUNED
VOLUME
SLEEP
A
SP
dB
LR
TV Sports
SLEEP indicator
01EN_HTR-5860_U.book Page 58 Thursday, December 30, 2004 12:27 PM


