14
CONNECTIONS
Connecting TV and audio/video
components
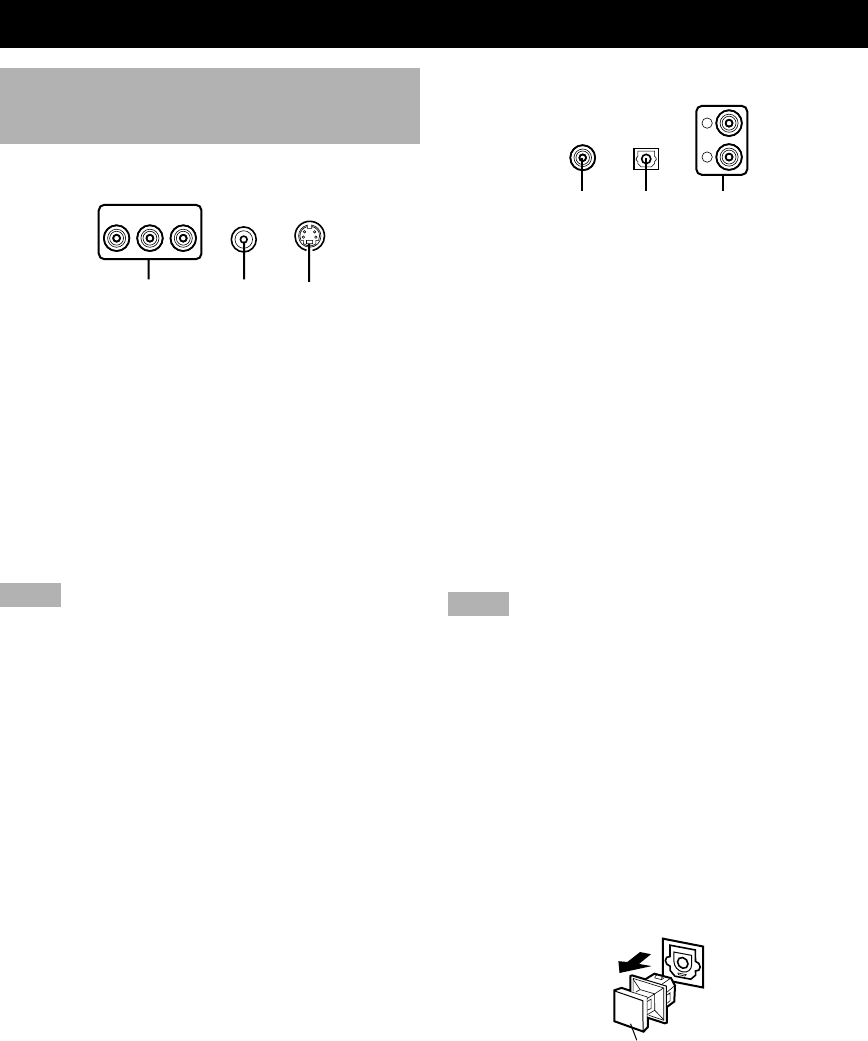
■ Types of video jacks
1 COMPONENT VIDEO jacks (U.S.A., Canada,
Australia and General models)
Transmit color difference (PB/CB, PR/CR) and luminance
separately and provide the best quality picture.
2 VIDEO jack
Conventional composite video signal.
3 S VIDEO jack
Transmits color and luminance separately and achieves
high-quality color reproduction.
Notes
• Each type of video jack works independently. Signals input
through the composite video and S video jacks are only output
through the corresponding composite video and S video jacks.
• When you connect this unit to a video monitor, a video
component and a recording component, connect the same types
of jack, for example, the video jack on this unit to the video
jack on the video component.
• The description of the component video jacks may differ
depending on the component (e.g. Y, CB, CR/Y, PB, PR/Y, B-Y,
R-Y etc.). When using these jacks, refer also to the operation
instructions for the component being connected.
• Do not connect this unit to a video monitor through a video
cassette recorder. If you do so, the picture may not be played
back properly due to the copyright protection technology
incorporated in this unit.
• When progressive output (p.38) is selected in the DVD mode,
video signals are only output from the component video jacks.
321
PR PB Y
■ Types of audio jacks
1 COAXIAL jack
Connects a coaxial pin cable and provides the better
quality sound than analog audio jacks.
2 OPTICAL jack
Connects an optical fiber cable and provides the better
quality sound than analog audio jacks.
3 Analog audio jacks
Connect an audio pin cable.
y
• 1 and 2 are digital jacks.
• You can use the digital jacks to input PCM, Dolby Digital and
DTS bitstreams.
• All digital input jacks are acceptable for 96-kHz sampling
digital signals.
Notes
• Digital output jack and analog OUT (Rec) jacks are
independent. Only digital signals are output from digital output
jack and analog signals from OUT (Rec) jacks.
• The OPTICAL jacks on this unit conform to the EIA standard.
If you use an optical cable that does not conform to this
standard, this unit may not function properly.
• Once you have connected a recording component to this unit,
keep its power turned on while using this unit. If the power is
off, this unit may distort the sound from other components.
Anti-dust cap
Remove the cap covering the OPTICAL jacks when
connecting an optical cable. Safely store the cap and
always re-insert it in the terminal when the terminal is not
in use. (This cap prevents the entrance of dust.)
1 23
L
R
Anti-dust cap
104_S100_10-20_EN 02.5.13, 1:27 PM14


