Wolf Cinema Owner's Manual
3-27
COLOR: This slidebar adjusts the Color Temp Adjust level, i.e. the amount of color in a video
image. Lower settings produce less saturated colors — for example a setting of “0” produces a
black and white image. If the color level is too high, colors will be overpowering and unrealistic.
TINT: This slidebar adjusts the red/green color hue for true color reproduction of video signals
connected to INPUT 3 or 4 of the projector. For best results, adjust tint while displaying an
external color bars test pattern — otherwise, it is recommended that tint remain at its default
setting.
CHROMA LUMA DELAY: This control affects any incoming composite or S-video signal, delaying
the luma signal (intensity) in relation to the chroma (color). In the image, increasing the luma
delay will move luma (seen as a shadow where colors overlap) to the right slightly, with colors
remaining in place. Decreasing this delay will move the shadow slightly to the left. If necessary
for your current source, adjust so that no shadows occur with adjacent colors.
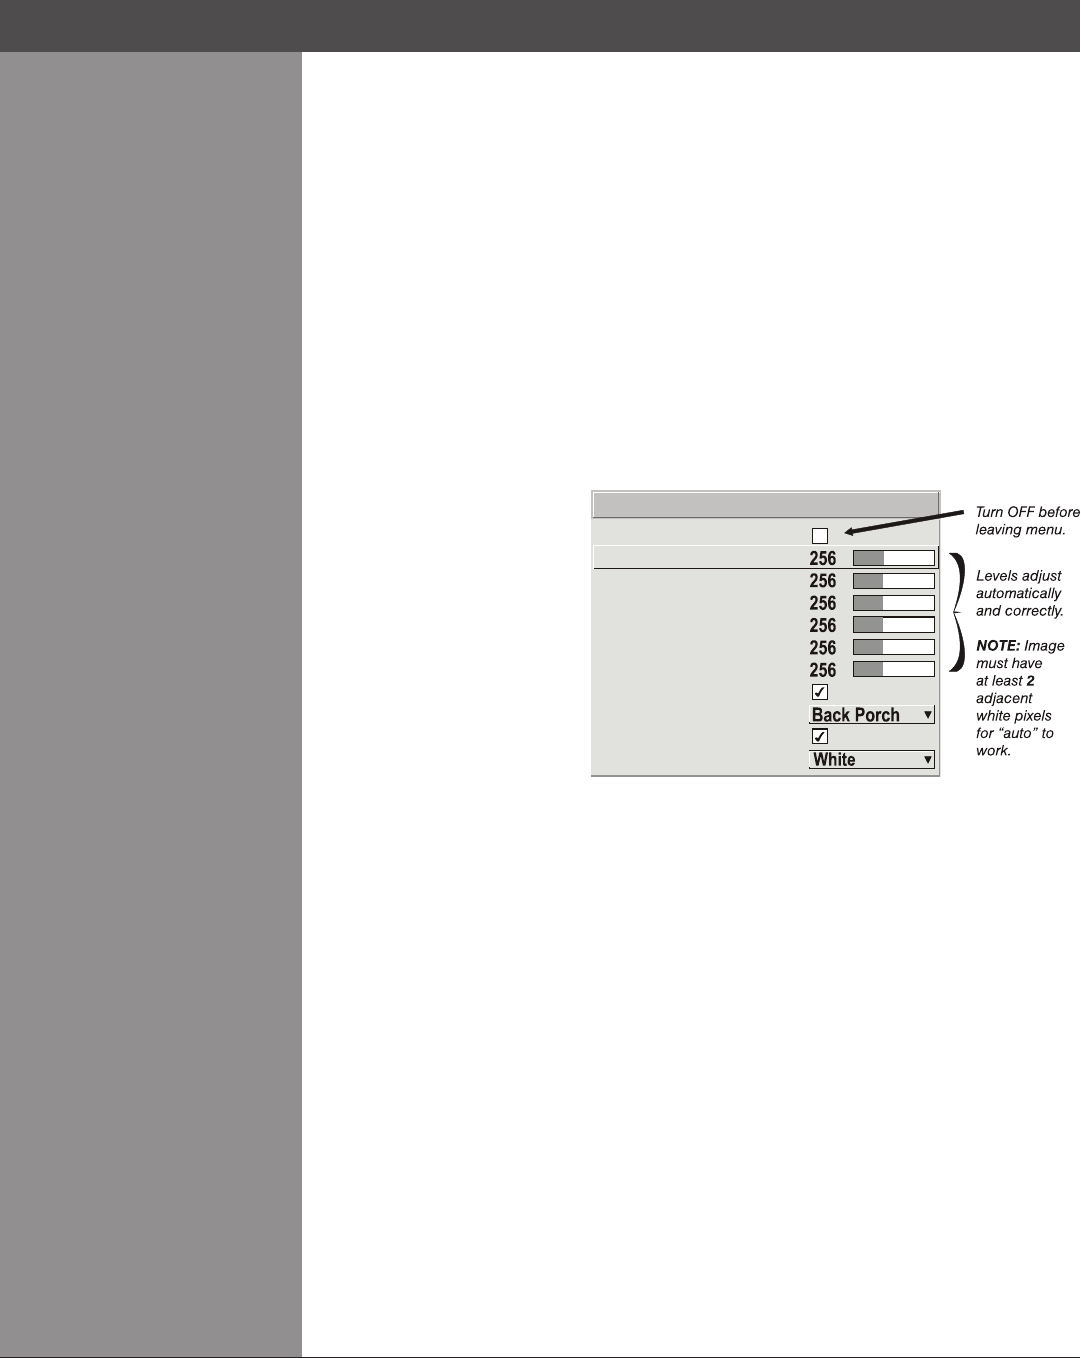
Input Levels — SUBMENU
NOTES: 1) Because the projector automatically optimizes input levels for all but the most unusual
of sources, it is recommended
that only experienced users use
the Input Levels submenu. 2)
Before beginning, check that
overall contrast and brightness
settings are near 50 and that
color temperature is properly
set up on an internal grayscale
test pattern. 3) There must be at
least 2 consecutive white pixels
present in the image for proper
“Auto Input Level” function.
Leave this control off after use.
Good RGB or input levels — that is, the drives and black levels for each of the three colors,
red, green and blue — ensure that images from analog sources other than decoded video
have maximum contrast without crushing black or white. By default (and in an “Auto Setup”),
the projector automatically determines the best input levels by monitoring image content and
adjusting the controls appropriately — further adjustment is typically not required to obtain proper
blacks or whites.
NOTE: This automatic adjustment requires at least 6-12 consecutive white pixels in the image.
Without these pixels, input levels may produce skewed colors, particularly in nonvideo images.
However, for a very unusual source exhibiting one or more overly high blacklevels (typically
caused by a noisy source causing blacklevel spikes), an experienced user may prefer to use
the Input Levels menu (shown above). These adjustments, which together serve as a calibration
process compensating for differences in sources and cabling, enable an experienced user to
perfect the source image input levels and eliminate the “overshoot” and “undershoot”. Note that
Input Levels are of limited use with digital signals, but do offer some ability to tweak poorly
mastered source materials.
NOTES: 1) Input levels apply for the current source only, but for any color temperature used. 2)
Assuming that color temperature has been set up based on the internal test patterns, you can
then set up input levels for a given source so that it matches the color temperature of the internal
test patterns.
Red (Pr) Black Level
Green (Y) Black Level
Green (Y) White Level
Blue (Pb) Black Level
Blue (Pb) White Level
Auto Color Enable
Clamp Location
Peak Detector
Auto Input Level
Red (Pr) White Level
1.
2.
3.
4.
5.
6.
7.
8.
9.
0.
Color Enable
Input Levels
Section3►Operation
