


50
RQT6894
Reference
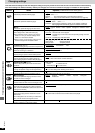
Troubleshooting guide
Before requesting service, make the below checks. If you are in doubt about some of the check points, or if the remedies indicated in the chart do not solve
the problem, consult your dealer for instructions.
Reference pages are shown as black circled numbers 7.
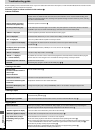
Common Problems
No sound.
Sounds unfixed, reversed or
come from one speaker only.
Humming heard during play.
“ERROR” is displayed.
“U70” is displayed.
“F61” is displayed.
“––:––” appears on the display.
The display starts up even after
the unit is turned off.
“DVD U11” displayed.
“DVD H ∑∑” displayed.
(∑∑ will be numbers.)
Initial settings menu cannot be
accessed.
Turn the volume up.
Switch off the unit, determine and correct the cause, then switch the unit on. Causes include shorting of the
positive and negative speaker wires, straining of the speakers through excessive volume or power, and using
the unit in a hot environment.
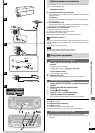
Check the speaker connections. 7
An AC mains lead or fluorescent light is near the cables. Keep other appliances and leads away from this unit’s cables.
If possible in your area, turn the AC mains lead’s plug or connector over to reverse the lead’s polarity.
Incorrect operation performed. Read the instructions and try again.
Connect the flat cables firmly. If “U70” remains on the display, contact the dealer.
There is a problem with the amplifier. Consult your dealer.
You plugged the AC mains lead in for the first time or there was a power failure recently.
Set the time. <
The demonstration feature (–DEMO) is on. Turn it off if it is not required. ;
The disc is dirty. Wipe it with a soft cloth. 5
A problem has occurred. Turn the unit off and unplug the AC mains lead. Wait a moment and then plug the
lead in and turn on the unit again. If the unit is still not working correctly, consult your dealer.
Select “DVD” as the source.
Cancel all group, program, random and ALL DISC play. C–E
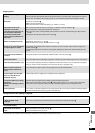
Listening to the radio
Use an outdoor antenna. ]
Turn the TV off or separate it from the unit.
Separate the antenna from other cables and leads.
Change the frequency step. Hold [TUNER/BAND] down for 10 seconds to change the step to 9 kHz.
Clean the heads. 3
Check the Dolby NR setting. M
If the erasure prevention tabs have been removed, cover the holes with adhesive tape. S
Listening to tapes
Poor quality sound.
Recording is not possible.
Noise is heard.
The stereo indicator flickers or
doesn’t light.
Sound is distorted.
A beat sound is heard.
A low hum is heard during AM
broadcasts.
The correct AM frequency can’t
be tuned in.
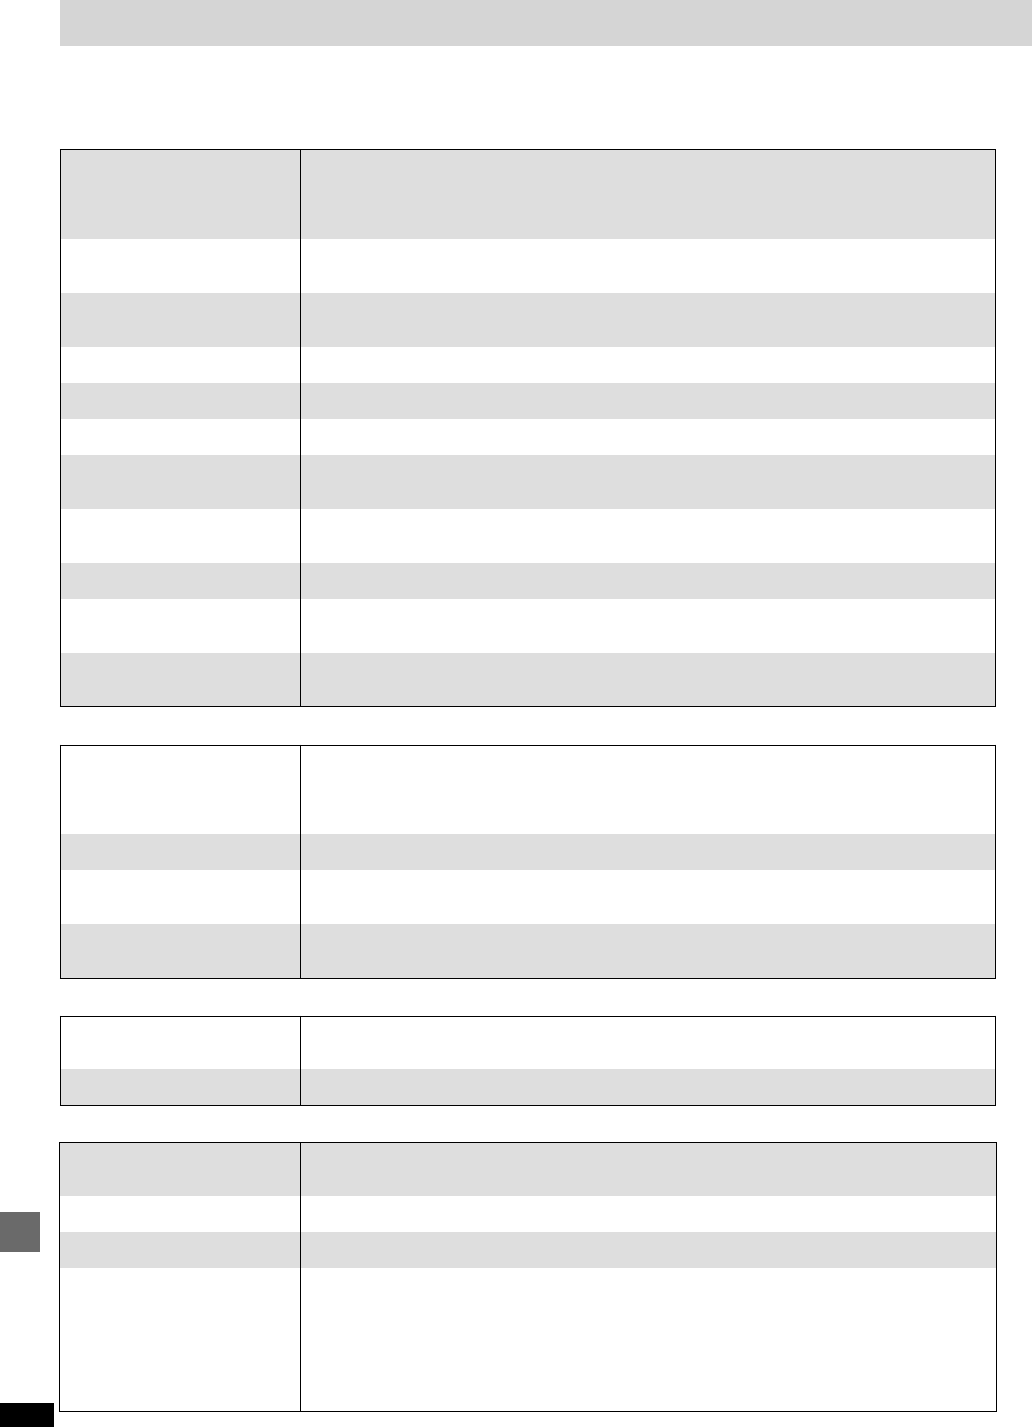
Enjoying discs
Sound is distorted.
“NO DISC” appears on display
“NO PLAY” appears on display
Play doesn’t start (or stops
immediately) when you press
[1] (play).
When you are playing a DVD recorded with Dolby Digital, you can reduce distortion by compressing the
dynamic range. See Audio–Dynamic Range Compression in the SETUP menus. ^
There is no disc on the selected tray or the disc is set incorrectly.
The disc does not correspond to the unit and cannot be played. 5
≥Condensation has formed: Wait 1 to 2 hours for it to evaporate.
≥This unit cannot play discs other than the ones listed in these operating instructions. 5
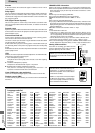
≥You can only play DVD-Video if their region number is the same or includes the same region number as the
unit or if the DVD-Video is marked “ALL”. Confirm the region number for the unit on the rear panel. 1
≥The disc may be dirty and may require cleaning. 5
≥Ensure that the disc is installed with the label of the side to be played facing upwards. >
≥Check that the DVD-RAM has something recorded on it.