


User's Manual
26
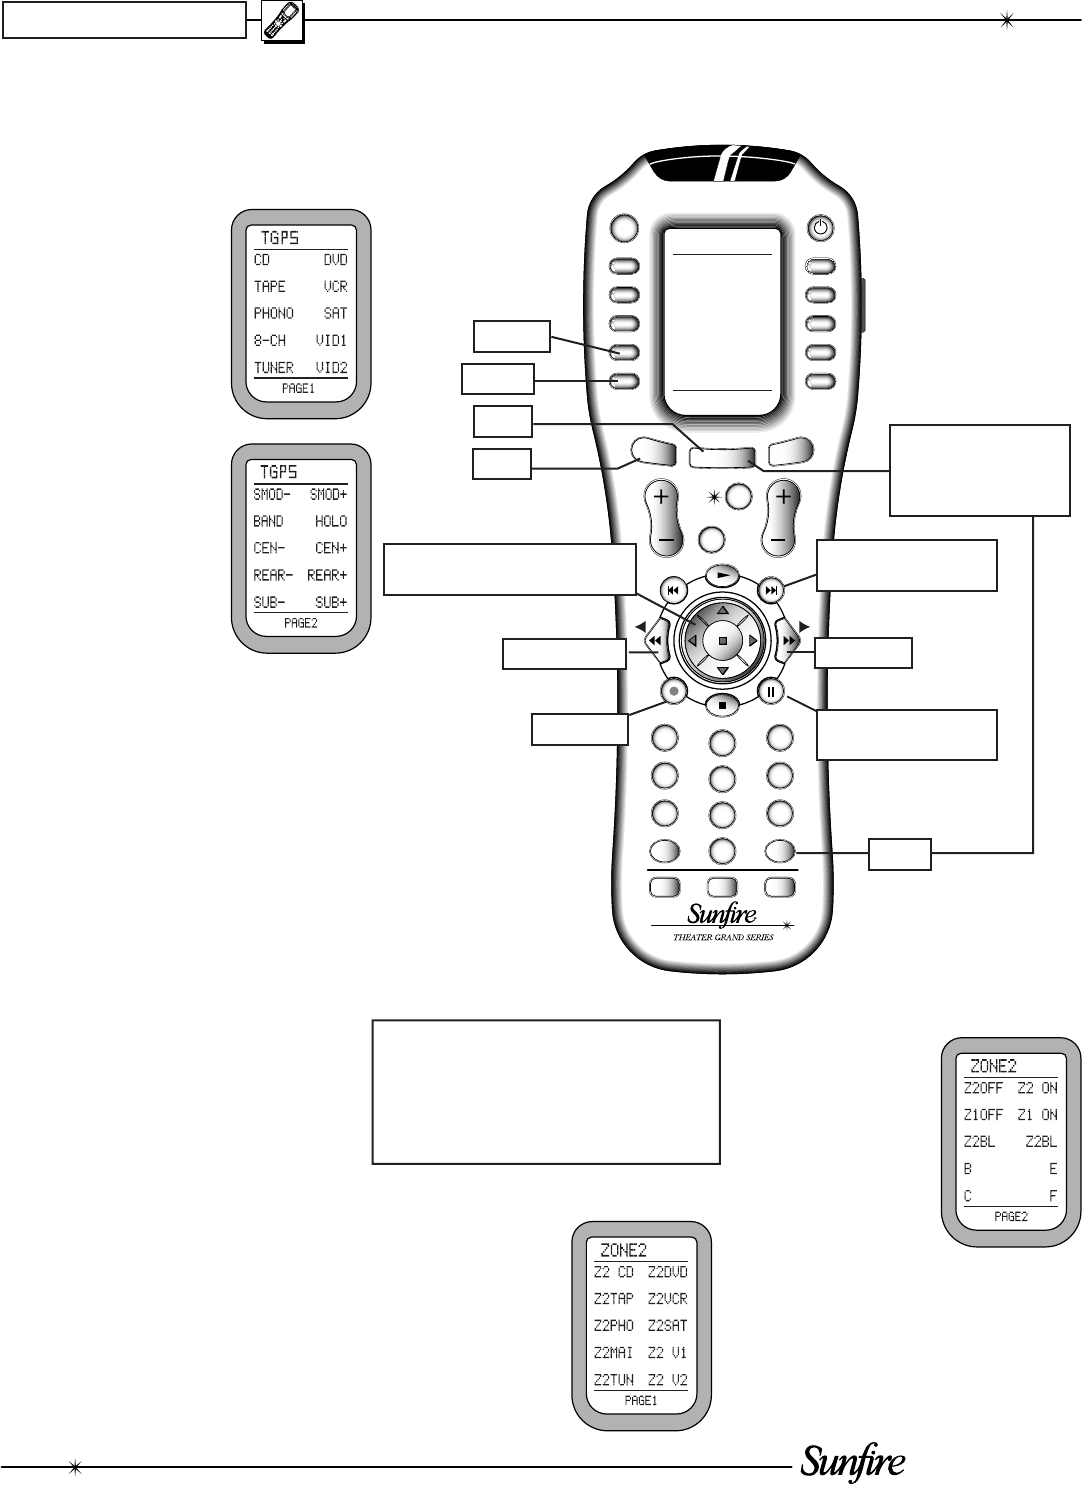
GUIDE MENU
MODEMODE
EXIT INFO
SYSTEM
+10
POWER
31
64
97
ENTDIS
M3M1
2
5
8
0
M2
PAG E
FAV
MAIN
OFF
VOL CH
MUTE
PREV
CH
CD
AUDIO
MAIN
TAPE
AUX
ZONE2
TGP5
DVD
VCR
SAT
TV
CABLE
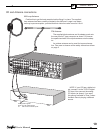
RC-500
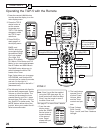
CHAPTER 3
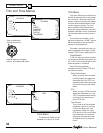
1. Press the remote's MAIN button
to make sure the display is on the
main display menu.
2. Press the TGP-5
device button to
set the remote
to operate your
TGP-5. The display
chang es to show
the TGP-5 input
se lec tions:
3. Press PAGE to
reach page 2 of
the display menu.
SMOD- and
SMOD+ allow you
to navigate through
the assorted Dolby
Pro Logic modes
(Pro Logic, PLII
Music, PLIIx Music,
PLII Movie, PLIIx Movie and PLII
Matrix) or you can toggle between
Neo:6 Cinema and Neo:6 Music.
The BAND button allows you to
switch between the AM or FM
bands of the Tuner.
Page 2 also allows you to engage
HO LO GRAM, and to adjust the
volume trims for center, sur rounds,
and sub. On the right is '+'
(in crease level) and on the left is '-'
(de crease level).
4. The fol low ing but tons with fi xed la-
bels are also pro grammed: Pow er,
Vol ume up, down and Mute. The
number pad accesses the tuner
presets directly, and CH+/- steps
through them. DIS is the +10 func-
tion, and ENT is station enter. The
MODE buttons either side of the
joystick, allow you to select the dif-
ferent surround modes.
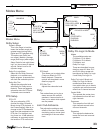
ZONE 2
Note: Zone 2 must fi rst be enabled
using the OSD (see page 36), or
these controls will have no effect.
Zone 2 can be turned on even if
the Main Zone is off.
See page 47 for more Zone 2 details.
1. From the main
display menu,
press the ZONE2
device button to
access features
of the second
zone. Page 1
shows the input
selections.
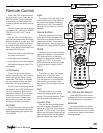
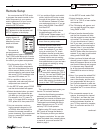
Operating the TGP-5 with the Remote
MAIN
PAGE
TGP-5
ZONE 2
Previous Mode
Next Mode
Full-page On Screen
Display (OSD)
Momentary status and
information display
OSD Exit
Use the Joystick to navigate
through the OSD (when active)
Hold down MAIN and
ENT for a few seconds
to enter the SETUP
mode. See next page.
ENT
2. The hard buttons
operate Zone 2,
such as Power,
Volume, Mute,
and the Tuner
controls and pre-
sets.
3. Page 2 shows
Zone 2 on/off,
Zone 1 on/off, and Zone 2 balance
left/right.