


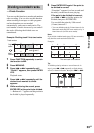


Tape – Recording
41
GB
To record CD or MD by specifying
track order
You can record only your favorite CD or MD
tracks using Program Play. Between steps 2 and
3, perform steps 1 to 5 of “Creating your own
program” (page 8) or “Programming MD
tracks” (page 12).
Note
Recording automatically stops if the tape becomes full
during recording.
Tip
If you select both sides recording and the tape reaches
the end of the front side part-way through a track, the
entire track is recorded again from the beginning of the
reverse side.
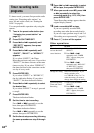
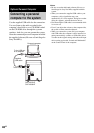
You can record just the portions you like from a
CD or an MD on a tape. You can also record a
radio program.
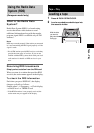
Use buttons on the unit for the operation.
1 Load a recordable tape.
2 Press FUNCTION repeatedly to select
the desired source to record.
• CD: To record from this system’s CD
player.
• MD: To record from this system’s MD
deck.
• TUNER: To record from this system’s
tuner.
• OPTICAL IN: To record from the
optional component connected to the
DIGITAL OPTICAL IN jack.
• ANALOG IN: To record from the
optional component connected to the
ANALOG IN jacks.
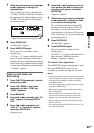
3 Press z TAPE.
The N indicator lights up and the tape
deck stands by for recording.
4 Press DIRECTION repeatedly until g
appears to record on one side or h (or
j) to record on both sides.
5 Press TAPE nN repeatedly to select
recording side.
If you select both sides recording or front
side recording, press TAPE nN to light
up the N indicator. If you record on the
reverse side, press TAPE nN again to
light up the n indicator.
6 Press X TAPE, then start playing the
desired source to record.
Recording starts.
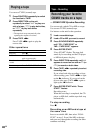
Other operations
Recording on a tape
manually
— Manual Recording
To Do this
Stop recording Press x.
Pause recording Press X TAPE.