


1-11
DFS-700/700P
Chapter 2 Location and Function of
Parts and Controls
2-10
Chapter 2 Location and Function of Parts and Controls
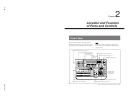
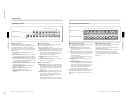
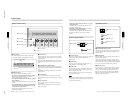
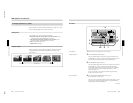
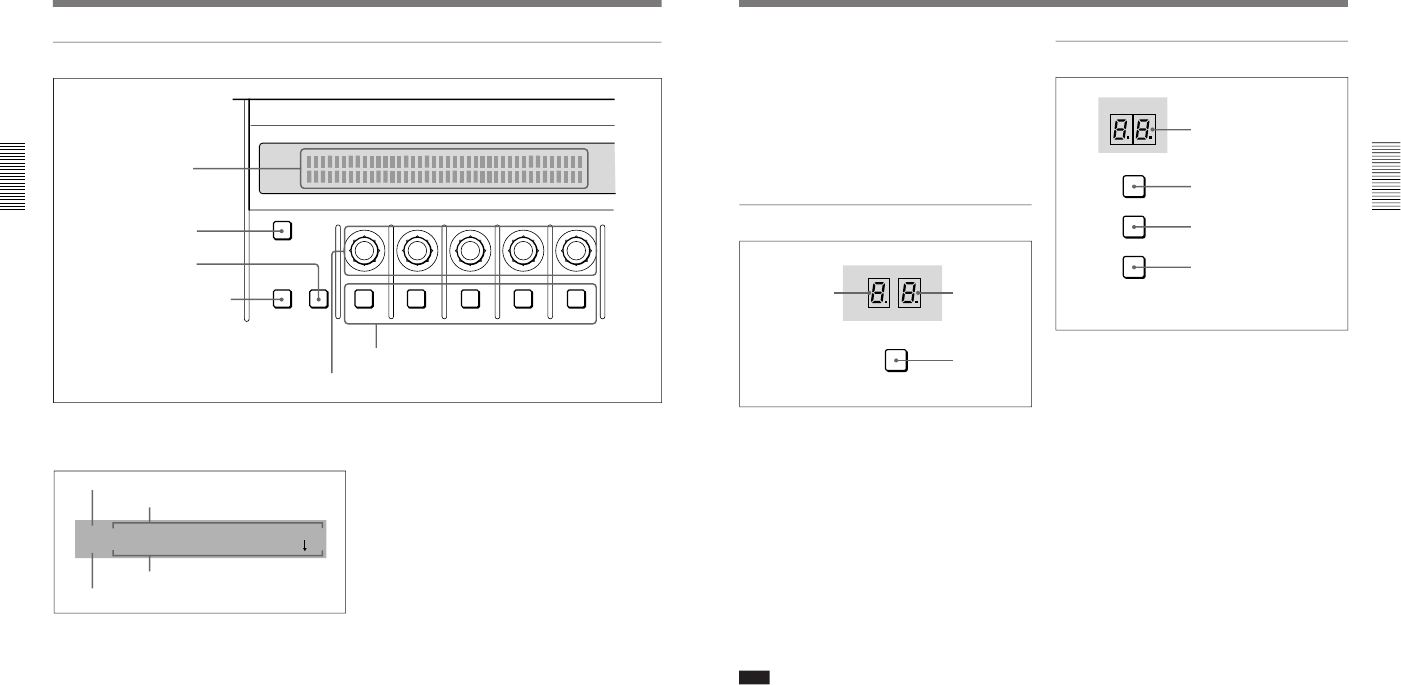
8 Effect control section
INITIAL
PATTERN
ADJ
PAGE
F1 F2 F3 F4 F5
2 INITIAL button
3 PAGE button
5 Control knobs
6 F1 to F5 buttons
1 Menu display
4 PATTERN ADJ button
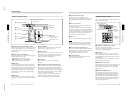
1 Menu display
This shows system and effect settings. Watch this
display while checking and adjusting the settings.
2 INITIAL button
This returns settings to their factory defaults.
•To return a selected setting to its factory default
Hold down the INITIAL button, and press the
corresponding F button (F1 to F5).
•To return all settings on the selected page to their
factory defaults
Hold down the INITIAL button, and press the PAGE
button.
•To return all settings on all pages of the currently
selected menu to their factory defaults (not valid
in setup menu or matte menu)
Hold down the INITIAL button, and press the
PATTERN ADJ button.
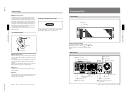
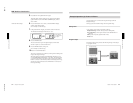
INIT SETUP--SNAP--USRPGM--KEYPAD EXEC
6/8 OFF OFF OFF OFF
Menu name or pattern number
Settings
Menu page
Setting values (ON/OFF or parameter values)
3 PAGE button
Press this button to move to the next page of a menu.
Pressing this button on the last page of a menu returns
to the first page.
Holding down the SHIFT button in the menu control
section and pressing this button moves to the previous
menu.
4 PATTERN ADJ (adjust) button
Press this button to adjust the settings for the pattern
number displayed in the PATTERN NUMBER display
window.
This displays the settings for the pattern in the effect
control section.
5 Control knobs
These correspond to the five settings shown in the
menu display. Turn the corresponding knob to adjust a
setting.
6 F1 to F5 buttons
These correspond to the five settings shown in the
menu display.
Press the corresponding button to select a setting, or
toggle it on and off.
Control Panel
Chapter 2 Location and Function of
Parts and Controls
Chapter 2 Location and Function of Parts and Controls
2-11
•Changing a setting value preceded by “+” (setup
menu operations)
Hold down the corresponding F button (F1 to F5),
and turn the control knob.
•Changing a setting value followed by “+” (user
program effect setting operations)
Hold down the corresponding F button (F1 to F5),
and enter the numeric value using the numeric
keypad.
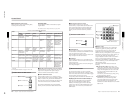
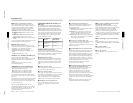
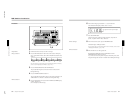
9 User program section
1 STATUS display
When a user program effect is selected, this shows the
number of key frames comprising the effect.
(Maximum 8)
2 EDIT display
In the user program edit mode, this shows the key
frame number to which editing applies.
3 EDIT button
Press this button to edit a user program effect. When
you press this button, it lights, and the system enters
the user program edit mode.
Press the button once more to turn it off and exit the
user program edit mode.
Note
If you press the EDIT button when an effect other than
a user program effect is selected, this does not switch
to user program edit mode.
EDIT
USER
STATUS
EDIT
PGM
1 STATUS display
2 EDIT display
3 EDIT button
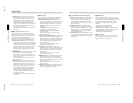
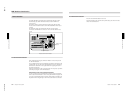
q; Snapshot section
1 SNAP SHOT number display
This shows a snapshot number (0 to 99). While you are
entering a number, the dot at the lower right of each
numeral lights.
2 LEARN button
Press this button to save the control panel settings as a
snapshot (learn function).
When you press this button, it lights, and the system
enters learn mode. Enter the snapshot number (0 to 99)
from the numeric keypad, and press the ENTER button
to save the control panel settings in the snapshot.
3 RECALL button
Press this button to recall settings saved as a snapshot.
When you press this button, it lights, and the system
enters recall mode. Enter the snapshot number (0 to
99) from the numeric keypad, and press the ENTER
button to recreate the control panel settings from the
snapshot on the control panel.
LEARN
RECALL
HOLD
INPUT
SNAP SHOT
1 SNAP SHOT number display
2 LEARN button
3 RECALL button
4 HOLD INPUT button