44
En/Fr
5 Recording Features
5 Fonctions d’enregistrement
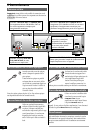
Recording a fade out
• Press FADER during recording to fade out.
After recording the fade out, the recorder goes into record-
pause mode. This happens in either normal or synchro
record mode.
• You can also just press 7 if you don’t need a fade out.
If you record a fade out during all-track sync mode, the
synchro mode is canceled after the fade out (see pages 66-69
for more on synchro recording).
Automatically numbering tracks
You can record from any source, letting the recorder number the
tracks automatically. From a digital source (CD, MD, DAT, or DCC),
the recorder will start new tracks as they change on the source
material. When recording other sources, the recorder will start a
new track if it detects more than 2 seconds of silence before the next
sound on the source. You can adjust the level that the recorder
regards as “silence” (see Setting the silence threshold below).
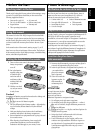
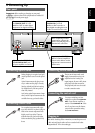
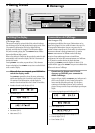
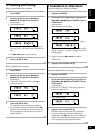
1 Press MENU/DELETE.
2 Turn the jog dial (4 and ¢ on the
remote) until AUTO TRACK appears in the
display, then press to ENTER.
The display shows either ON or OFF. ON is the default.
3 Turn the jog dial (4 and ¢ on the
remote) to switch AUTO TRACK ON or OFF.
4 Press the jog dial to ENTER.
To check that tracks will start at the correct points on the
recording, see Monitoring a source on page 65.
Enregistrement d’un fondu à la sortie
• Appuyez sur FADER pendant
l’enregistrement pour effectuer un fondu à
la sortie.
Après le fondu à la sortie, l’enregistreur passe en mode de
pause d’enregistrement. Ceci se produit en mode
d’enregistrement normal ou synchronisé.
• Si vous ne souhaitez pas un fondu à la sortie, vous pouvez
aussi appuyer simplement sur 7.
Si vous enregistrez un fondu à la sortie en mode de
synchronisation de toutes les plages, le mode de
synchronisation est annulé après le fondu en sortie
(consultez les pages 66-69 à propos de l’enregistrement
synchronisé).
Numérotation automatique des plages
Vous pouvez enregistrer à partir de n’importe quelle source en
laissant l’enregistreur numéroter automatiquement les plages. À
partir d’une source numérique (CD, MD, DAT ou DCC),
l’enregistreur commence les nouvelles plages à mesure qu’elles
changent sur la source. Si vous enregistrez d’autres sources,
l’enregistreur commencera une nouvelle plage s’il détecte un
silence de plus de 2 secondes avant le son suivant de la source. Vous
pouvez ajuster le niveau considéré comme “silence” par
l’enregistreur. (Consultez “Réglage du seuil de silence” ci-après.)
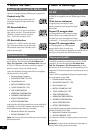
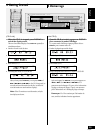
1 Appuyez sur MENU/DELETE.
2 Tournez la bague Jog (4 ou ¢ sur la
télécommande) jusqu’à apparition de AUTO
TRACK sur l’afficheur et appuyez alors sur
ENTER.
L’afficheur indique ON ou OFF. Par défaut, le réglage est
ON.
3 Tournez la bague Jog (4 ou ¢ sur la
télécommande) pour sélectionner AUTO
TRACK ON ou OFF.
4 Appuyez sur la bague Jog (ENTER) pour
valider le réglage.
Pour vérifier que les plages commenceront aux points exacts
à l’enregistrement, reportez-vous à Contrôle d’une source à
la page 65.