45
En/Fr
More recording features
Autres fonctions d’enregistrement
6
Setting up a future recording
You can set the timer to record something from either the
tuner or a component connected to the auxiliary inputs. For
example, you might want to record a program on the radio
that is broadcast while you're at work. If you're recording
from an auxiliary component it must also be able to switch
on at the time the recording starts—this system can't control
it—or you have to leave it switched on until the recording
has finished. During the actual recording, the volume is
automatically set to minimum.
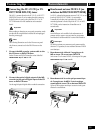
1 Prepare for recording.
• load a recordable MD
• switch on/off the auto mark (track numbering)
• choose the record mode you want (p. 39)
2 Set up the tuner/auxiliary component.
If you're recording from the tuner, switch to the tuner, and
tune into the station (see your CD tuner manual for more
detailed instructions on this).
If you're recording from the auxiliary component, switch to
that component and set it up for playback.
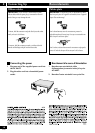
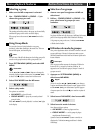
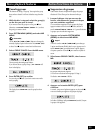
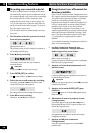
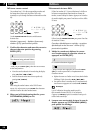
3 Press CLOCK/TIMER (TIMER) and select
TIMER REC.
Remember
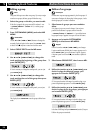
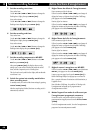
Use the 2 and 3 (4 and ¢) buttons to change the
currently displayed option in the menu. Press ENTER (SET)
to select. Press 7 anytime to cancel and exit the menu.
4 Select TIMER EDIT, then press ENTER (SET).
Note
If you have previously set the timer, then switched it off
(p. 47), TIMER ON will be displayed as an option. Select
TIMER ON here to recall your switch on/off times.
Réglage de programmation d’un
enregistrement ultérieur
Vous pouvez régler le programmateur d’enregistrement pour
un enregistrement ultérieur à partir du tuner ou d’un
appareil raccordé aux entrées auxiliaires. Cette fonction est
utile pour enregistrer un programme radiophonique diffusé
pendant vos heures de travail, par exemple. Si la source est
un appareil auxiliaire, celui-ci doit pouvoir s’activer au
moment du début de l’enregistrement(l’enregistreur de MD
ne peut pas commander cette fonction), sinon vous devrez le
laisser activé jusqu’à la fin de l’enregistrement. Pendant
l’enregistrement, le volume est automatiquement réglé au
minimum.
1 Procédez aux préparatifs de l’enregistrement.
• placez un MD enregistrable dans l’appareil
• activez ou désactivez la numérotation automatique des
plages (“auto mark”)
• choisissez le mode d’enregistrement souhaité (p. 39)
2 Réglez le tuner/l’appareil auxiliaire.
Si vous enregistrez à partir du tuner, sélectionnez celui-ci et
la station souhaitée (reportez-vous au mode d’emploi du
tuner CD pour des instructions détaillées).
Si vous enregistrez à partir d’un appareil auxiliaire,
sélectionnez celui-ci et réglez-le pour la lecture.
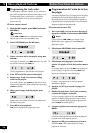
3 Appuyez sur CLOCK/TIMER (TIMER) et
sélectionnez TIMER REC.
Rappel
Utilisez les touches 2 et 3 (4 et ¢) pour changer
l’option actuellement affichée dans le menu. Appuyez sur la
touche ENTER (SET) pour sélectionner l’option. Appuyez
n’importe quand sur la touche 7 pour annuler et quitter le
menu.
4 Sélectionnez TIMER EDIT, puis appuyez sur
ENTER (SET).
Remarque
Si vous avez déjà réglé le programmateur, puis que vous
l’avez désactivé (p. 47), l’indication TIMER ON s’affiche en
tant qu’option. Sélectionnez alors TIMER ON pour réactiver
les heures d’activation/désactivation de l’appareil.