Connecting up02
12
En
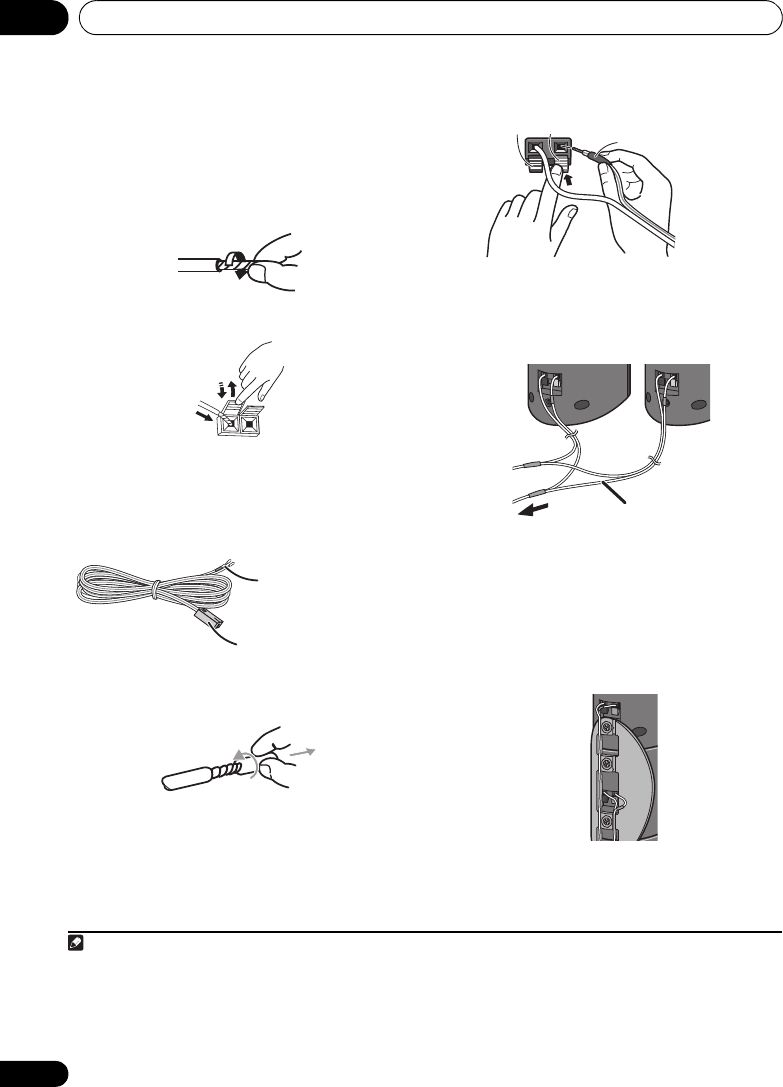
2 Connect the AM and FM antennas.
1
a. Pull off the protective shields of both AM
antenna wires. Connect one wire of the AM
loop antenna to each AM antenna
terminal.
2
For each terminal, press down on the tab to
open; insert the wire, then release to secure.
b. Push the FM antenna
3
plug onto the center
pin of the FM antenna socket.
3-1 Connect each speaker.
• Connect the wires to the speaker.
• Twist and pull off the protective shields on
each wire.
• Match the color-coded wire with the color
indicator on the label, then insert the color-
coded wire into the red (+) side and the
other wire into the black (–) side.
HTZ585DVD-AP only:
a. When connecting the center speakers,
connect the Y-cable dual end to the two
center speakers in the same way.
When you select a 4-spot, 3-spot or 2-spot
layout where the brackets are used for
assembling, also follow step b below.
b. When connections are completed, secure
the speaker cables. Fix the cables to the
groove in the brackets.
Note
1 • Keep antenna cables away from the receiver and other cables.
• If reception with the supplied antenna is poor, see Improving poor FM reception on page 20.
• Do not attach any antenna other than the provided loop antenna, or an external antenna as described on page 45.
2 • Don’t let it come into contact with metal objects and avoid placing near computers, television sets or other electrical
appliances.
• If radio reception is poor, you may be able improve it by re-inserting each antenna wire into the opposite terminal.
• For best reception, do not untwist the AM loop antenna wires or wrap them around the loop antenna.
3 To ensure optimum reception, make sure the FM antenna is fully extended and not coiled or hanging at the rear of
the unit.
1
2
3
Color-coded wire
(Connect to speaker)
Color-coded connector
(Connect to rear panel)
Black (–)
Color-coded wire
Red (+)
Y-cable
To Main Unit
HTZ585DVD_EN.book 12 ページ 2009年3月19日 木曜日 午後6時35分


