


OTHER OPERATIONS
16
RQTX1220
16
ENGLISH
ENGLISH
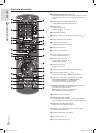
FM/AM radio
Manual tuning
1 Press [FM/AM/EXT-IN] (main unit: [FM/AM]) to select “FM”
or “AM”.
2 Press [
5
] or [
3
] (main unit: [
5
/
6
] or [
2
/
3
]) to
select the frequency of the required station.
To tune automatically, press and hold the button until the
frequency starts changing quickly.
“ST” is shown when a stereo FM broadcast is being received.
If there is too much noise
When “FM” is selected
Press [PLAY MODE] to select “MONO”.
• To cancel, press [PLAY MODE] again.
• “MONO” is also cancelled when you change the frequency.
When “AM” is selected
Press [FUNCTION] to select “BP 1” or “BP 2”.
Memory preset
30 FM and 15 AM stations can be preset.
Preparation
Press [FM/AM/EXT-IN] (main unit: [FM/AM]) to select “FM” or “AM”.
Automatic presetting
1 Press [MENU] to select “LOWEST” or “CURRENT”
frequency.
2 Press and hold [OK] to start presetting. Release the button
when “FM AUTO” or “AM AUTO” is shown.
To cancel, press [OK].
Manual presetting
1 Press [
5
] or [
3
] (main unit: [
5
/
6
] or [
2
/
3
]) to
tune in to the station and press [OK].
2 Press the numeric buttons to select a preset number.
The new station replaces any station that occupies the same
preset number.
3 Do steps 1 and 2 again to preset more stations.
Selecting a preset station
Press the numeric buttons, [
2
] or [
6
] to select the preset
station.
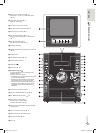
AM allocation setting (by main unit only)
This system can receive AM broadcasts allocated in 10 kHz steps.
1 Press [FM/AM] to select “FM”.
2 Press and hold [FM/AM].
After a few seconds, the display panel shows the current minimum
radio frequency. Release the button when the minimum frequency
changes.
• To go back to the initial setting, do the above steps again.
• After you change the setting, preset frequencies are erased.
Cassette tape – Play and record
Preparation
Press [TAPE].
Note:
Use normal position cassette tapes.
You can use high position and metal position cassette tapes, but the
system cannot identify the properties of these cassette tapes to be
played, recorded or erased accordingly.
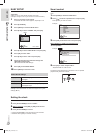
Basic playback
1 Press [
8
/
x
, STOP/EJECT] and put in the cassette tape.
Put in with the side to be played facing up and the exposed tape
facing you. Close the cassette tape deck manually.
2 Press [
4
, PLAY] to start playback.
Stop playback
Press [
8
/
x
, STOP/EJECT].
Pause playback
Press [
9
, PAUSE].
Press again to continue playback.
Fast-forward or
rewind
Press [
5
, FF/CUE] or [
3
, REW/REV].
Note:
If you select other source during playback of the cassette tape, the
playback will not stop.
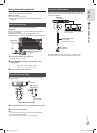
Recording
Preparation
Wind the leader tape so recording can begin immediately.
1 Press [
8
/
x
, STOP/EJECT] and put in the cassette tape.
2 Select the source you want to record.
Disc:
1. Put in the disc.
2. Press [
4
, DVD/CD].
Record specified tracks (
Z
11, “Program playback”).
Radio:
Tune in to the radio station (
Z
right).
USB:
1. Connect the USB mass storage device (
Z
14).
2. Press [
4
, USB].
Music port or AUX:
Connect and play the equipment (
Z
19).
Microphone:
Connect the microphone (
Z
18).
3 Press [
7
, REC] to start recording.
Stop recording
Press [
8
/
x
, STOP/EJECT].
Pause recording
Press [
9
, PAUSE].
Press again to continue recording.
Erase recording
1. Press [
8
/
x
, STOP/EJECT] and put in
the cassette tape.
2. Press [
7
, REC] to start recording.
Note:
Changes to volume and sound quality have no effect on recording.
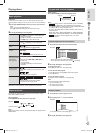
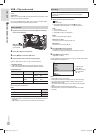
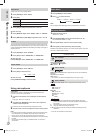
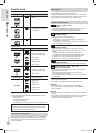
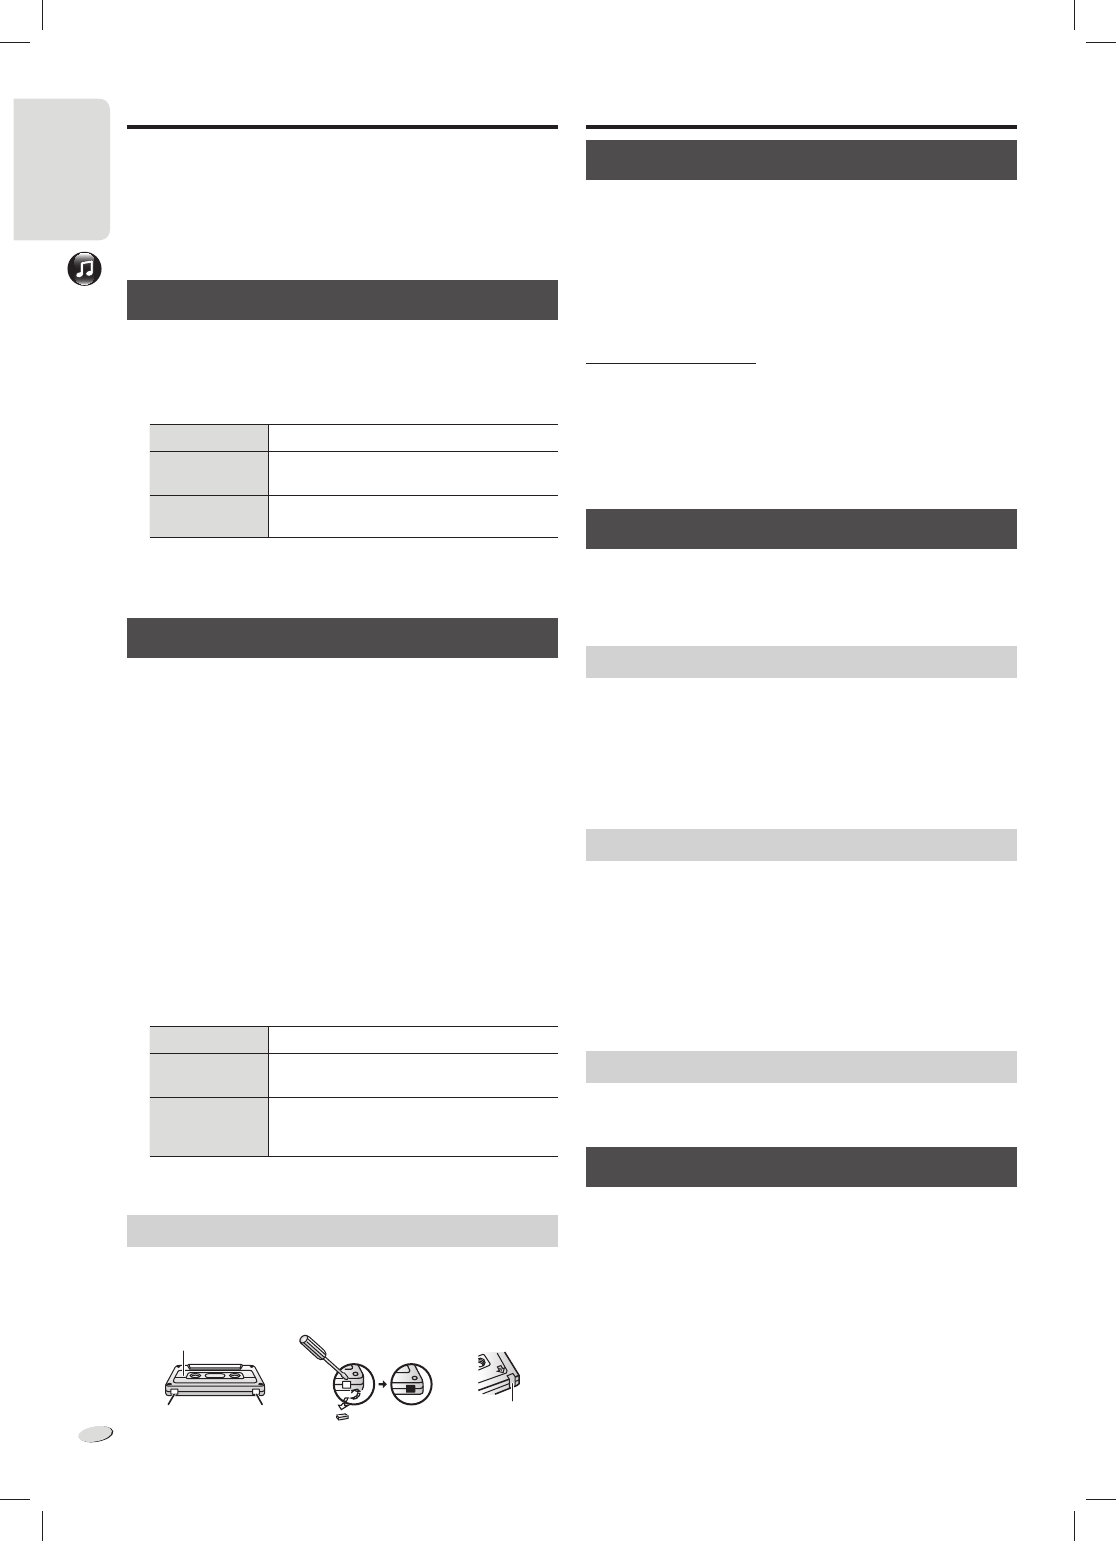
Erasure prevention
The illustration shows how to remove the tabs to prevent recording.
To record on the cassette tape again, put adhesive tape across the
hole as shown.
Adhesive
tape
To record again
Tab for
Side B
Tab for
Side A
Side A
To prevent recording
VKX80_GC_1En.indd 16VKX80_GC_1En.indd 16 9/22/2010 2:34:44 PM9/22/2010 2:34:44 PM