


13
Connecting the T-4555—Continued
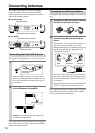
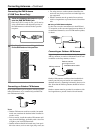
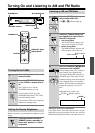
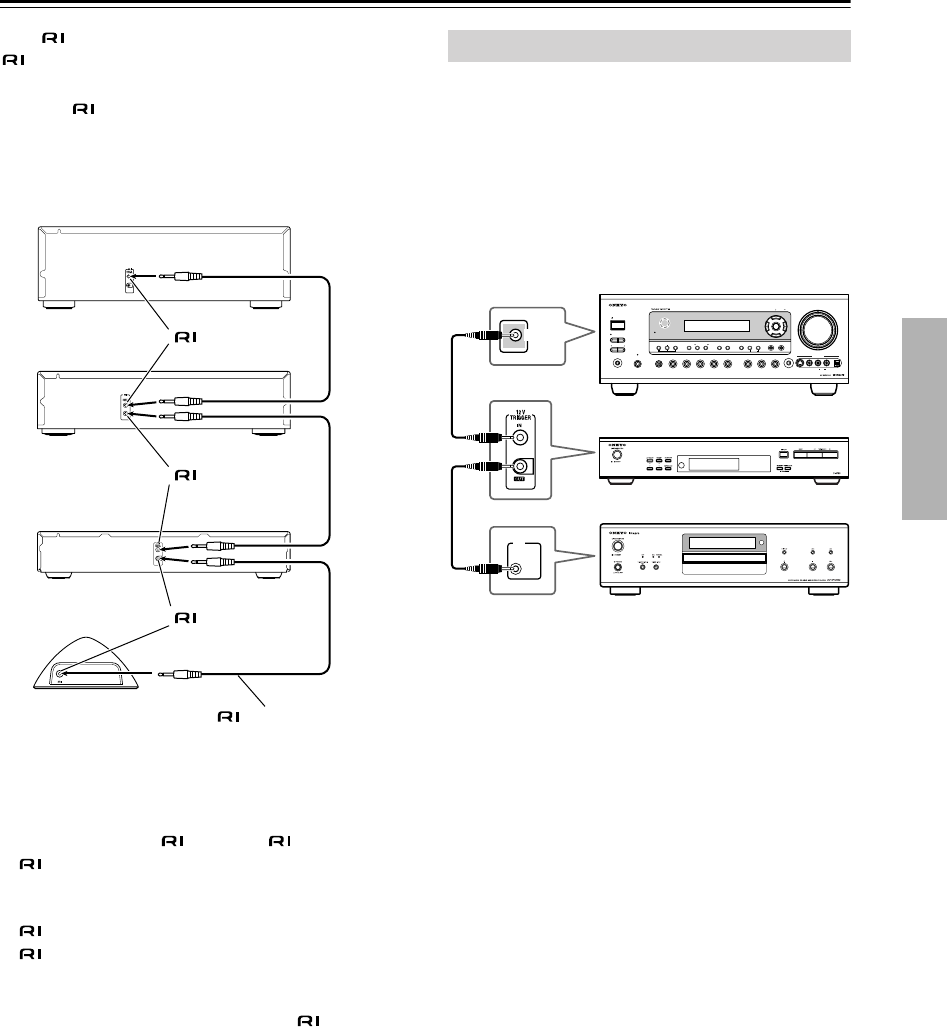
With (Remote Interactive), you can control your
-capable Onkyo CD player, T-4555, and so on with
your amp’s remote controller.
•To use , you must make an analog audio con-
nection between your amplifier and each audio
component.
Notes:
• Push each plug in all the way to make a good connec-
tion.
• Use only dedicated cables for connections.
cables are supplied with Onkyo tuners and play-
ers (DVD, CD, etc.).
• Some components, including the T-4555, have two
jacks. They’re both the same, so use either one.
• jacks should be connected only to Onkyo compo-
nents. Connecting them to another manufacturer’s
component may cause a malfunction.
• Some components may not support all functions.
See the manuals supplied with your other Onkyo
components for more information.
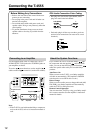
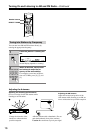
To have the T-4555 turn on automatically when another
component is turned on, connect the T-4555’s 12V
TRIGGER IN jack to a 12-volt trigger output on the
other component with a miniplug cable.
Likewise, to have another component turn on automati-
cally when the T-4555 is turned on, connect the
T-4555’s 12V TRIGGER OUT jack to a 12-volt trigger
input on the other component with a miniplug cable.
Onkyo amplifier
(A-9555), etc.
Onkyo CD player
(DX-7555), etc.
T-4555
Remote Interactive
Dock, etc.
jack
jack
jack
cable
Connecting the 12V Trigger Jacks
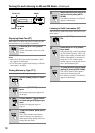
STANDBY/ON
ZONE2
ZONE 2 LEVEL
PHONES
MULTl CH
TONE
+
STEREO
LISTENING MODE
DISPLAY
DIGITAL INPUT
RT/PTY/TP
MEMORY
TUNING MODE
RETURN
TUNING/ PRESET
ENTER
SETUP
DVD VIDEO 1 VIDEO 2
VCR 1 VCR 2
VIDEO 3 VIDEO 4 TAPE TUNER CD
SETUP MIC S VIDEO VIDEO
MASTER VOLUME
VIDEO 4 INPUT
LR
AUDIO
DIGITAL
OFF
STANDBY
CLEAR
PURE AUDIO
12 V
TRIGGER
OUT
ZONE 2
IN
12
V
TRIGGER
Amplifier, AV receiver, etc.
T-4555
CD player, etc.