15
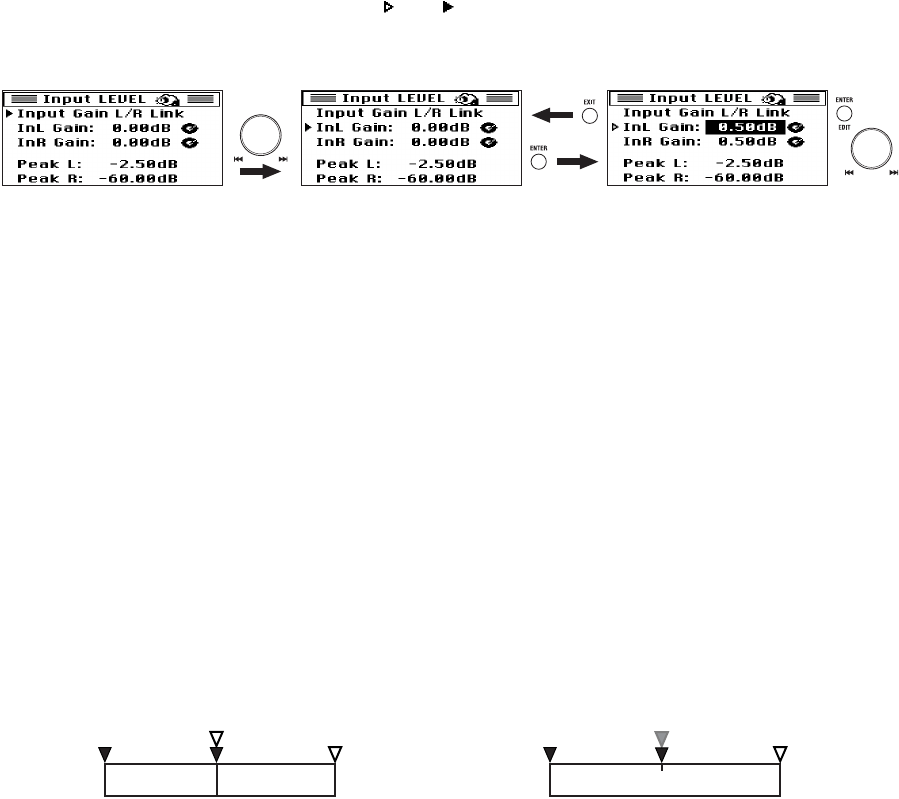
4. Use the dial to select the desired gain value, and press the enter button to confirm.
The selection icon will change from " " to " ". Perform these steps for the left and right channels.
Adjust the level so that the signal does not exceed the "0" marking.
When you've finished setting the input volume, press the exit button to return to the menu list screen,
and then press the menu button once again to return to the home screen.
Starting and stopping recording
Each time you record on the MR-2000S, a folder is created containing an audio file and a settings file, collec-
tively called a "project." The folder is named automatically (→p.34).
You can edit this name after you've finished recording (→p.19).
Operations on the MR-2000S will handle the entire project folder just as if it were an audio file.
1. To start recording from the record-ready mode, press the play/pause button (the play LED will light-
up).
The record LED will change from blinking to lit.
2. To pause recording, press the play/pause button (the record LED will blink); to resume recording,
press the play/pause button once again (the play LED will light-up).
A new project is not created if you pause during recording; the recording will still be a single project.
3. When you're finished recording, press the stop button.
The record LED and play LED will both go dark.
Record operation lock (REC Lock)
When the display shows the home screen and the MR-2000S is in record-ready mode or during recording,
you can hold down the enter button for approximately 2 seconds to lock the recording operations.
When lock is enabled, the REC Lock icon (→p.11) will be shown in the upper part of the home screen, and
you will be unable to perform the operations "record-pause," "cancel record-ready mode," or "pause during
recording."
A message will appear in the screen if you attempt to perform one of these disabled operations.
To defeat the record operation lock function, hold down the enter button once again until the REC Lock
icon disappears.
Pause and then
resume recording
Project 1 Project 1Project 2
Start recording Start recording
Stop recording
Stop and then
resume recording
Stop recording


