


SCAN-2
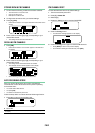
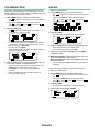
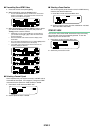
VFO SCAN
VFO Scan monitors all frequencies tunable on the band, using
the current frequency step size.
1 Select your desired band.
2 Press [VFO] (1s).
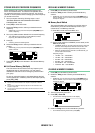
• Scan starts at the current frequency.
• The 1 MHz decimal blinks while scanning is in progress.
• To reverse the scan direction, turn the Tuning control clockwise
(upward scan) or counterclockwise (downward scan). You can
also press microphone [UP]/ [DWN].
3 To quit VFO Scan, press [VFO] again.
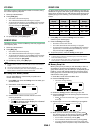
MEMORY SCAN
Use Memory Scan to monitor all Memory channels programmed
with frequency data.
1 Select your desired band.
2 Press [MR] (1s).
• Scan starts at the current frequency.
• The 1 MHz decimal blinks while scanning is in progress.
• To reverse the scan direction, turn the Tuning control clockwise
(upward scan) or counterclockwise (downward scan). You can
also press microphone [UP]/ [DWN].
3 To quit Memory Scan, press [MR] again.
Note:
◆ At least 2 Memory channels must contain data and must not be locked out
of scan.
◆ The L0/U0 to L9/U9 Memory channels will not be scanned.
◆ You can also start Memory Scan when in Channel Display mode. While
Scan is paused on a channel, the channel number blinks.
■ Locking Out a Memory Channel
You can select Memory channels that you prefer not to
monitor while scanning.
1 Press [MR], then rotate the Tuning control to select your
desired channel.
2 Enter Menu mode and access Menu 202.
3 Set the lockout to ON to lock the channel out of the
scanning sequence.
• To cancel lockout, set the lockout to OFF.
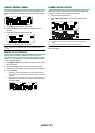
• The icon appears on the display for a channel
that has been locked out.
Note: The L0/U0 to L9/U9 Memory channels cannot be locked out.
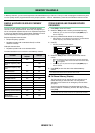
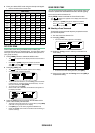
GROUP SCAN
For the purpose of Group Scan, the 1000 Memory channels are
divided into 10 groups, with each group containing 100 channels.
Group Scan monitors only the 100 channels which belong to the
specifi c group you are scanning. The channels are grouped as
follows:
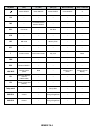
Memory
Group
Channel
Range
Memory
Group
Channel
Range
0 0 ~ 99 5 500 ~ 599
1 100 ~ 199 6 600 ~ 699
2 200 ~ 299 7 700 ~ 799
3 300 ~ 399 8 800 ~ 899
4 400 ~ 499 9 900 ~ 999
1 Press [MR], then rotate the Tuning control to select a
channel in your desired group.
2 Press the Tuning control (1s).
• Scan starts at the current channel.
• The 1 MHz decimal blinks while scanning is in progress.
• To reverse the scan direction, turn the Tuning control clockwise
(upward scan) or counterclockwise (downward scan). You can
also press microphone [UP]/ [DWN].
3 To quit Group Scan, press the Tuning control again.
Note:
◆ At least 2 Memory channels in the selected group must contain data and
must not be locked out of scan.
◆ You can also start Memory Scan when in Channel Display mode. While
Scan is paused on a channel, the channel number blinks.
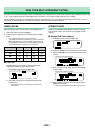
■ Memory Group Link
Memory Group Link provides you with the ability to link 2 or
more Memory channel groups together to act as a single
group when scanning. You can link up to 10 separate groups
together, or even add multiple instances of the same group
to the group link, to ensure that one group is scanned more
often than the other groups.
1 Enter Menu mode and access Menu 203.
2 Press the Tuning control.
• The cursor will begin blinking.
3 Rotate the Tuning control to select a group to link.
4 Press the Tuning control to set the group and move the
cursor to the right.
• Press [ ] to move the cursor back or [ ] to move the cursor
to the right.
5 Repeat steps 3 and 4 to link additional groups together.
6 When you have entered your desired groups, press [
] to move the cursor to the right, then press the Tuning
control to complete the entry and exit Menu mode.
• You can insert a character by pressing [INS].
• You can delete the selected character by pressing [CLR].
• If you have entered the maximum of 6 groups, simply press
the Tuning control to complete the entry and exit Menu mode.