


5
English
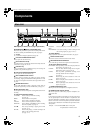
Components
Description
(For details, refer to page in parentheses.)
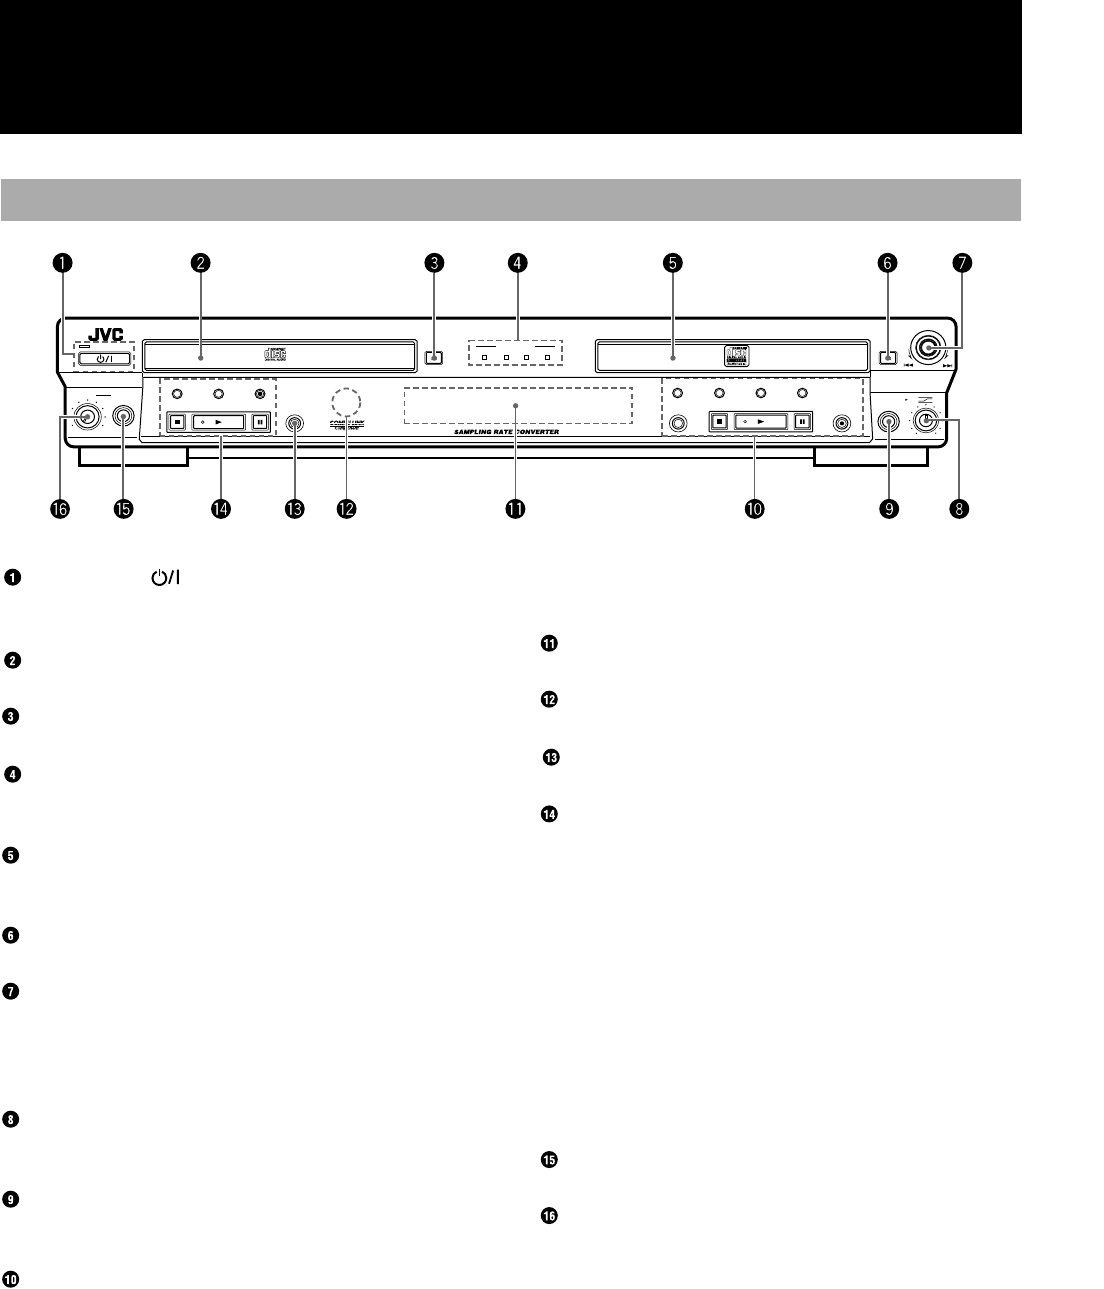
STANDBY/ON button and STANDBY lamp
Press to turn the power on or to put the unit in standby mode. When
the unit is in standby, the STANDBY lamp is lit. (see page 9)
CD Tray
Load a CD in the CD player playback. (see page 10)
CD Control OPEN/CLOSE 0 Button
Press to open and close the CD tray.
Source Selection Lamps
The selected source is indicated by activation of the lamp under the
source name. (see page 20, 29, 30)
CDR Disc Tray
Load a recordable CD-R or CD-RW in this tray for recording. CD
playback is also possible using this tray.
CDR Control OPEN/CLOSE 0 Button
Press to open and close the CDR disc tray.
MULTI JOG/REC LEVEL Control
Use this control for selecting and setting use options, changing
clock settings, skipping forward/backward through tracks on a CD,
etc. Also use it to adjust the level of the source signal when record-
ing discs.
MIX BALANCE Control
Use the MIX BALANCE control to adjust the mixing levels of
independent signals being recorded simultaneously. (see page 31)
MIC (Microphone) Jack
Use this jack to connect a microphone (not supplied) to the unit for
recording.
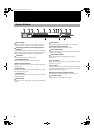
CDR Control Operation Buttons
SYNCHRO: Press to select synchronized recording.
(see page 29)
MENU: Press to enter the menu options.
SET: Press to enter an operation or selection.
CANCEL: Press to cancel an operation or selection.
FINALIZE: Press to finalize a CD-R/RW disc when recording
has been completed. (see page 34)
STOP 7: Press to stop recording or playing of the CDR.
(see page 11, 21)
PLAY 3: Press to start playing, or resume recording if the
CDR is in the recording pause mode.
(see page 11, 21)
PAUSE 8: Press to pause play or recording. (see page 11)
REC/
REC MUTING: Use to start recording, or when recording to mute
the recording signal. (see page 21, 26, 27)
Display Window
Displays operation modes and system information. (see page 6)
Remote Control Sensor
This sensor receives commands from the remote control.
REC SOURCE SELECTOR Button
Use to select the type of source the signal is to be recorded from.
CD Control Operation Buttons
PLAY MODE: Press repeatedly to select one of the play modes for
the CD player. (see page 10, 16)
CD EDIT: Press to select either Listening Edit or Program
Edit recording mode. (see page 25, 26)
CD REC: Press to perform synchronized recording of the
currently selected CD in the CD player.
(see page 23)
STOP7: Press to stop play of the selected disc in the CD
player. (see page 10)
PLAY3: Press to start play of the selected disc in the CD
player. (see page 10)
PAUSE8: Press to pause play of the selected disc in the CD
player. (see page 10)
PHONES (Headphones) Jack
Use this jack to connect headphones (not supplied) to the unit.
PHONES LEVEL (Volume) Control
Use this to adjust the volume being output to headphones con-
nected to the unit.
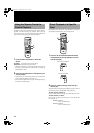
Note
In this manual, procedures using buttons on the front panel of the
unit are depicted by the name of the button in capital letters with
the button illustration immediately after it. Procedures using the
buttons on the remote control are depicted by the button illustration
with the name of the button in small letters and parentheses imme-
diately after it.
Example: CD Control PAUSE 8 button Front panel
8 (pause) button Remote control
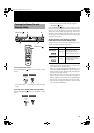
Main Unit
STANDBY
STANDBY/ON
MAXMIN
LEVEL
PHONES
PLAY MODE CD EDIT
REC SOURCE
SELECTOR
CD REC
STOP PLAY PAUSE
REC SOURCE
DIGITAL CD LINE MIC
OPEN/CLOSEOPEN/CLOSE
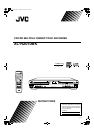
XL-R2010 CD/CDR MULTIPLE COMPACT DISC RECORDER
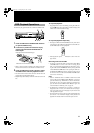
CANCELSETMENU
PAUSE
REC/REC MUTING
PLAYSTOP
SYNCHRO
FINALIZE
MULTI JOG/REC LEVEL
+
–
MIX BLANCE
CD
LINE
LINE
MIC
MIC
Eng.book Page 5 Monday, May 28, 2001 9:46 AM