20
To disable/enable the Add Finalize feature with the
remote control
1
Press the MENU button.
2
Press the 2
22
2 or 3
33
3 button to select "FINALIZE".
3
Press the SET button.
4
Press the 2
22
2 or 3
33
3 button to select "OFF" or "ON".
5
Press the SET button.
Analog recording level adjustment
When recording analog signals, and the main unit is recording or
stopped in the recording pause mode, after pressing the MENU
button on either the main unit or remote control, the recording level
can be adjusted using the MULTI JOG control on the main unit.
The recording level is shown in the information display as “REC
LEVEL - **” (** is a value ranging from
-
80-0, the default being
-12). (Recording level adjustment is not possible when recording
using digital signals.)
When CD ANALOG recording is selected, the recording level is
set automatically to the CD in the CD player.
To increase the recording level from LINE IN
When recording the sound from LINE IN, if the recording level is
still low after adjustment of the analog recording level stated
above, change "LINE IN GAIN" to "HIGH". "LINE IN GAIN" is
set to "LOW" at the time of purchase.
Place the unit in the stop mode and follow the steps below.
1
Press the MENU button.
• "TRACK ERASE" is shown in the information display.
2
Turn the MULTI JOG to select "LINE IN GAIN".
3
Press the SET button.
• "LOW" is shown in the information display.
4
Turn the MULTI JOG to select "HIGH".
5
Press the SET button.
• The recording level further increases.
• - To change "LINE IN GAIN" back to "HIGH", follow steps 1
through 3 in the above procedure and select "LOW" in step 4.
To increase the recording level with the remote
control
1
Press the MENU button.
2
Press the 2
22
2 or 3
33
3 button to select "LINE IN
GAIN".
3
Press the SET button.
4
Press the 2
22
2 or 3
33
3 button to select "HIGH".
5
Press the SET button.
Sampling rate converter
The main unit is equipped with a sampling rate converter to ensure
that the original digital signals will be recorded regardless of the
sampling frequency (32kHz, 44.1kHz or 48kHz) of the signal from
the source.
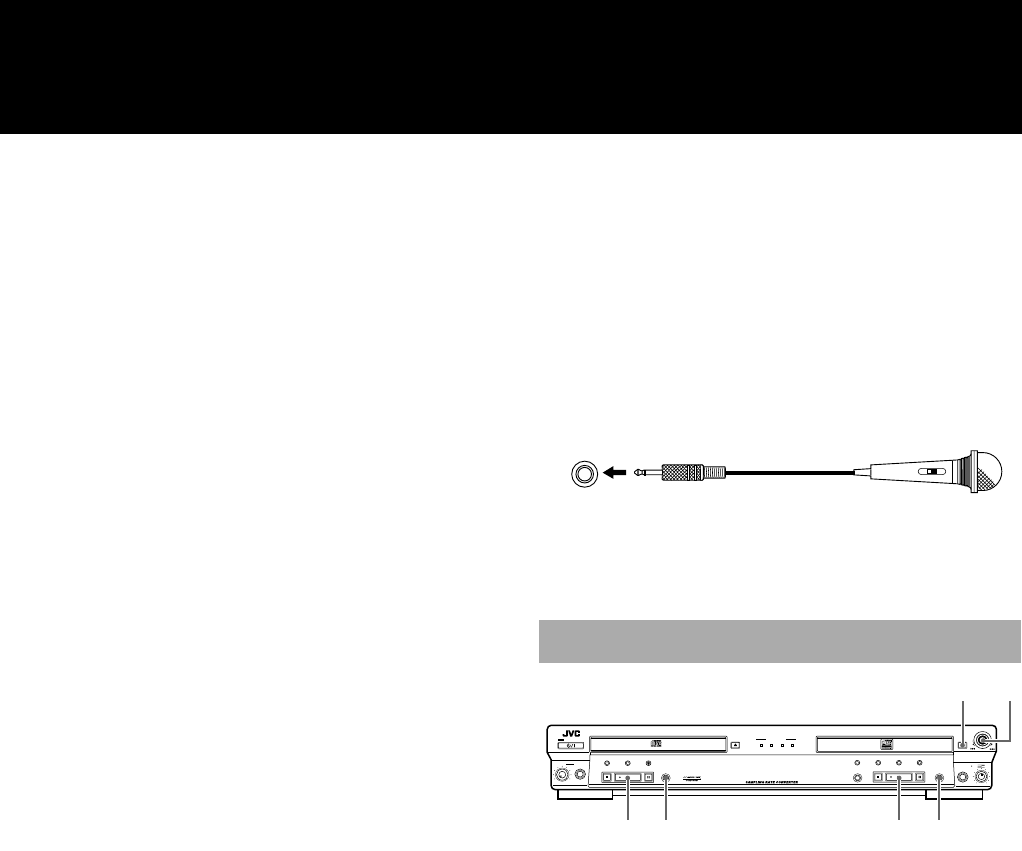
Microphone connections
Use a microphone equipped with a standard plug to connect to the
MIC jack on this unit.
1
Insert a recordable CD-R or CD-RW.
2
Select a recording source.
Use the REC SOURCE SELECTOR button to select the recording
source. Press the button repeatedly to toggle between sources. The
source type will appear in the display window, and a lamp
(DIGITAL, CD, LINE or MIC) will light on the front panel show-
ing the selected source. The order of toggling and appearance of
the sources in the information display (starting from DIGITAL IN)
are as follows.
DIGITAL IN: Record digital signals via the OPTI-
CAL terminal.
COAXIAL IN: Record via the COAXIAL terminal.
CD DIGITAL: Record digital signals from CD player.
CD ANALOG*: Record analog signals from CD player.
LINE IN: Record via the LINE IN terminal.
MIC IN: Record via the MIC jack.
CD+LINE MIX**: Record via CD player and LINE mix.
CD+MIC MIX**: Record via CD player and MIC mix.
LINE+MIC MIX**: Record via LINE and MIC mix.
Notes
• *In accordance with the SCMS (Serial Copy Management
System), recording systems are not allowed to create a second-
generation digital copy of a first generation copy (refer to
SCMS see page 41). Therefore, if a CD-R or CD-RW disc
loaded in the CD player is a first-generation digital copy, this
recording selection must be used. If you attempt to record the
disc using the digital setting, “SCMS PROTECT” is shown in
the information display and recording will not be allowed.
ON
OFF
MIC
6.3 mm diameter
standard plug
• After connecting the
microphone to the unit, if it
has an ON/OFF switch, set it
to ON.
Microphone purchased
separately
Manual Recording
STANDBY
STANDBY/ON
MAXMIN
LEVEL
PHONES
PLAY MODE CD EDIT
REC SOURCE
SELECTOR
CD REC
STOP PLAY PAUSE
REC SOURCE
DIGITAL CD LINE MIC
OPEN/CLOSEOPEN/CLOSE
XL-R2010 CD/CDR MULTIPLE COMPACT DISC RECORDER
CANCELSETMENU
PAUSE
REC/REC MUTING
PLAYSTOP
SYNCHRO
FINALIZE
MULTI JOG/REC LEVEL
+
–
MIX BLANCE
CD
LINE
LINE
MIC
MIC
14
3526
Eng.book Page 20 Monday, May 28, 2001 9:46 AM


