


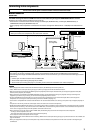

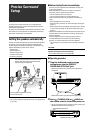
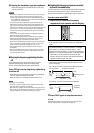

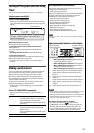

3 Put on the microphones.
• Insert the microphone with “L” into your left ear, the
microphone with “R” your right ear.
4 Take your usual listening position with
the microphones and the remote control.
CAUTION:
Keep quiet so that Precise Surround Setup can detect test
tones properly.
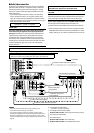
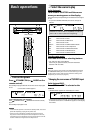
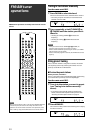
5 Press and hold PSS on the remote control
for about 4 seconds until “PSS START”
starts flashing on the display.
• If Precise Surround Setup is not completed
properly...
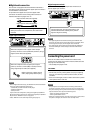
An error message will appear on the display.
In such a case, see “Troubleshooting for Precise
Surround Setup“ on page 19.
Continued on the next page
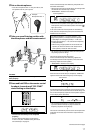
Precise Surround Setup starts detecting the speaker and
subwoofer information.
• When starting Precise Surround Setup, the muting mode
and Dimmer are automatically canceled.
• “MEASURING 1” flashes on the display.
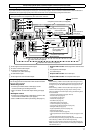
*
1
When the current speaker is the right or left surround
back speaker, two surround back speaker indicators (
)
light up at a time.
A test tone comes out of each speaker in the following
order, then the microphones pick up the test tones and
feedback it to the receiver:
FL (Left front speaker) = C (Center speaker) = FR
(Right front speaker) = SR (Right surround speaker)
= SBR (Right surround back speaker)*
2
= SBL (Left
surround back speaker)*
2
= SL (Left surround speaker)
= SW (Subwoofer)
*
2
When using a single speaker for the surround back
speaker, the test tone comes out of “SB (Surround
back speaker)” instead of “SBR” and “SBL.”
• Do not touch the microphones while the microphones
are picking up the test tones.
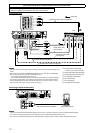
‘
The receiver generates test tones again.
Precise Surround Setup starts detecting, adjusts the
sound output level from each speaker, and corrects the
frequency response of each speaker.
• “MEASURING 2” flashes on the display.
‘
When Precise Surround Setup is completed, “COMPLETE”
appears and the PSS indicator lights up on the display.
‘
An optimized test tone comes out of each speaker so that
you can confirm the results of Precise Surround Setup, and
the corrected frequency response of each speaker appears
on the display at the same time.
• See “Checking the frequency responses corrected
by Precise Surround Setup” on page 18 about the
frequency responses on the display.
‘
The receiver automatically returns to the normal operation
mode after all the test tones have been output from the
speakers.
Example:
Microphone with “L”
PSS indicator
Current speaker*
1
PSS
17