


27
9
∗
CENTER
+10
∗
REAR R
100
+
0
∗
REAR L
FM MODE
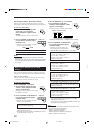
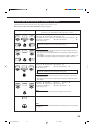
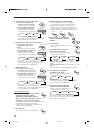
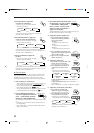
5. Select the speaker you want to adjust.
• To select the center speaker level, press CENTER.
“CTR” appears on the remote control display window.
• To select the left rear speaker level, press REAR L.
“REARL” appears on the remote control display window.
• To select the right rear speaker level, press REAR R.
“REARR” appears on the remote control display window.
6. Press LEVEL +/– to adjust the
speaker output levels (–10 dB to
+10 dB).
7. Press SOUND.
• To adjust other speaker output levels, repeat
steps 5 and 6.
8. Press TEST again to stop the test
tone.
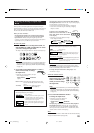
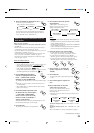
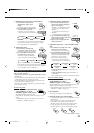
9. Press CTR TONE to select the
center tone level you want.
The center tone adjustment affects the mid-
frequency range, which the human voice is
mostly made up of.
• Each time you press the button, the display changes to show
the following:
To make the dialogue softer, select “CTR TONE 1” or “CTR
TONE 2.”
To make the dialogue clearer, select “CTR TONE 4” or “CTR
TONE 5.”
When “CTR TONE 3” is selected, no adjustment is applied.
On the front panel:
You can also use the buttons on the front panel to adjust the
Surround modes. However, no test tone is available when using the
buttons on the front panel. So, make adjustments while listening to
the sound of the source played back.
1. Select and play a sound source.
• To enjoy Dolby Pro Logic, play back a software encoded with
Dolby Surround and labeled with
DOLBY SURROUND
mark.
• To enjoy Dolby Digital, play back a software encoded with
Dolby Digital and labeled with
DIGITAL
mark.
• To enjoy DTS Digital Surround, play back a software encoded
with DTS Digital Surround and labeled with mark.
+
−
CH/
∗
LEVEL
∗
BAL L
∗
BAL R
CTR TONE 1
CTR TONE 2
CTR TONE 3
CTR TONE 4
CTR TONE 5
(Softer)
(Soft) (Flat)
(Sharper)
(Sharp)
Adjusting the Surround Modes
You can also use a Surround mode with a DAP mode (see page 30).
Before you start, remember...
• Make sure that you have set the speaker information correctly
(see page 17).
• There is a time limit in doing the following steps. If the setting is
canceled before you finish, start from step 3 again.
• You cannot adjust the rear speaker output levels when you have set
“REAR SPK” to “NONE.” See page 17.
• You cannot adjust the center speaker output level and center tone
when you have set “CTR SPK” to “NONE.” See page 17.
• To adjust the front speaker output balance and subwoofer output
level, see pages 16 and 17.
From the remote control:
1. Select and play a sound source.
• To enjoy Dolby Pro Logic, play back a software encoded with
Dolby Surround and labeled with
DOLBY SURROUND
mark.
• To enjoy Dolby Digital, play back a software encoded with
Dolby Digital and labeled with
DIGITAL
mark.
• To enjoy DTS Digital Surround, play back a software encoded
with DTS Digital Surround and labeled with mark.
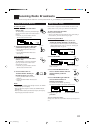
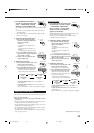
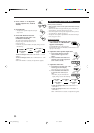
2. Press SURROUND ON/OFF to
activate an appropriate Surround
mode — PRO LOGIC, DOLBY
DIGITAL or DTS SURROUND.
The SURROUND ON/OFF lamp on the front panel button lights
up.
• Each time you press the button, the Surround mode turns on
and off alternately.
• When “PRO LOGIC” is selected, the PRO LOGIC indicator
lights up on the display.
3. Press SOUND.
The 10 keys are activated for sound adjustments.
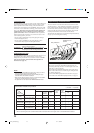
4. Press TEST to check the speaker
output balance.
“TEST TONE L” starts flashing on the
display, and a test tone comes out of the
speakers in the following order:
Notes:
• You can adjust the speaker output levels without outputting the
test tone.
• No test tone comes out of the center speaker when “CTR SPK”
is set to “NONE” (see page 17).
• No test tone comes out of the rear speakers when “REAR SPK”
is set to “NONE” (see page 17).
• If the TV is turned on and the proper video input is selected on
the TV, the test tone screen will appear on the TV.
ON/OFF
SURROUND
SOUND
MENU
4
TEST
TEST TONE L
(Left front speaker)
TEST TONE LS
(Left rear speaker)
TEST TONE RS
(Right rear speaker)
TEST TONE C
(Center speaker)
TEST TONE R
(Right front speaker)
5
ENTER
CTR TONE
MENU
4
TEST
SOUND
EN24_35.RX-8010V[J]_f 01.1.11, 9:09 PM27