


15
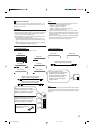
Using the Sleep Timer
Using the Sleep Timer, you can fall asleep to music and know the
receiver will turn off by itself rather than play all night.
From the remote control ONLY:
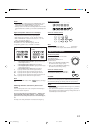
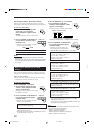
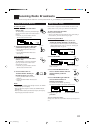
Press SLEEP repeatedly.
The SLEEP indicator lights up on the display, and
the shut-off time changes as follows (in minutes):
When the shut-off time comes
The receiver turns off automatically.
To check or change the time remaining until the shut-off time
Press SLEEP once.
The remaining time until the shut-off time appears in minutes.
• To change the shut-off time, press SLEEP repeatedly.
To cancel the Sleep Timer
Press SLEEP repeatedly until “SLEEP 0min” appears on the display.
(The SLEEP indicator goes off.)
• Turning off the power also cancels the Sleep Timer.
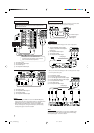
Recording a Source
For analog-to-analog recording
You can record any analog source through the receiver to —
• the cassette deck (or MD recorder) connected to the TAPE/MD
jacks,
• the VCRs connected to the VCR 1 and VCR 2 jacks, and
• the CD recorder connected to the CDR jacks
— at the same time.
For digital-to-digital recording
You can record the currently selected digital input source through
the receiver to a digital recording device connected to the DIGITAL
OUT terminal.
Notes:
• Analog-to-digital and digital-to-analog recordings are not possible.
• The output volume level, midnight mode (see page 13), bass boost
(see page 14), digital equalization (see the left), Surround modes
and DSP modes (see page 24) cannot affect the recording.
• The test tone signal (see page 27) does not come out through the
DIGITAL OUT terminal.
SLEEP
2010 30 40 50 60 70 80 90
(Canceled)
0
DIGITAL
EQ
LEV
E
ADJ
U
EQ63Hz EQ250Hz
EQ1kHz
EQ4kHzEQ16kHZ
and its level
and its level
and its level
and its level
and its level
CONTROL
DOWN UP
SOUND
10
∗
DIGITAL EQ
RETURN
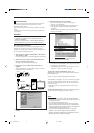
Adjusting the Equalization Patterns
You can adjust equalization to your preference.
• You can do this setting for each source.
Before you start, remember....
• There is a time limit in doing the following steps. If the setting is
canceled before you finish, start from step 1 again.
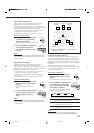
On the front panel:
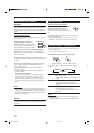
1. Press DIGITAL EQ (Equalization)
repeatedly to select the frequency.
• Each time you press the button, the frequency
with its current level changes as follows:
2. Press CONTROL UP 5/DOWN ∞
repeatedly to adjust the frequency level.
The frequency level changes by 2 dB from
–8 dB to +8 dB. The DIGITAL EQ indicator
lights up on the display.
3. Repeat Steps 1 and 2 to adjust the other frequency level.
To flat the equalization pattern,
Set all the frequency levels to “0” in step 2. The DIGITAL EQ
indicator goes off from the display.
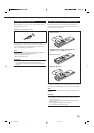
From the remote control:
1. Press SOUND.
The 10 keys are activated for sound adjustments.
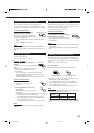
2. Press DIGITAL EQ (Equalization)
repeatedly to select the frequency you want.
“EQ” appears on the remote control display
window.
• Each time you press the button, the frequency with its level
changes as follows:
3. Press LEVEL + or − repeatedly to adjust
the frequency level.
The frequency level changes by 2 dB from
–8 dB to +8 dB. The DIGITAL EQ indicator
lights up on the display.
4. Repeat steps 2 and 3 to adjust the other
frequency level.
To flat the equalization pattern,
Set all the frequency levels to “0” in step 3. The DIGITAL EQ
indicator goes off from the display.
Notes:
• When the line direct function is turned on, the digital equalization
cannot be adjusted.
• The digital equalization affects the front speaker sounds only.
EQ63Hz EQ250Hz
EQ1kHz
EQ4kHzEQ16kHZ
and its level
and its level
and its level
and its level
and its level
+
−
CH/
∗
LEVEL
∗
BAL L
∗
BAL R
EN11_23.RX-8010V[J]_f 01.1.11, 5:52 PM15