7
To connect the AV COMPU LINK cords
This system allows you to use JVC’s TV with simple
operations; by starting playing back a disc, the TV
automatically turns on and changes the input mode to the
appropriate position so that you can view the playback
picture.
To use AV COMPU LINK, you need to connect the System
and the TV by using a cord with monaural mini-plugs (not
supplied) in addition to the video input/output connection
through the COMPONENT jacks, S-VIDEO jack or VIDEO
(composite) jack on the rear.
To connect digital audio
Before connecting optical digital cord, remove the
protective cap from the DVD OPTICAL DIGITAL OUT
terminal.
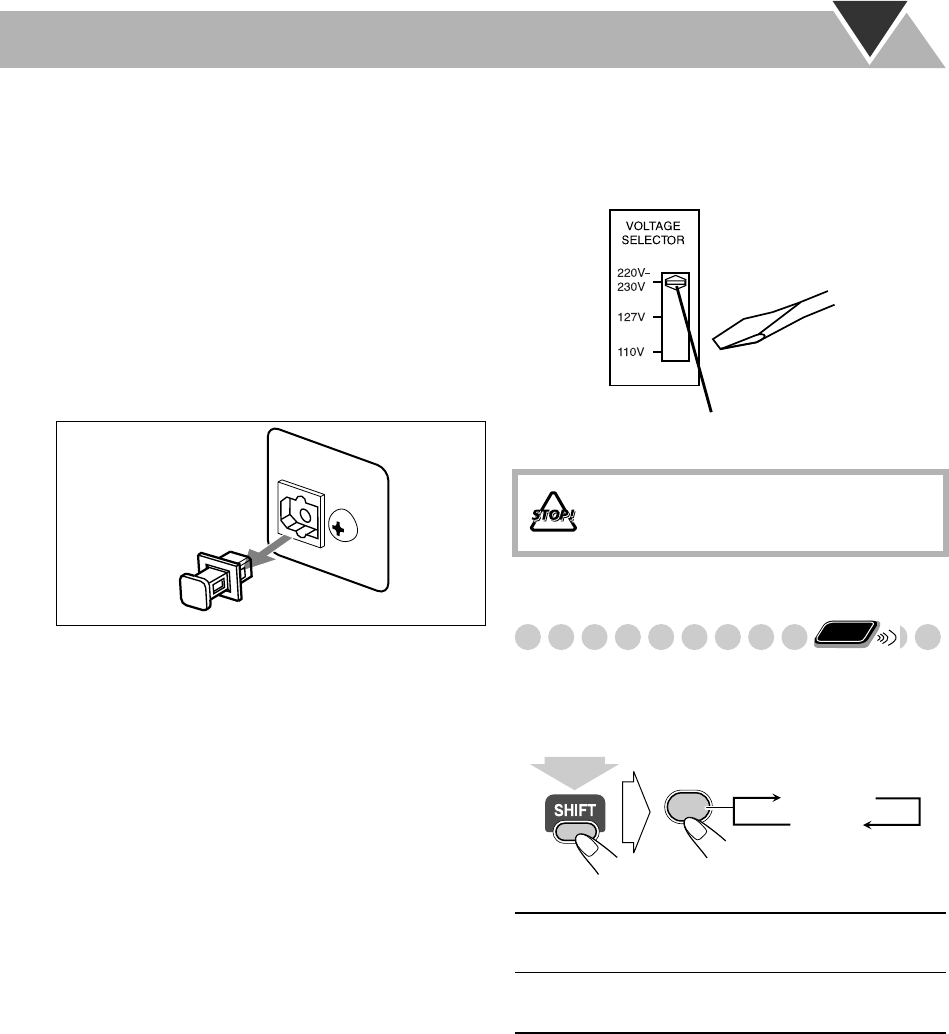
Adjusting the Voltage Selector
Use a screwdriver to slide the voltage selector so that the
voltage marker is pointing at the same voltage as where you
are plugging in the unit. (See also the back cover page.)
Changing the Scanning Mode
This System supports progressive scanning.
If you connect a progressive TV through the COMPONENT
jacks, you can enjoy a high quality picture from the built-in
DVD player by selecting “PROGRE.”
DVD OPTICAL
DIGITAL OUT
PCM/STREAM
DO NOT plug in before setting the voltage
selector on the rear of the unit and all
connection procedures are complete.
PROGRE
Progressive scanning. For a progressive
TV.
INTER
Interlaced scanning. For a conventional
TV.
Voltage marker
Remote
ONLY
PROGRESSIVE
0
PROGRE
INTER
(at the same time)


