- 7 -
Connecting to a PC
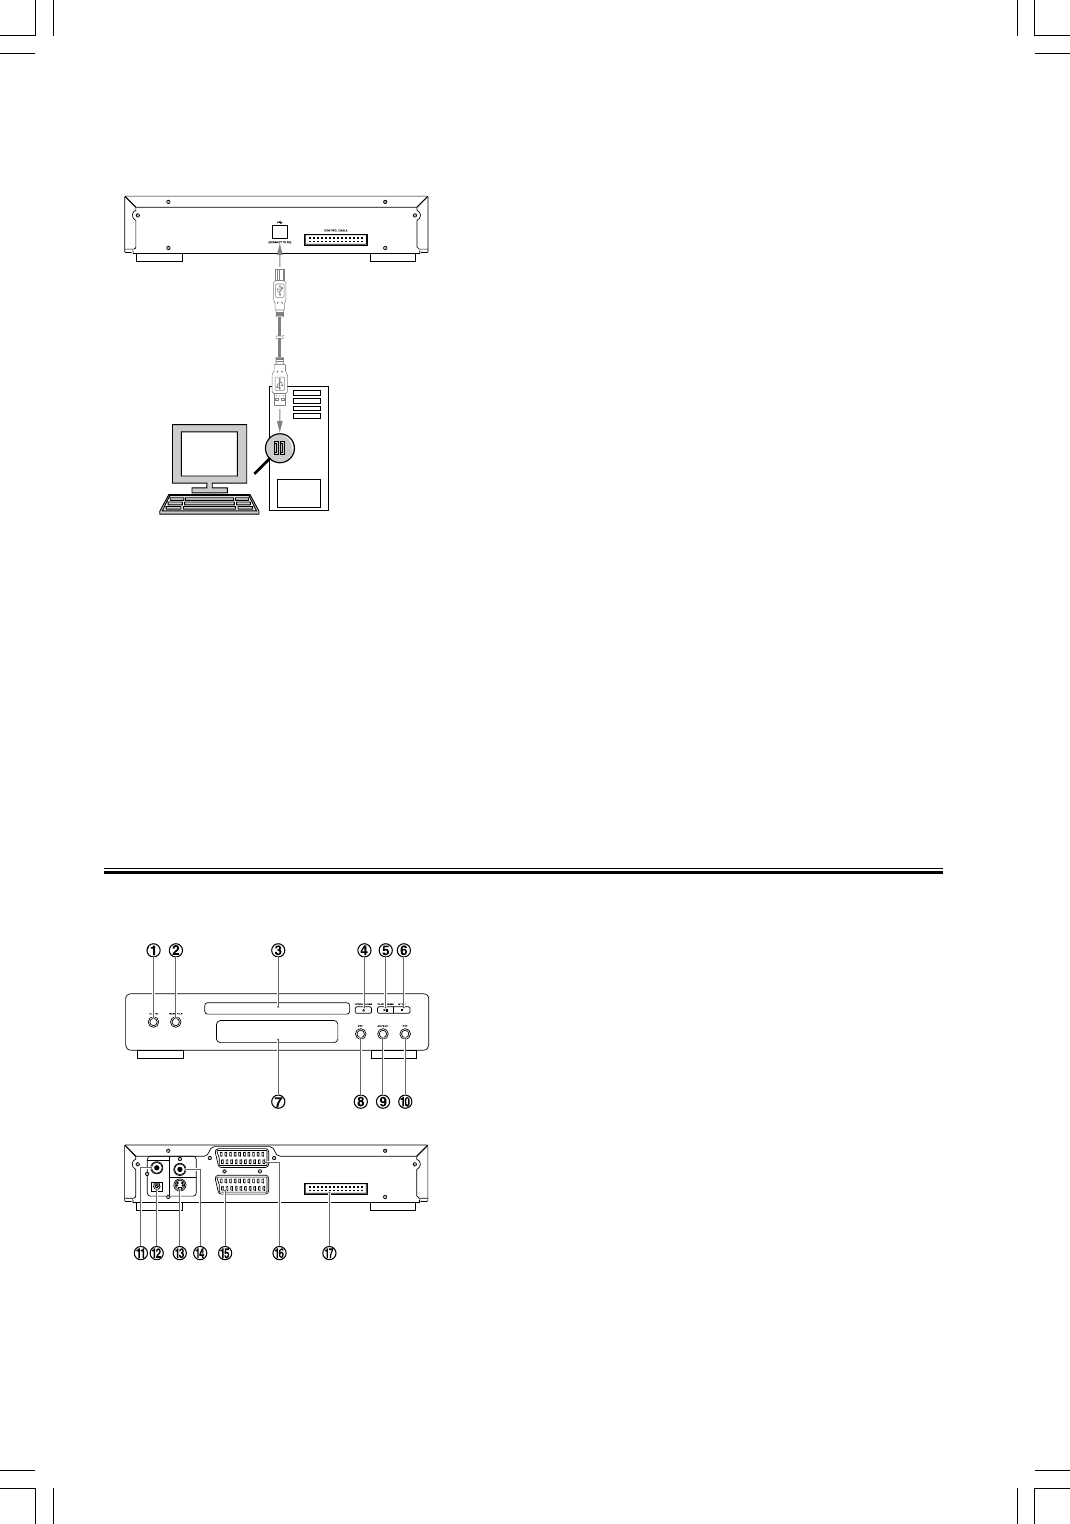
The AX-M140 can be connected to a PC via the
USB (B) Port on the rear of the unit. Music files on
your PC can then be transferred to the Music bank
for storage and play back through the AX-M140 Hi-
Fi. Your PC should see the AX-M140 Music bank as
an external hard drive/storage device then files can
be copied, pasted and deleted as desired.
Connecting the AC Power Cord
Insert the AC power cord into a wall outlet, and your system is ready for use.
Caution: Be sure to unplug the power cord from the outlet when going away or when the system is not
in use for an extended period of time.
Connecting the Headphones
Connect a pair of headphones to the phone jacks. No sound comes out of the speakers.
Note: Be sure to turn down the volume before connecting or putting on headphones.
Control Locations
The DVD Player
1. Vocal Mode Select / Language Select
2. Subtitle
3. Disc Tray
4. Open/Close
5. Play/Pause
6. Stop
7. VFD Display Lens
8. Previous
9. Repeat
10. Next
11. Digital Audio Out Coaxial
12. Digital Audio Out Optical
13. S-Video Output Terminal
14. Video Monitor Terminal
15. TV Scart Output
16. VCR Scart Input
17. Control Cable Connector
COAXIAL
OPTICAL
DIGITALOUTPUT
VIDEO
MONITOR
CONTROLCABLE
VCRSCARTINPUT
TVSCARTOUTPUT
DVDS-VIDEO


