28 SYSTEM SETUP
System Setup
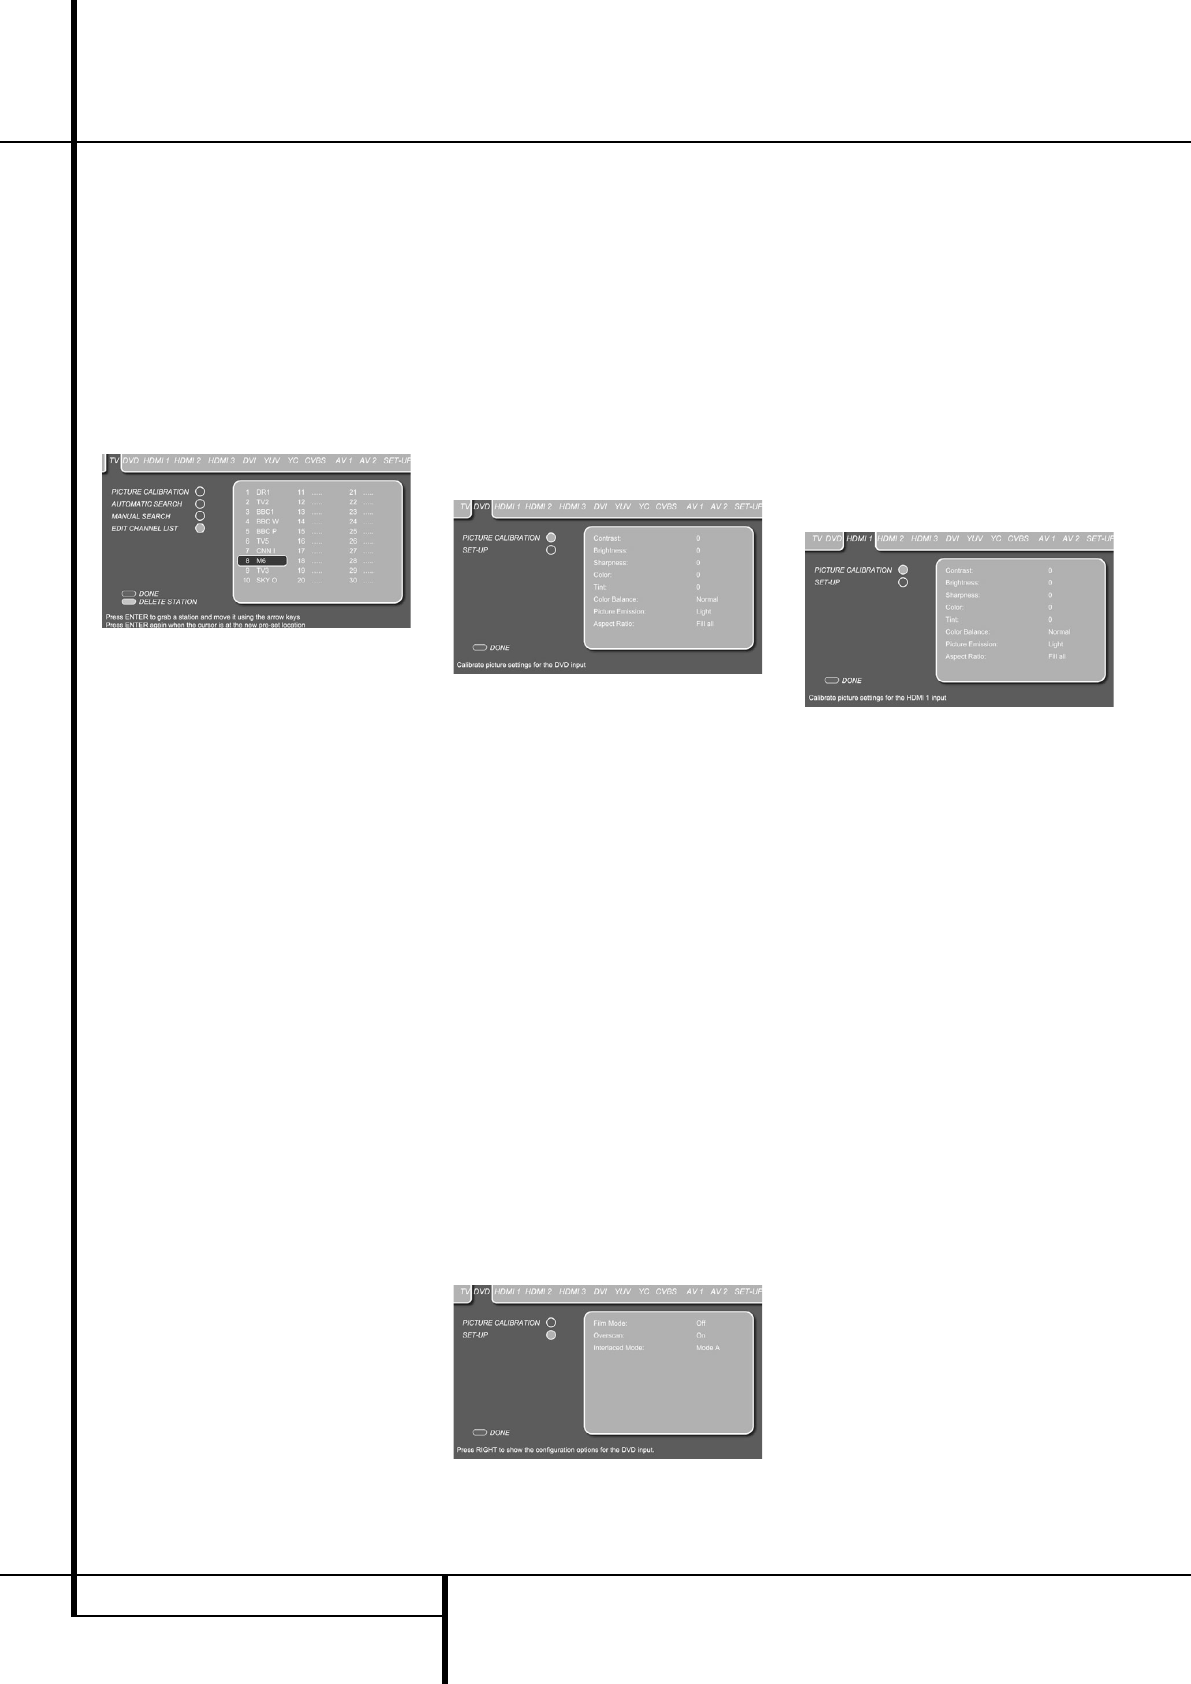
Edit Channel List (For analog TV only)
The last submenu in the TV Set Up Menu is the
Edit Channel List Menu that allows you to make
adjustments to the order of the TV channels. With
the TV Set Up Menu on the screen, press the
L
Button
9
until the Edit Channel List text line is
highlighted. Press Enter
6
to select, followed
by pressing the
N
Button
9
to access the Edit
Channel List Menu. In order to move a channel
up or down the list, select it first by moving the
cursor until it is highlighted by the blue bar. Press
the Enter Button
6
to confirm.
Figure 2h
The blue bar will turn white and the channel can
now be moved on the list using the
KL
/
NM
Buttons
9
. Once the TV channel is on its new
position, press the Enter Button
6
to confirm
the new position. All stations after the new posi-
tion will automatically move one station down
the list.
Stations can also be deleted from the channel
list. In order to delete a channel from the list,
select it first by moving the cursor until it is high-
lighted by the blue bar. Press the Green Button
O
to delete the station from the list.
DVD Set Up
To access the DVD Set Up Menu, press the TV
Button
0
followed by the Set Up Button
8
.
Move the cursor to the right using the
N
Button
9
until the DVD tab is highlighted in dark
blue.
The DVD Set Up Menu contains 2 submenus.
Each submenu can be selected by moving the
blue bar with the
K
/
L
Buttons
9
until the
requested submenu is highlighted, and pressing
the Enter Button
6
to confirm.The selected
submenu will be marked by a light blue circle
behind the submenu text line.
Picture Calibration
The Harman Kardon Digital Lounge is among the
few systems that have individual picture calibra-
tion settings for each individual video input. As
the picture calibration menus for each of the
video inputs are the same, please refer to the
explanations of the Picture Calibration on page
36. An exclusive setting for the DVD and HDMI
inputs is TINT. This will vary the color temperature
between green and purple in many small steps in
contrast to the "Color Balance" setting. It can be
selected and changed in the same way as
described for all other Picture Calibration settings
on page 36.
Figure 2i
Set Up
The DVD Set Up Menu permits changes to Film
Mode, Overscan and Interlaced Mode.
Film Mode: This mode allows you to switch the
Film Mode on or off. When switched to On, this
setting will activate the correct film mode detec-
tion. The Film Mode should be switched on for all
inputs that are used to watch movie playback. If
you are not watching movies on a specific video
input, the Film Mode setting should be set to Off.
Should you wish to change the film mode, press
the Enter Button
6
once the line is highlight-
ed. The blue bar will disappear and the rest of
the screen will fade out. Switch the film mode on
or off by pressing the
N
or
M
Buttons
9
. Press
the Enter Button
6
to confirm.
Overscan: This mode allows you to switch
Overscan Mode on or off.
Interlaced Mode: This mode allows you to
switch the field order for interlaced signals
between Mode A and Mode B. If your video
source sends an interlaced signal to the screen,
you can select the mode that results in the best
image quality.
Figure 2j
HDMI Set Up
To access the HDMI Set Up Menu, press the TV
Button
0
followed by the Set Up Button
8
.
Move the cursor to the right using the
N
Button
9
until the HDMI tab is highlighted in dark
blue.
The HDMI Set Up Menu contains 2 submenus.
Each submenu can be selected by moving the
blue bar with the
K
or
L
Buttons
9
until the
requested submenu is highlighted and pressing
the Enter Button
6
to confirm. The selected
submenu will be marked by a light blue circle
behind the submenu text line.
For the Picture Calibration menu, please refer to
the DVD Set Up description.
Figure 3a
Set Up
The second submenu in the HDMI Set Up menu
is the Set Up Menu. With the HDMI Set Up Menu
on the screen, press the
L
Button
9
until the
Set Up text line is highlighted. Press Enter
6
to
select, followed by pressing the
N
Button
9
to
access the Set Up Menu.
The same Picture Calibration and Set Up settings
can be made for the HDMI 2 and HDMI 3 inputs.
0007CSK - DigitalLounge 632_640_646 ENG v11.qxp:0007CSK - DigitalLounge 632,640,646 UK 12/06/08 11:10 Side 28 (Sort/Black plade


