36 TEST SCREEN
Test Screen
Picture Calibration Using the
supplied Test Disc
When doing the calibration first insert the disc in
the slot loader
6
. The disc will start reading, and
a main menu will appear on the screen. Select
the test pattern required using the
K
or
L
Buttons
9
. Once the pattern appears on the
screen, press the Pause Button
C
to make
sure the test pattern will stay long enough on the
screen to make the adjustments.
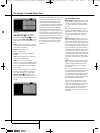
With the requested test pattern on the screen
press the Mode Button
e
repeatedly until the
TV Button turns red. This will change the remote
control to the TV mode, without changing the
system's source to TV. Next, press the Setup
Button
8
, and use the
KLN M
Buttons
9
to select any of the calibration settings to be
changed and follow the directions mentioned
previously to find the right settings.
When the first calibration setting has been cor-
rectly made, press the Enter Button
6
to go
back to the Setup Menu. Use the
KL
Buttons
9
to select the next calibration setting.
Once all calibration settings for the specific video
input have been confirmed, press the Mode
Button
e
once so that the DVD Button turns
red. Should additional calibration settings be
made using the supplied disc, these can be
selected by pressing the Disc Menu Button
B
and select the next calibration setting to be
changed. Follow the directions above to make all
other calibration settings.
Once all calibration settings have been made,
press the Mode Button
e
until the DVD
Button turns red to change the remote control
back to controlling the DVD receiver.
0007CSK - DigitalLounge 632_640_646 ENG v11.qxp:0007CSK - DigitalLounge 632,640,646 UK 12/06/08 11:11 Side 36 (Sort/Black plade


