59
Up-down: Set the distance from the transducer to the antenna unit in the
vertical direction.
Port-starboard: Set the distance from antenna unit to the transducer in
port-starboard direction. When the transducer is located on the starboard
side, set a positive value.
e) Click the Motion Sensor pull-down menu, and choose SC-30 or SC-50/110 if
connected.
f) Set the transducer position at the Transducer Position pull-down menus.
g) If the DFF3 is equipped with a water temperature sensor, click the Temperature
Port pull-down menu, and choose the temperature source, MJ (NMEA0183
connector), High-frequency or Low-frequency.
Note:
For DFF3, set the tap setting in the network sounder after setting up all the MFDs.
For details, see the Operator’s Manual for DFF3.
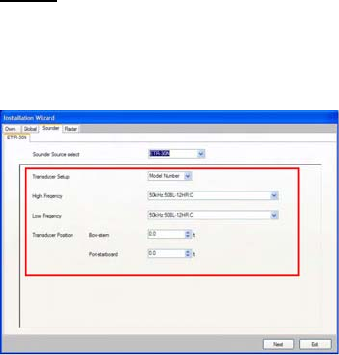
ETR 30/60 (BBFF1/3)
a) Click the Transducer Setup pull-down menu, and choose Model Number or
Manual, according to the transducer connected.
Model Number: Furuno’s transducer
Manual: Transducers other than Furuno
b) If you choose Model Number at step a), click the High Frequency and Low
Frequency pull-down menus, and choose the applicable model type. For Manual,
set the high and low frequencies with the respective pull-down menus.
c) Use the arrow buttons at Transducer Position to set transducer position.
d) If a radar sensor is connected, click the Next button to continue.
If you don’t have any DRS (Radar), click on Exit to finish the installation. If you have
radar, click on “Next” to continue the configuration.


