


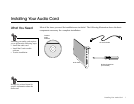


Installing Your Audio Card 5
8. Next, you are asked to accept the default destination directory, or enter a new directory. When the
directory is correct, click the Next button.
9. Next, the Setup Options are displayed. When you select an option, the installation continues.
10. The Select Program Folder dialog allows you to select the folder to which the audio software is to
be installed, or you may confirm the default selection. Click the Next button when the Program
Folder is correct.
11. The Installation Information dialog lists the installation selections you have made.
To make changes to your selections, click on the Back button until you reach the screen with the
option to be changed. Then, click Next until you are returned to the Installation Information dialog.
If the information is correct, click the Next button to continue.
12. The Creative Sound Blaster PCI512 installation screen appears to inform you of the progress of the
installation.
13. You may be prompted to restart your computer—restart your computer for the drivers to take effect.
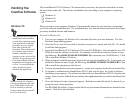
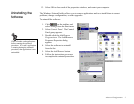
Windows 98 The following instructions describe the Sound Blaster PCI512 installation in Windows 98.
To install in Windows 98:
1. The Windows 98 Add New Hardware Wizard automatically detects the Sound Blaster PCI512 and
attempts to locate the driver media provided by the manufacturer. Insert the Sound Blaster
PCI512 installation CD and click the Next button.
2. Select the Search For The Best Driver For Your Device (Recommended) option and click the Next
button.
3. Clear all check boxes and click only the Specify a Location check box. Type or click the Browse
button and point to the driver path: D:\AUDIO\ENGLISH\WIN95DRV (D: represents your
CD-ROM drive). Click the Next button.
4. Click the Next button to install the Windows 98 drivers.
5. Click the Finish button when the installation is complete.
6. Restart your computer for the changes to take effect.
7. Follow the software installation instructions for Windows 95 (step 6).